

Turn your raw thoughts into viral LinkedIn posts
Build an AI Slack agent that turns your voice ramblings into LinkedIn ready posts in your tone of voice.

Friends,
This week I’m coming to you with a brand new AI marketing use-case. Today I’ll show you how you can create a voice AI agent that lives on Slack that turns your voice ramblings into LinkedIn-ready posts in your tone of voice.
I had a revelation last night: people's authentic voices are getting buried under the pressure to create "perfect" content, while trying not to add to the AI slop.
Founders tell me they're exhausted trying to keep up with LinkedIn while running their companies. The mental toll of content creation is real, and it's draining the energy you need for what truly matters.
That's why I built Rita AI – an agent that lives in Slack and preserves your authentic voice while giving you back precious time to rest and reconnect with yourself.
Here's the step by step guide on how to do it.
Let’s dive in.
The Demo:
Here’s how this works:
Send a voice note to Rita in Slack (where you already spend your day)
• Share your raw, unfiltered thoughts in 2 minutes or less
• Rita transforms them into a polished LinkedIn post that still sounds exactly like you
• Make quick edits, approve, and post in your dashboard.
• Ship to LinkedIn.
Here’s the detailed breakdown:
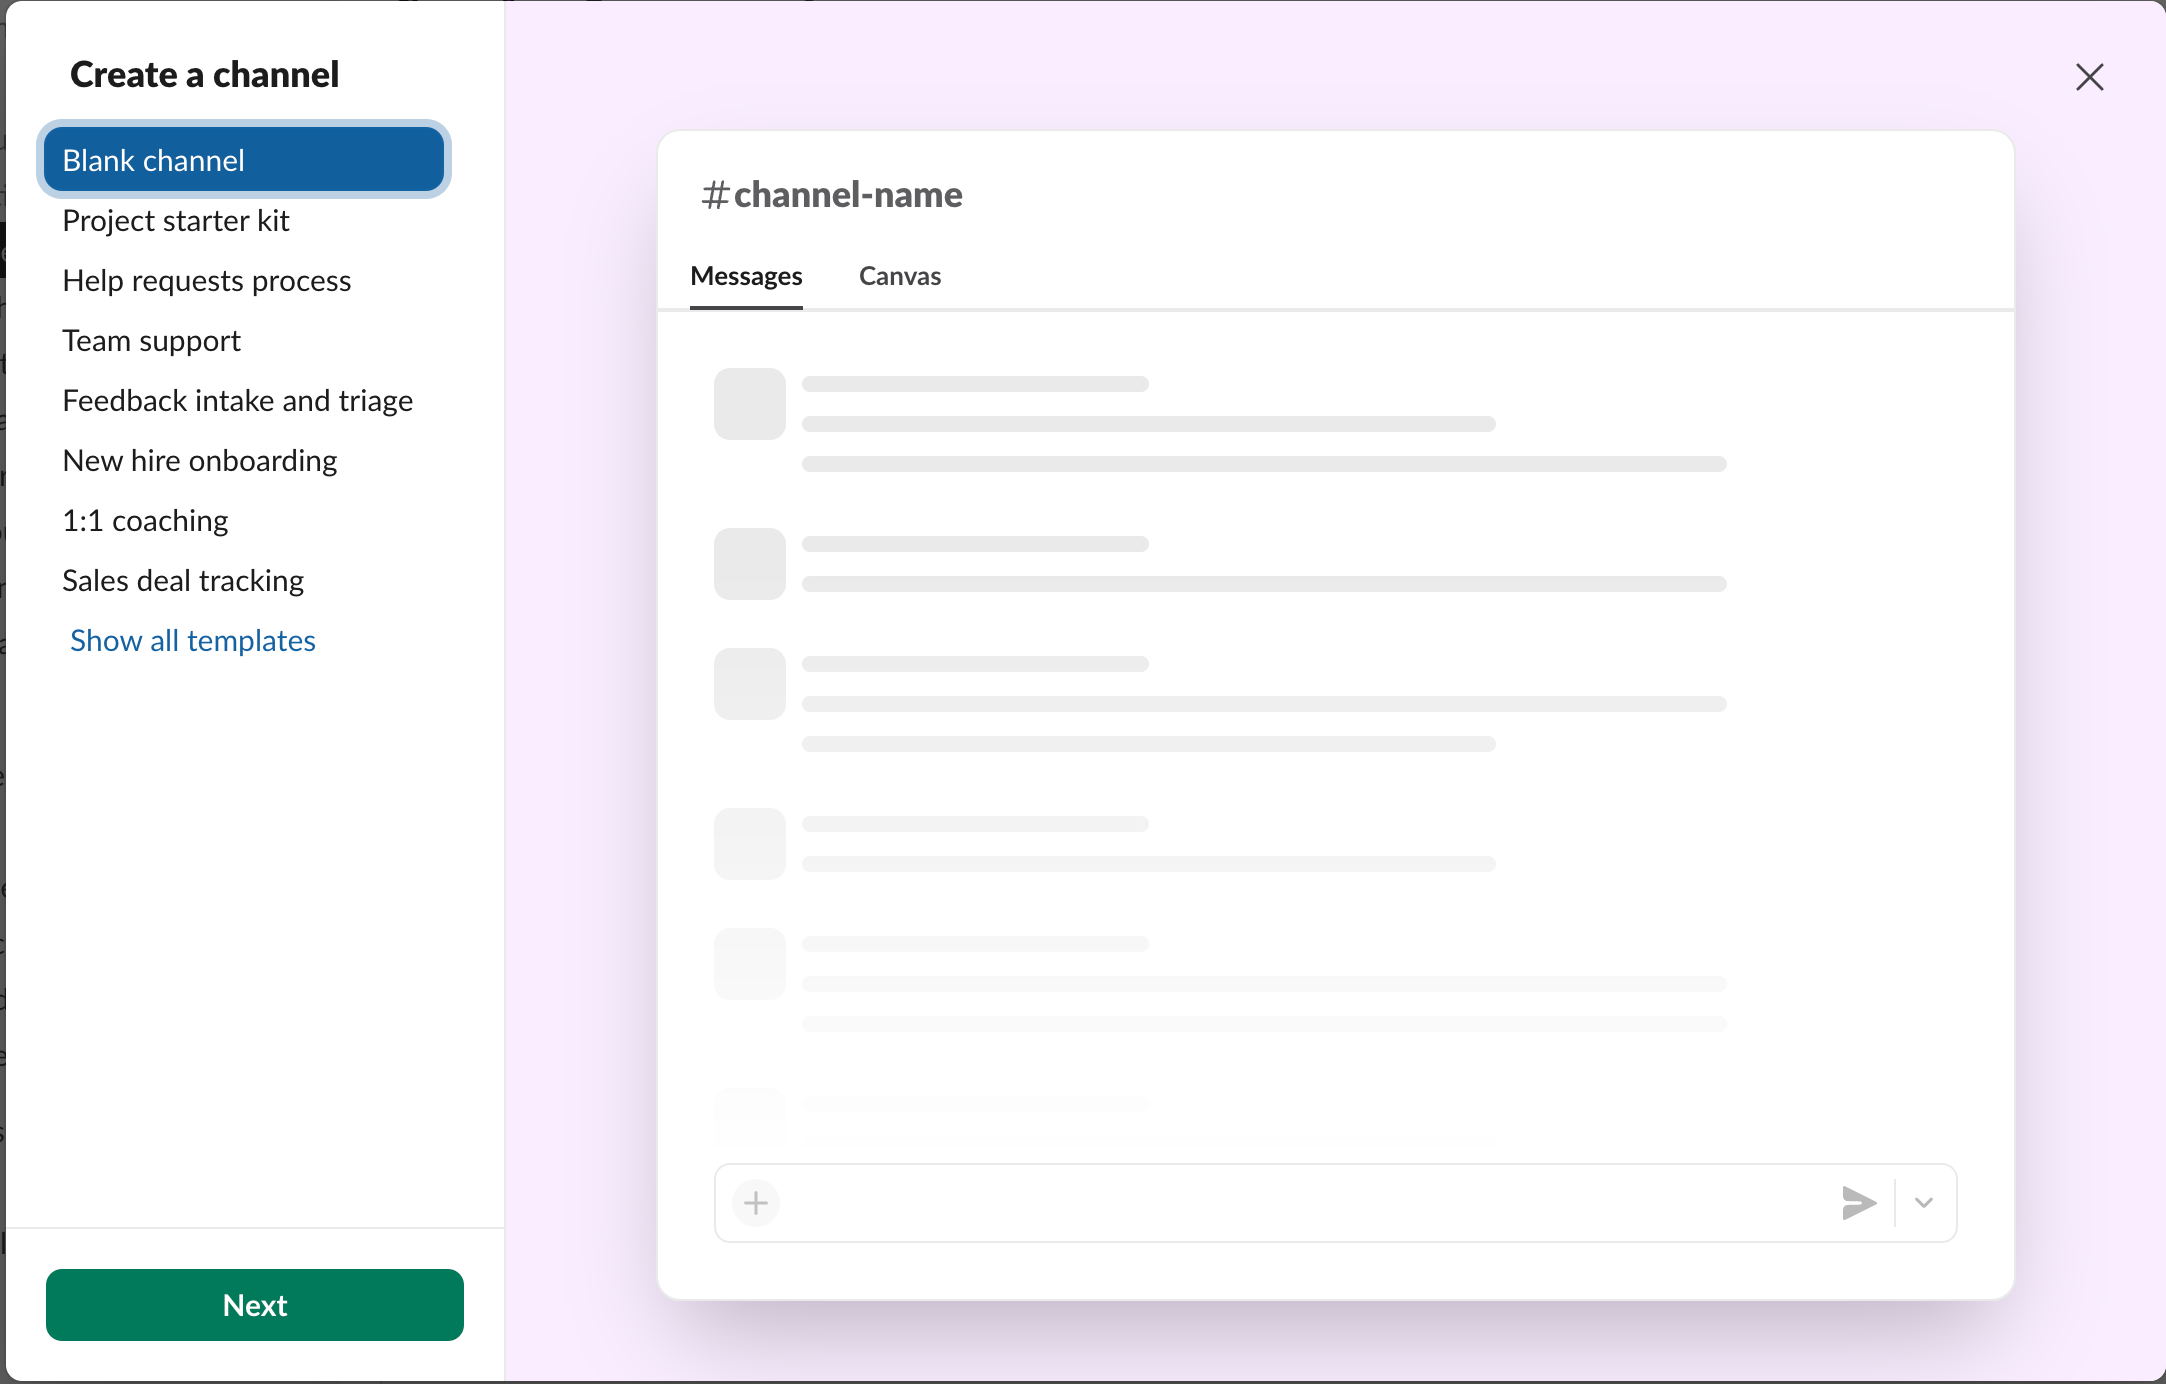
Step 1: Setting up Slack
Go to Slack and create your workspace. Create a new channel where you want your agent to live.
Go to Slack API Apps at this URL - https://api.slack.com/apps
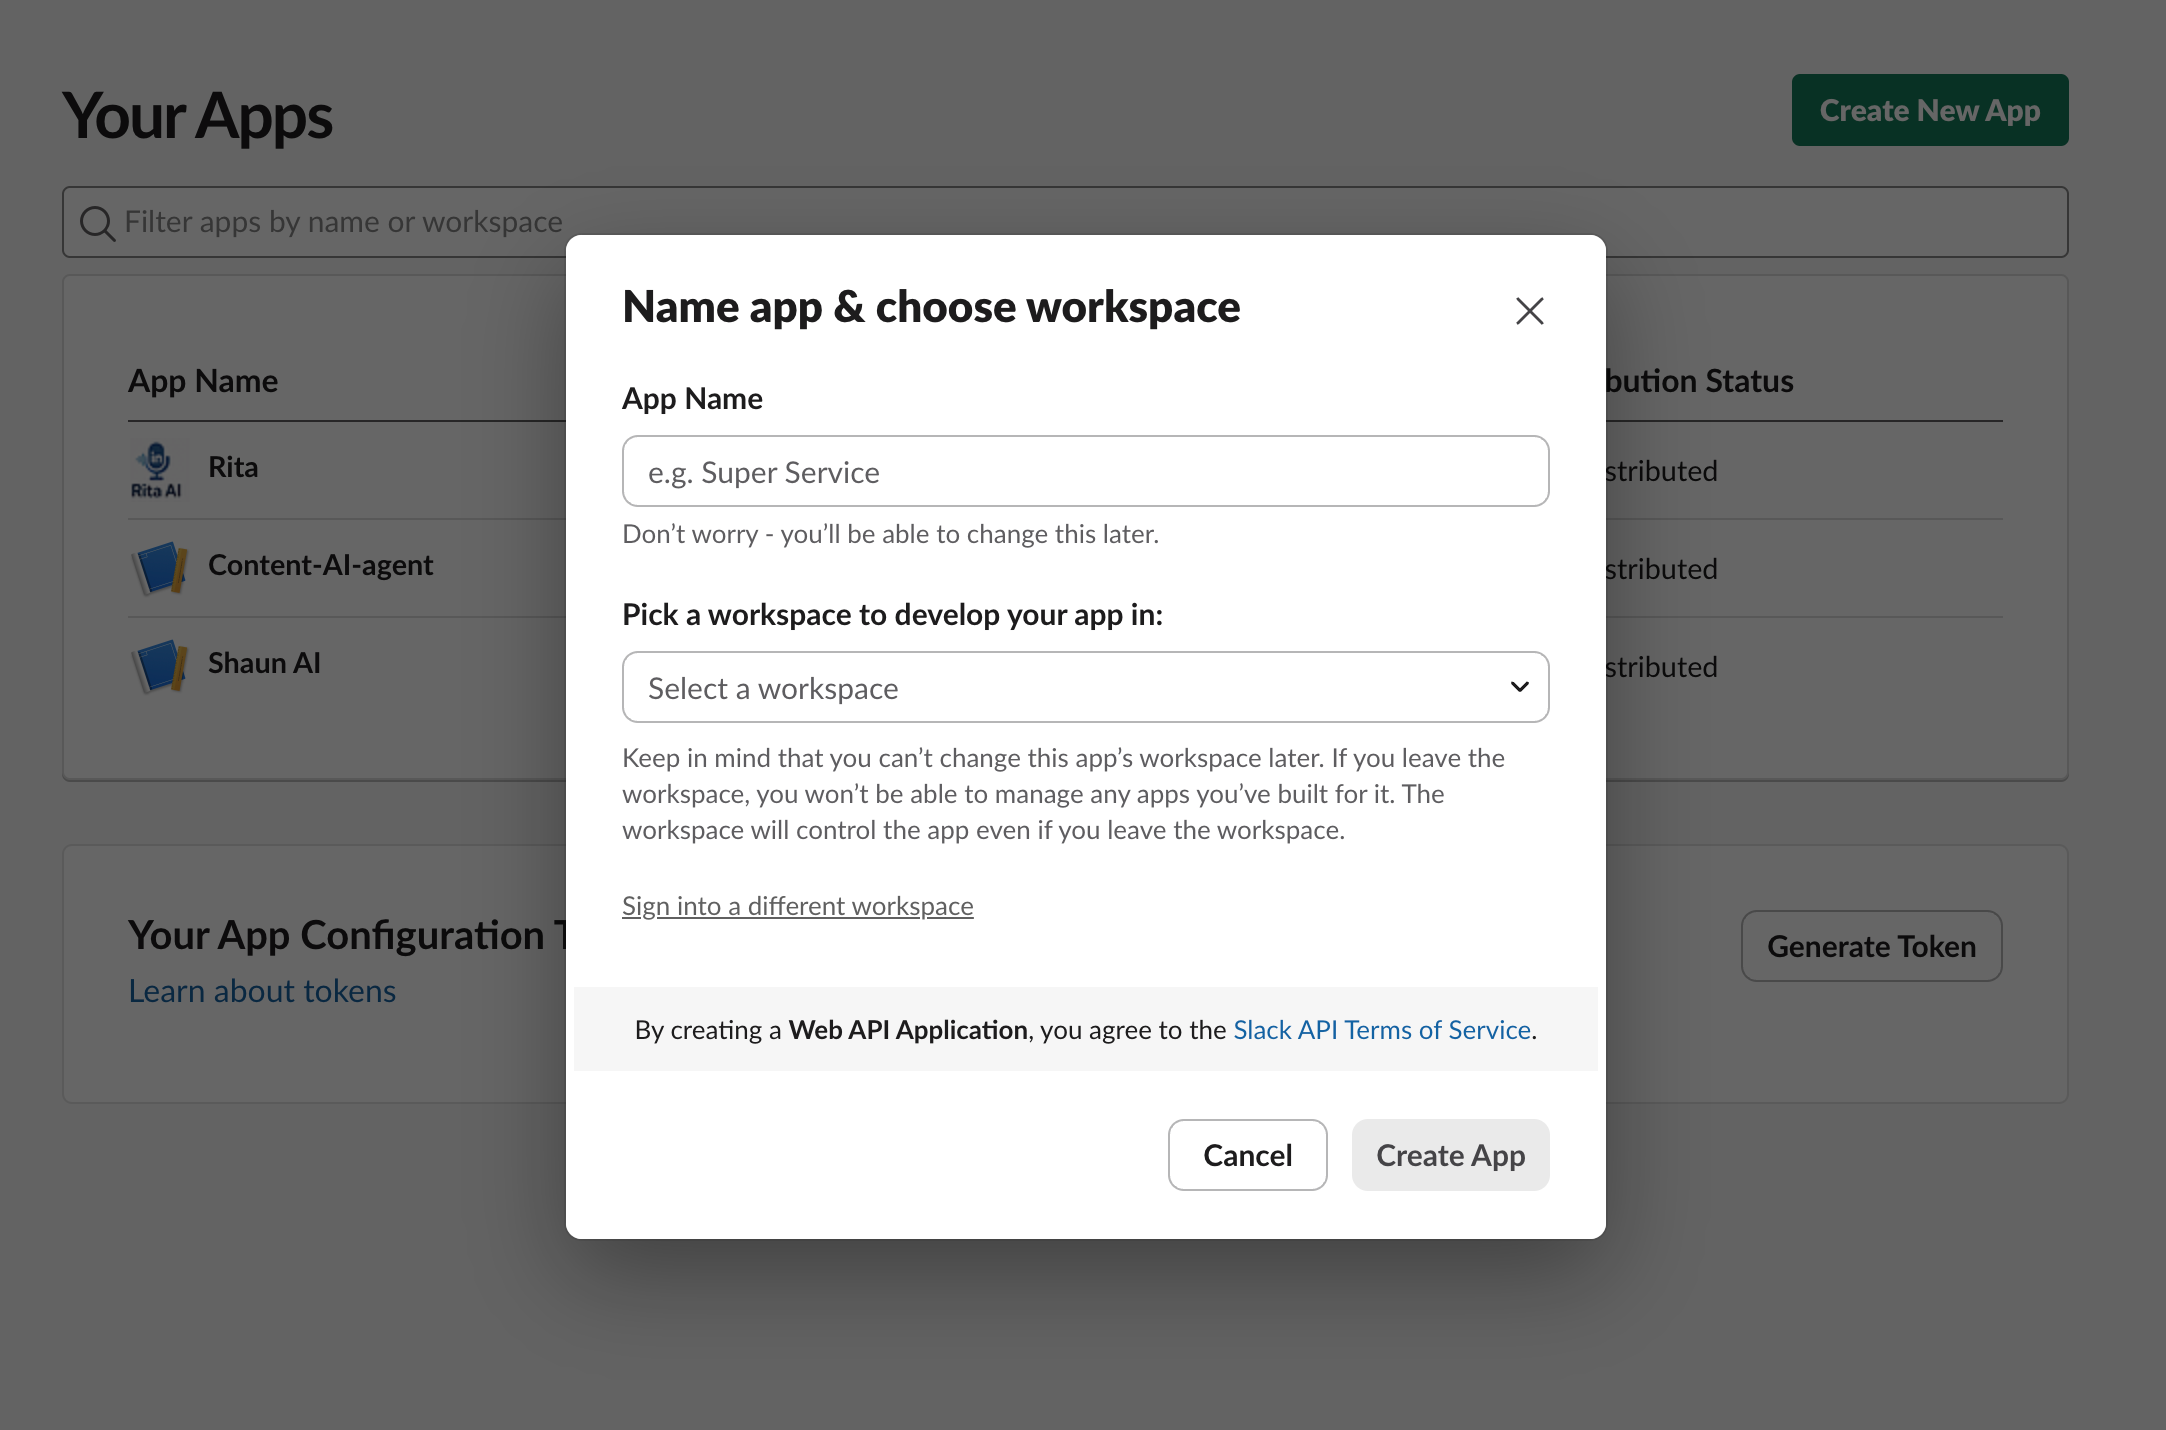
Create a new app. You will see this screen.
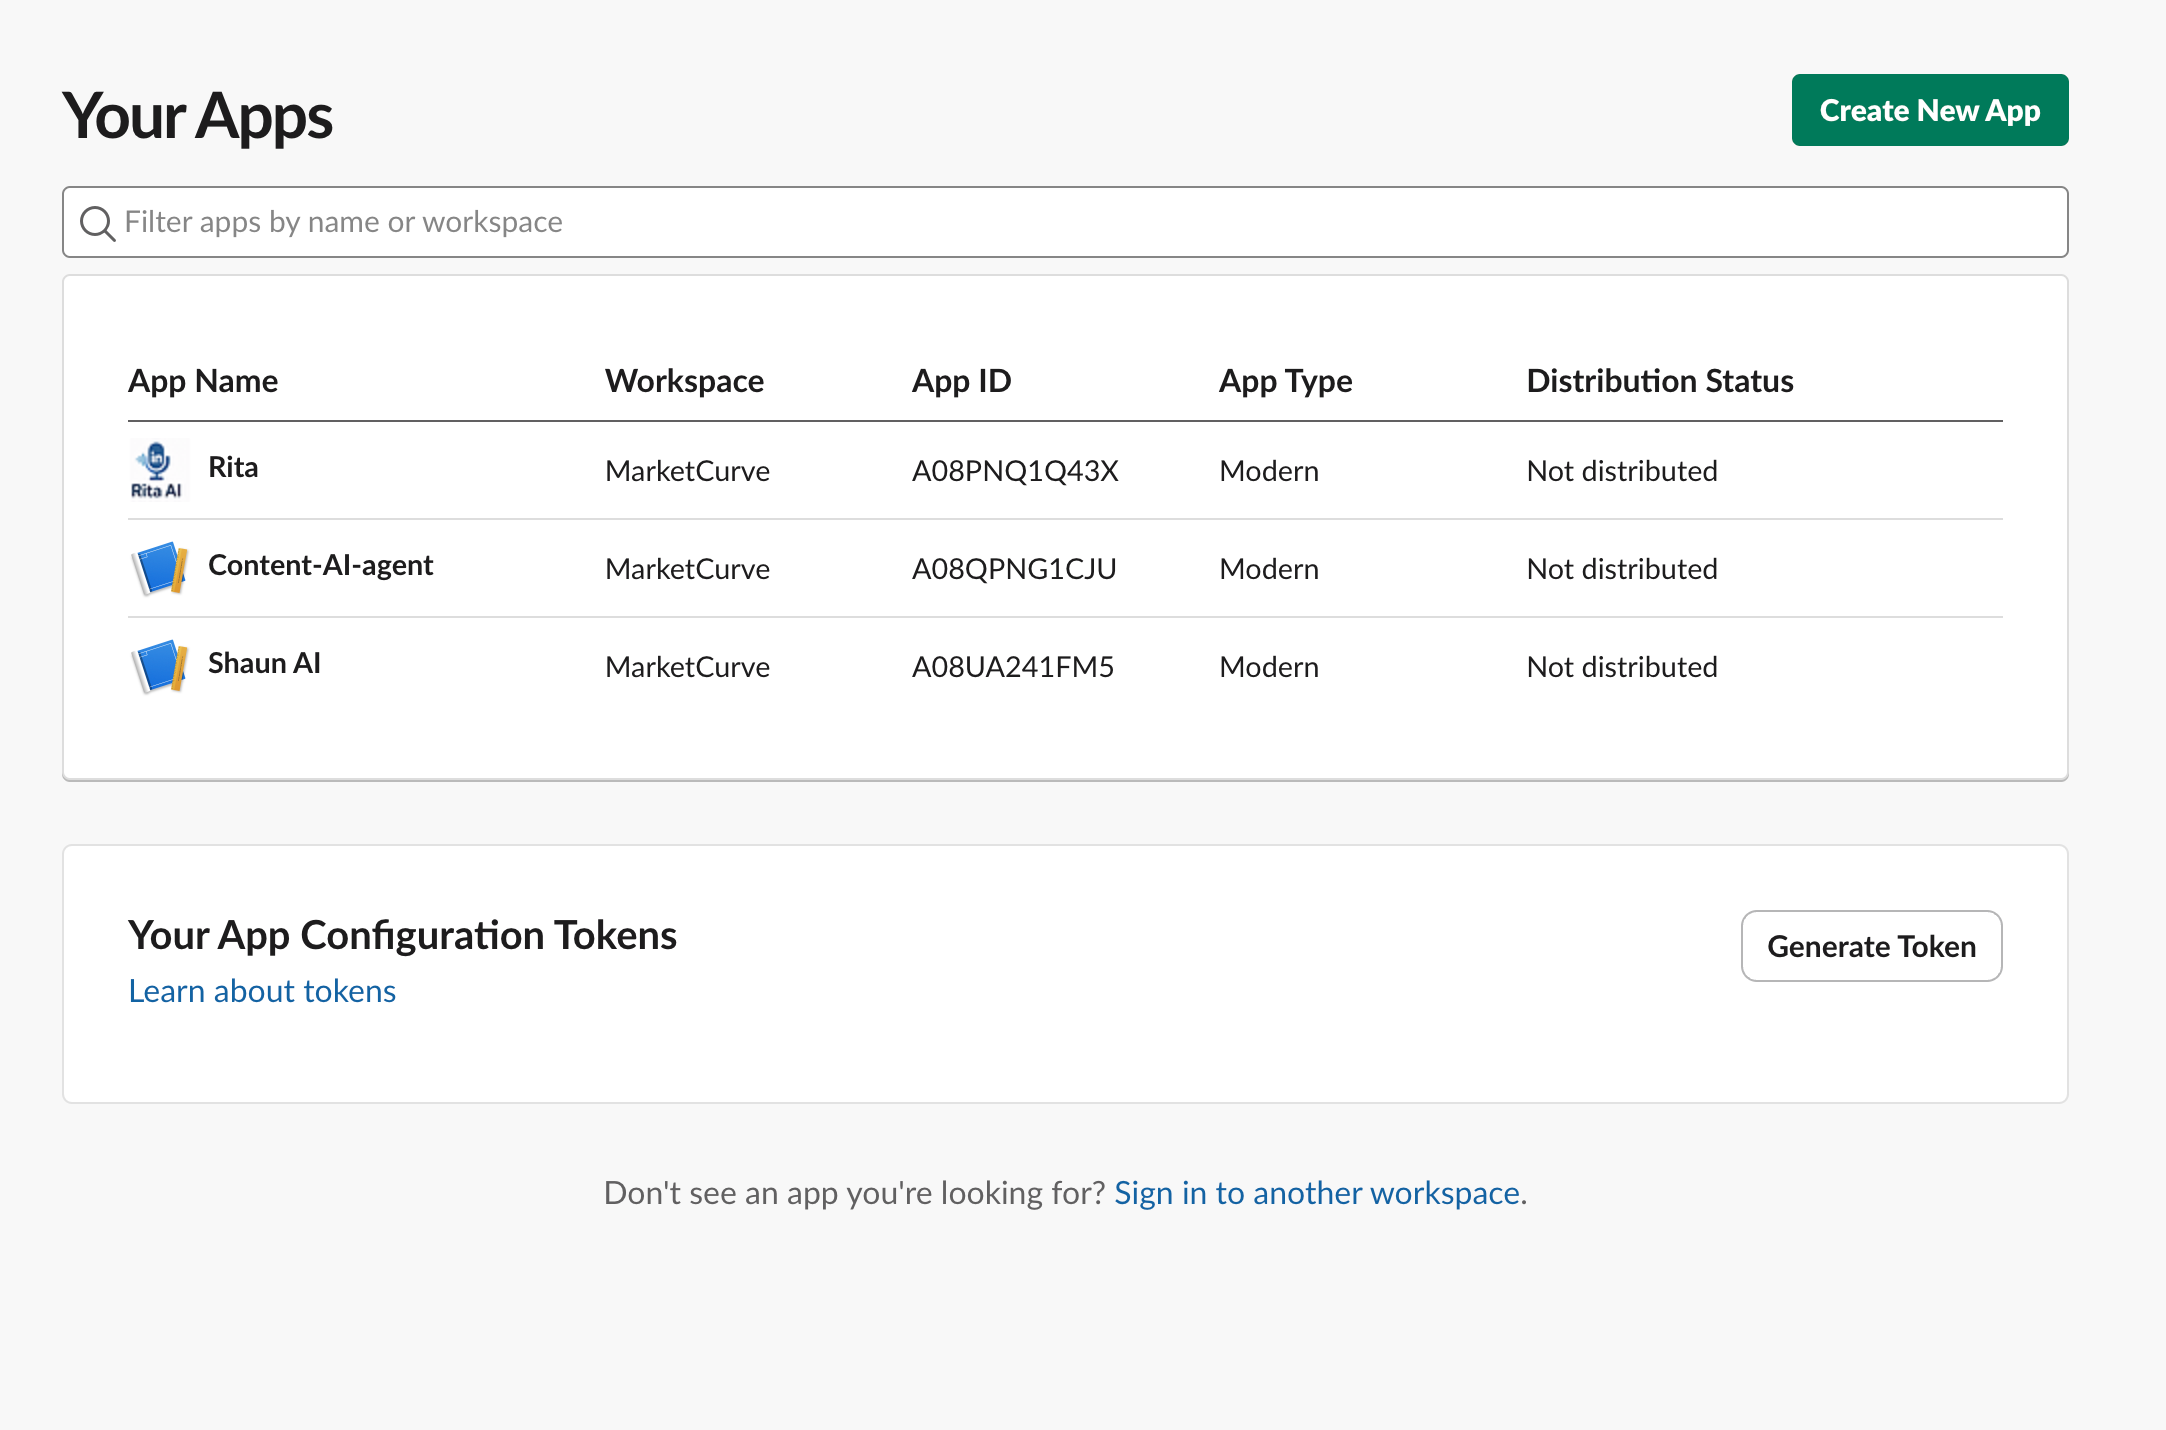
Click create from scratch
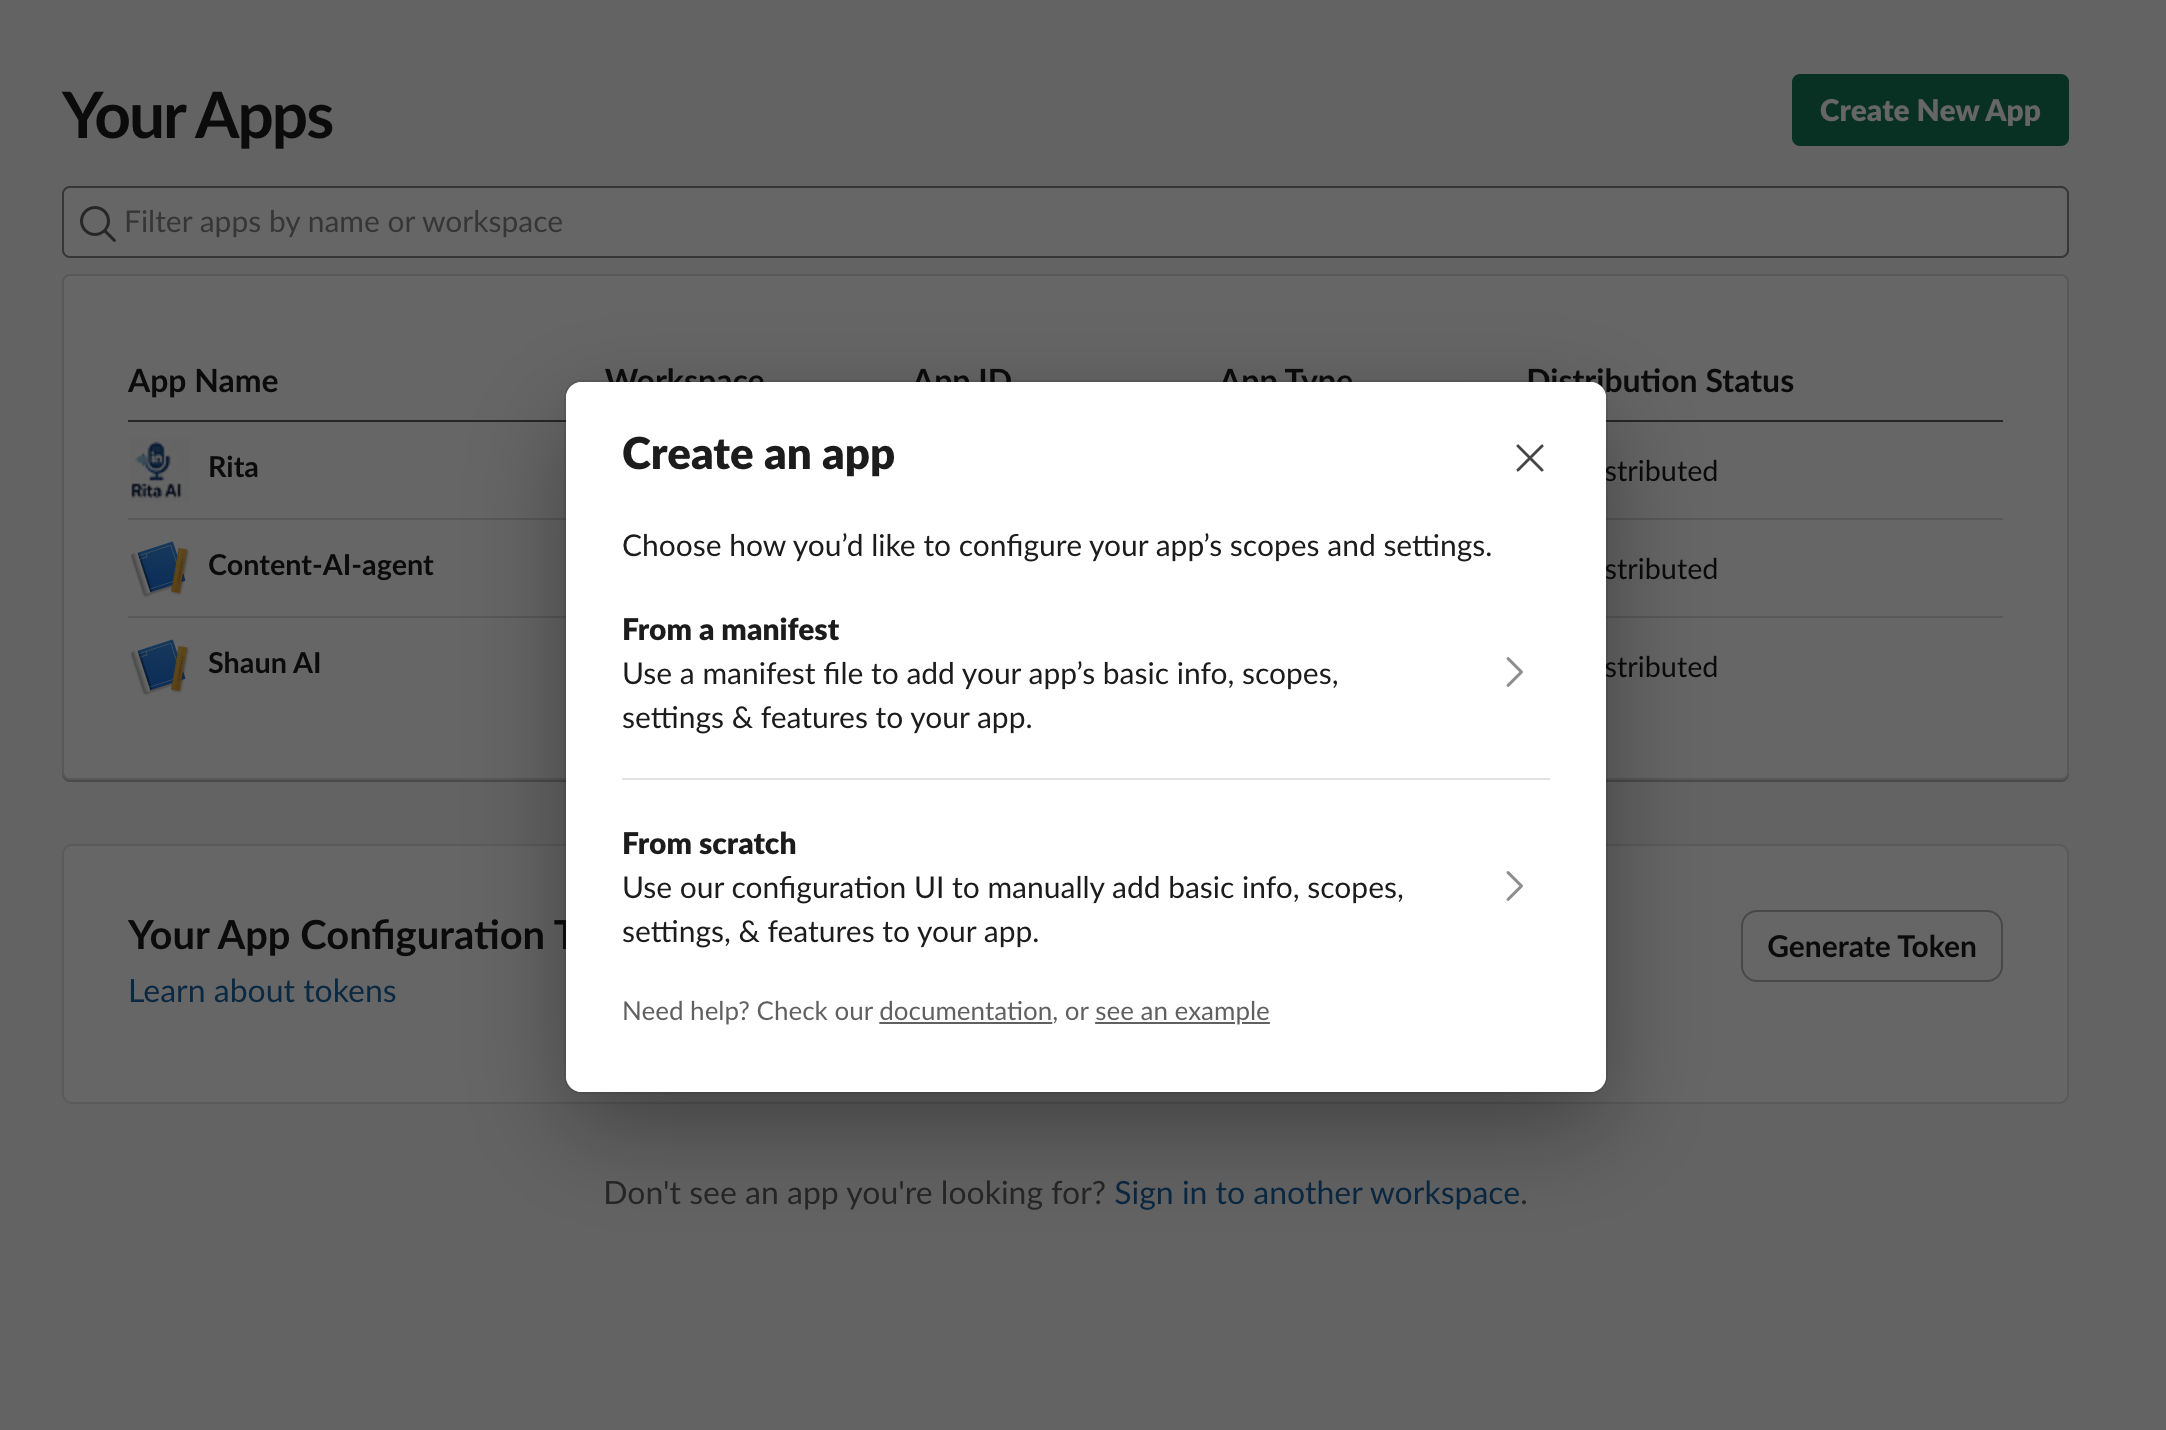
Pick your app name & your workspace where your agent will live.
Once you create, you will see this screen:
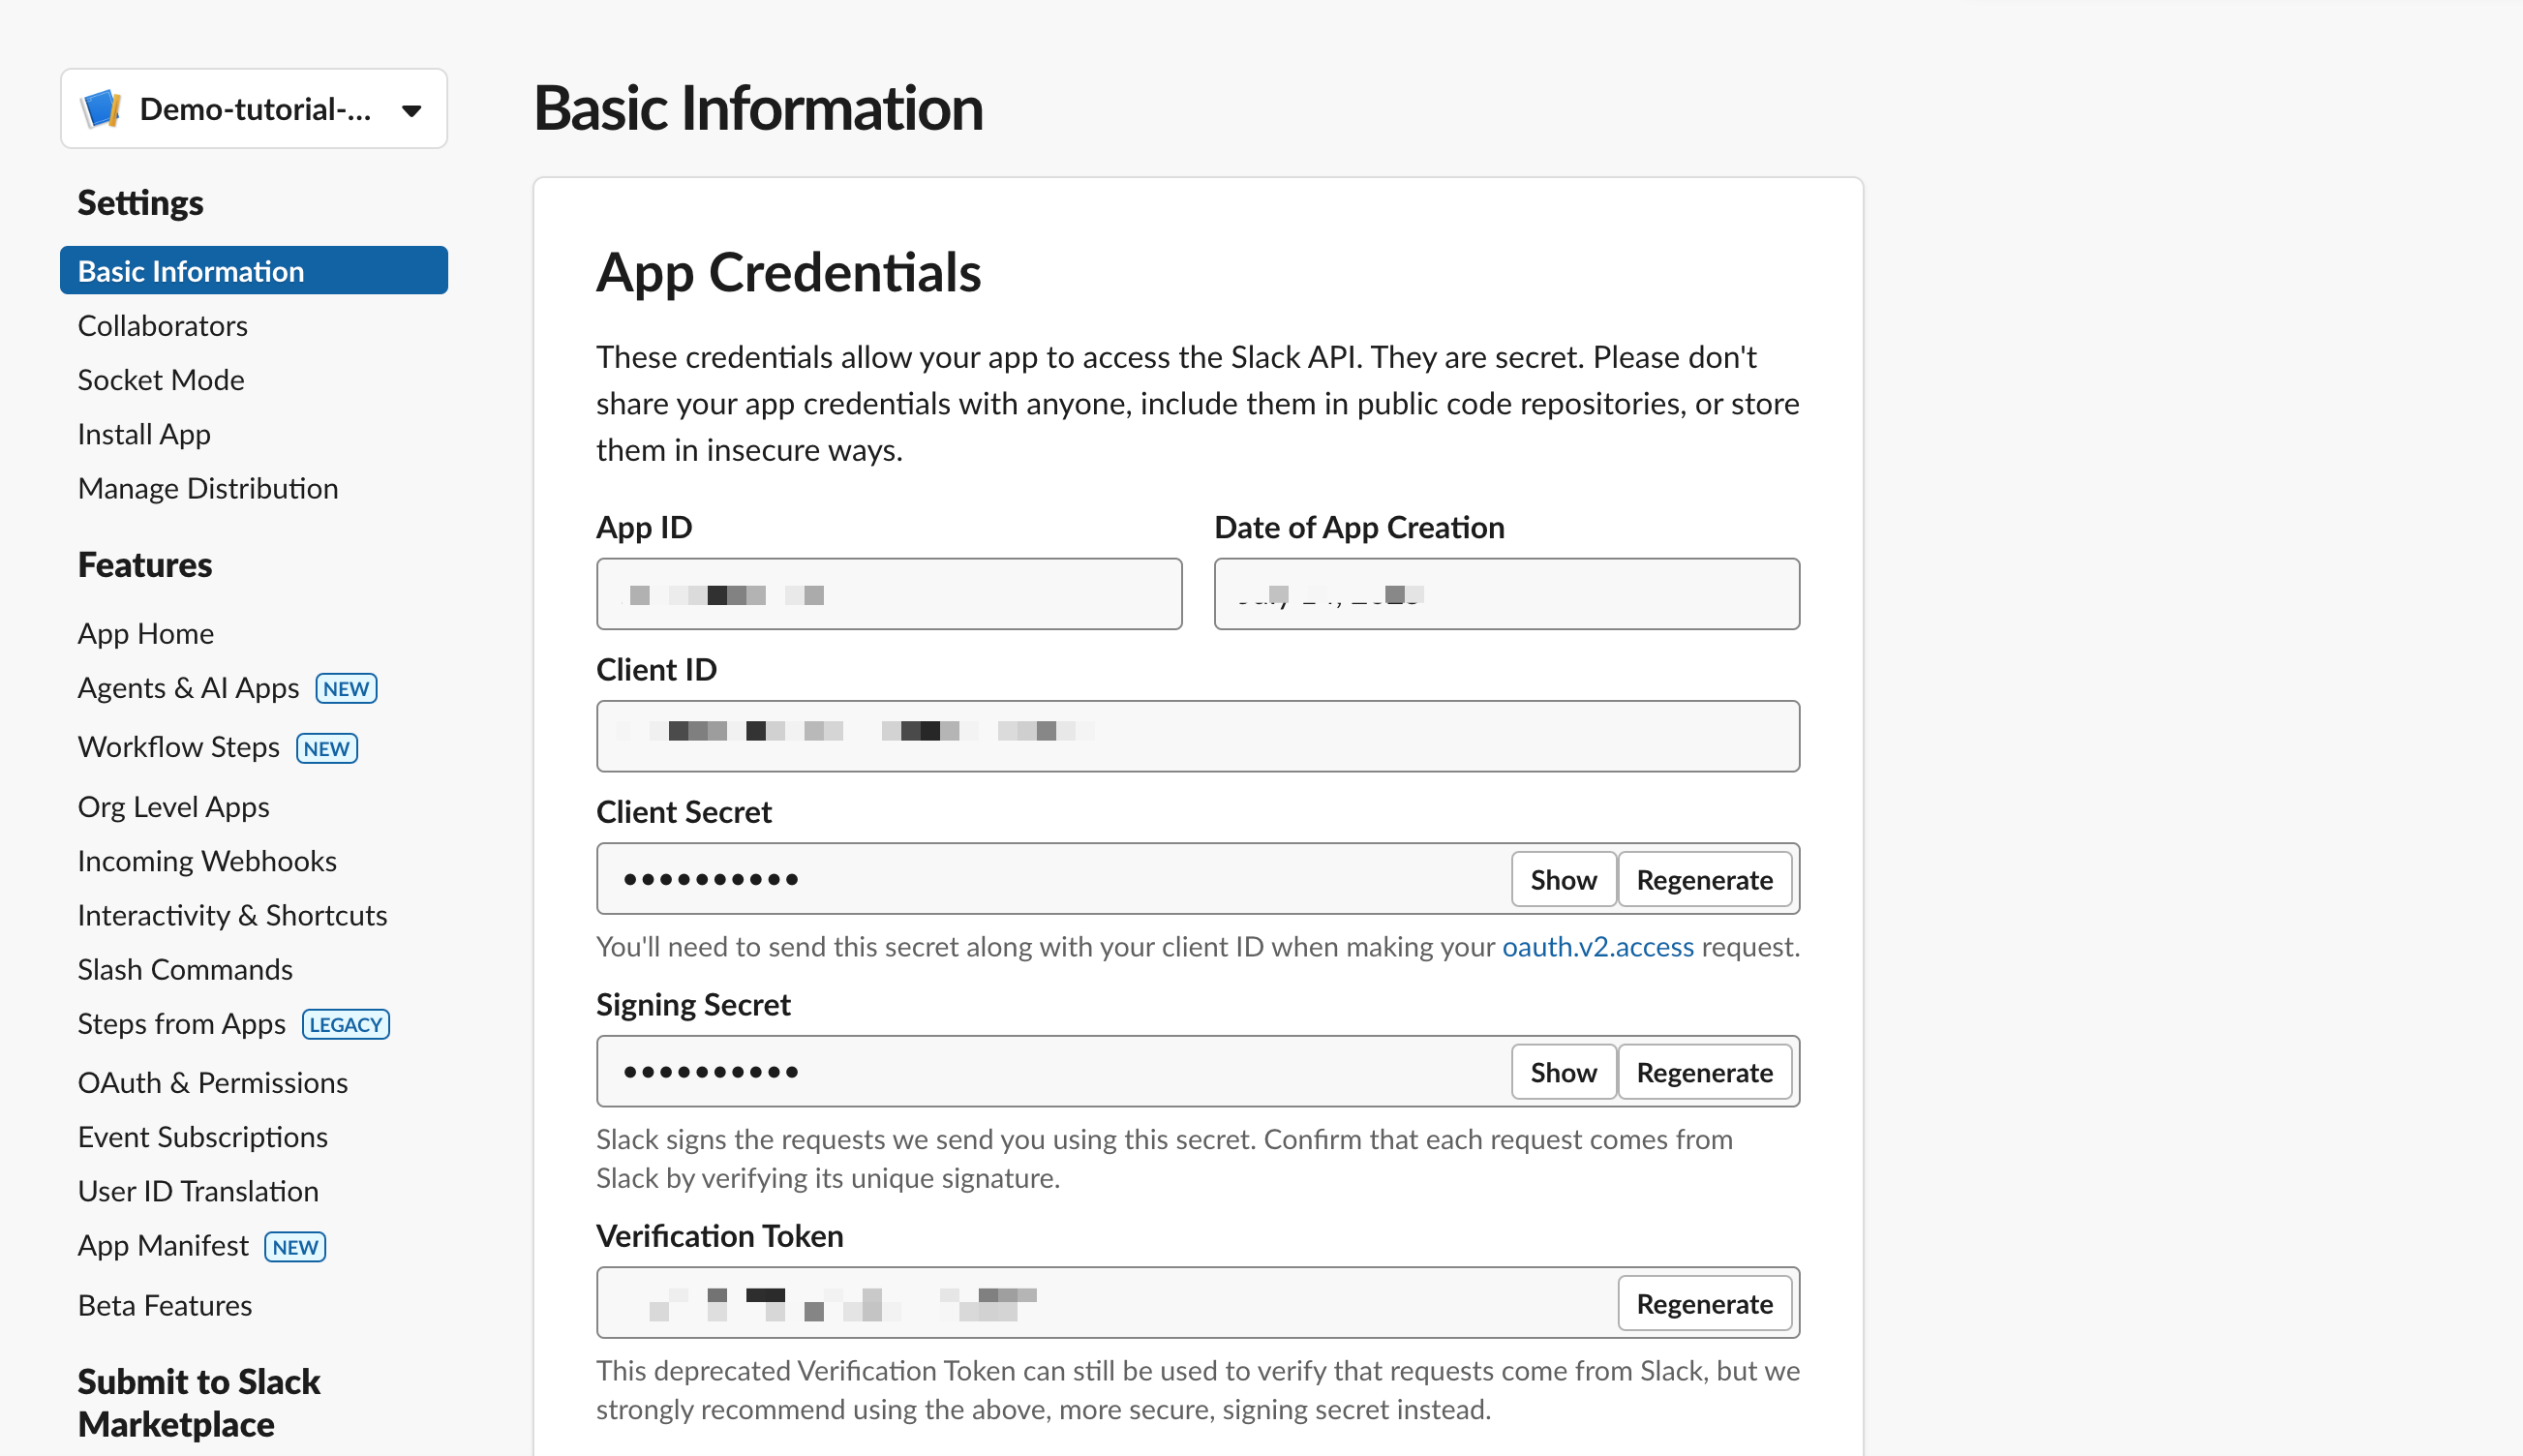
Click on the oAuth & Permissions tab on the left hand side.
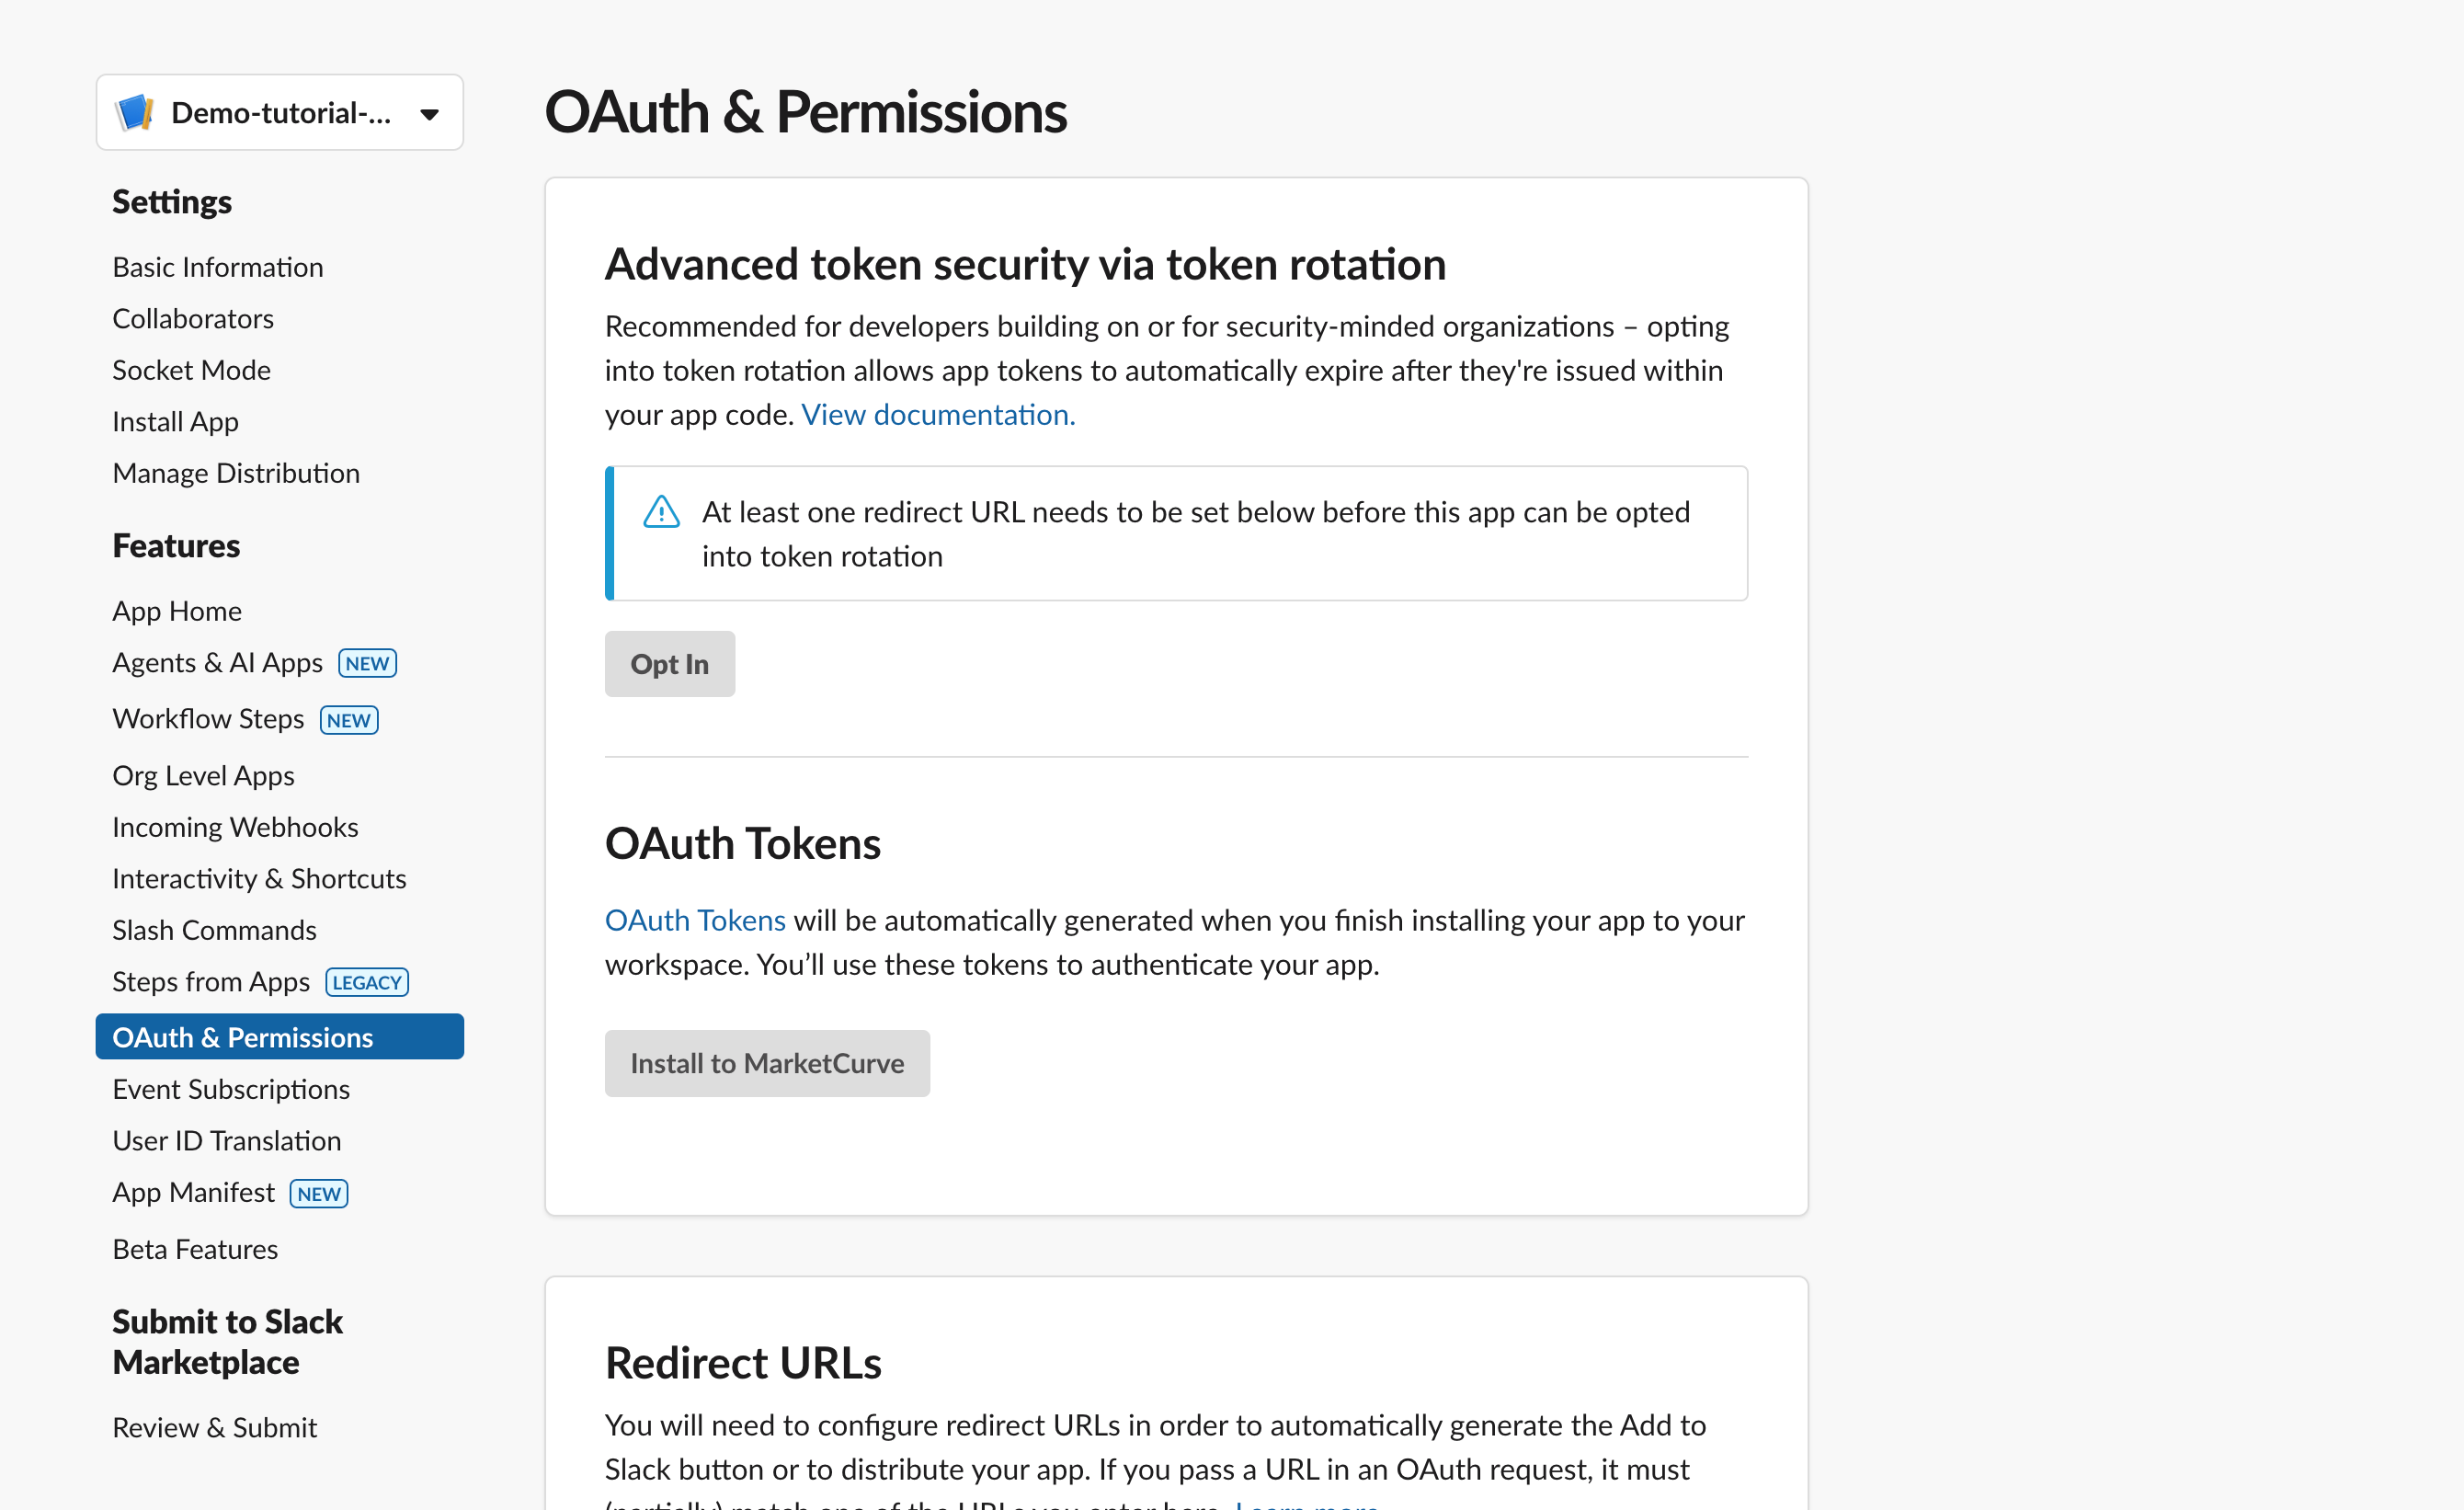
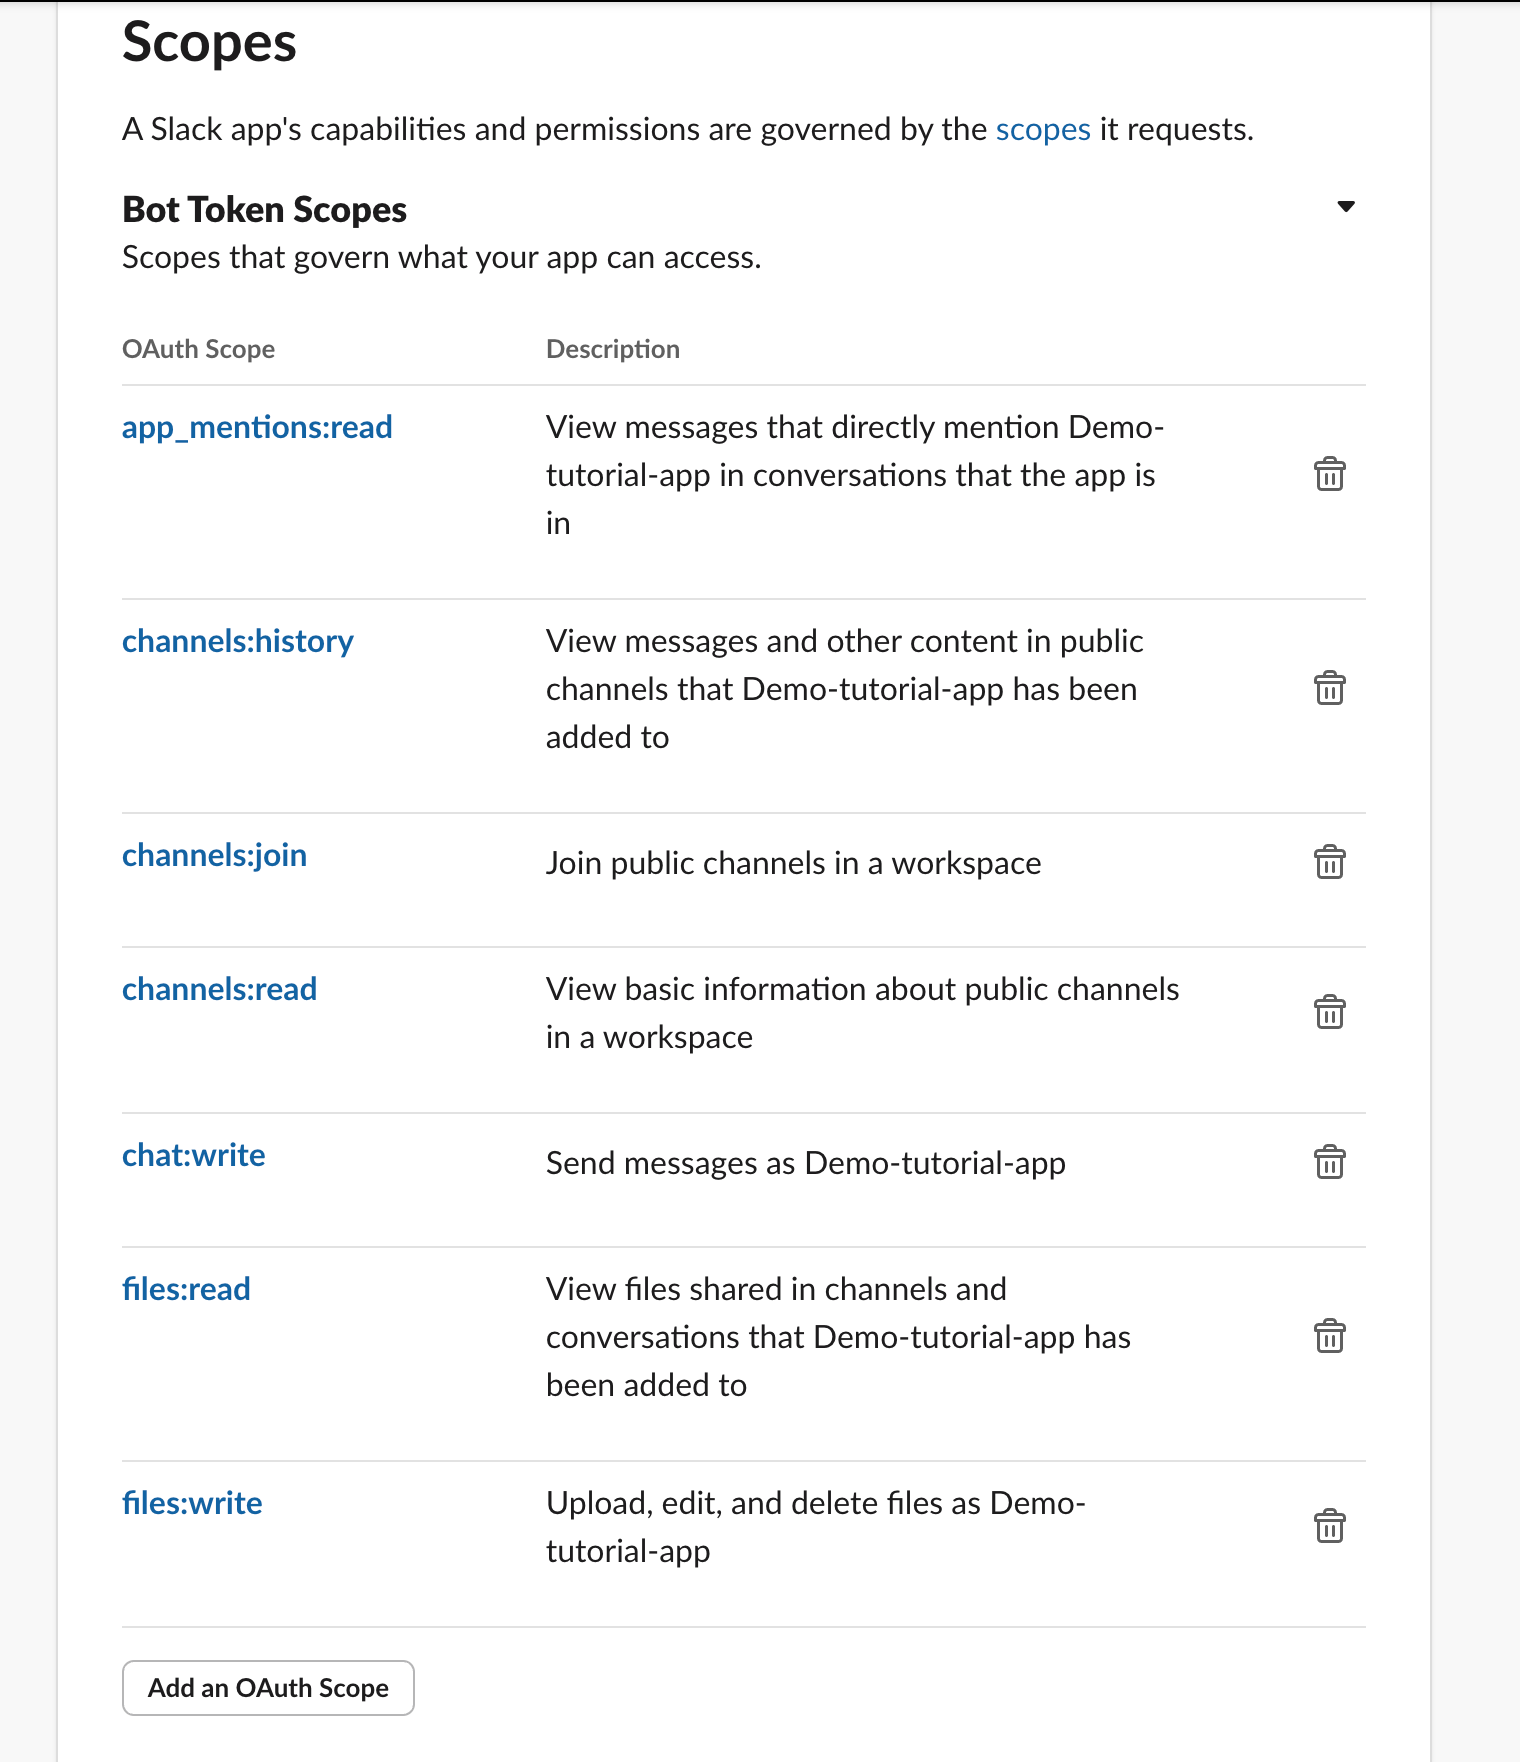
Scroll down to the OAuth scopes section.
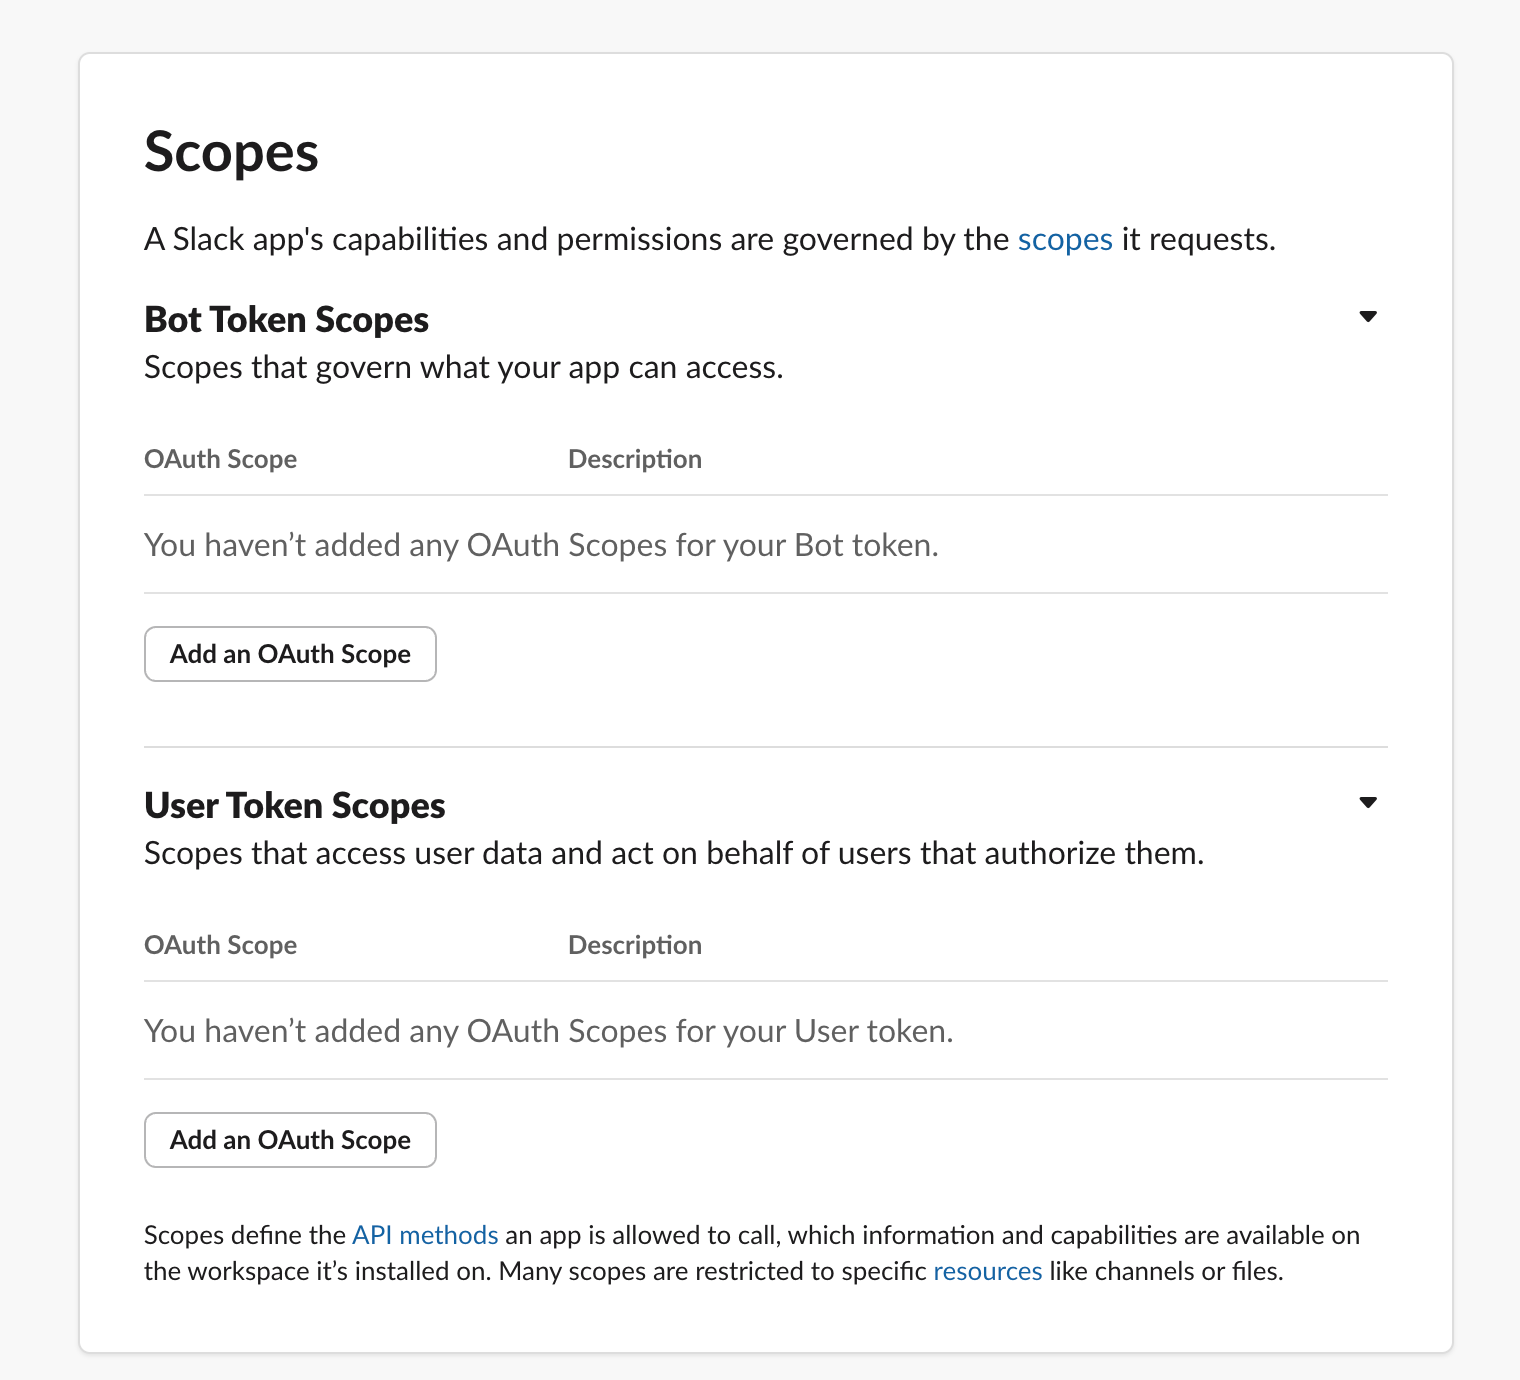
Next, add Oauth scopes to your app. This will enable your agent to do stuff like read texts, send messages etc. Super important.
These are the ones I’ve used for this workflow. You can customize these too.
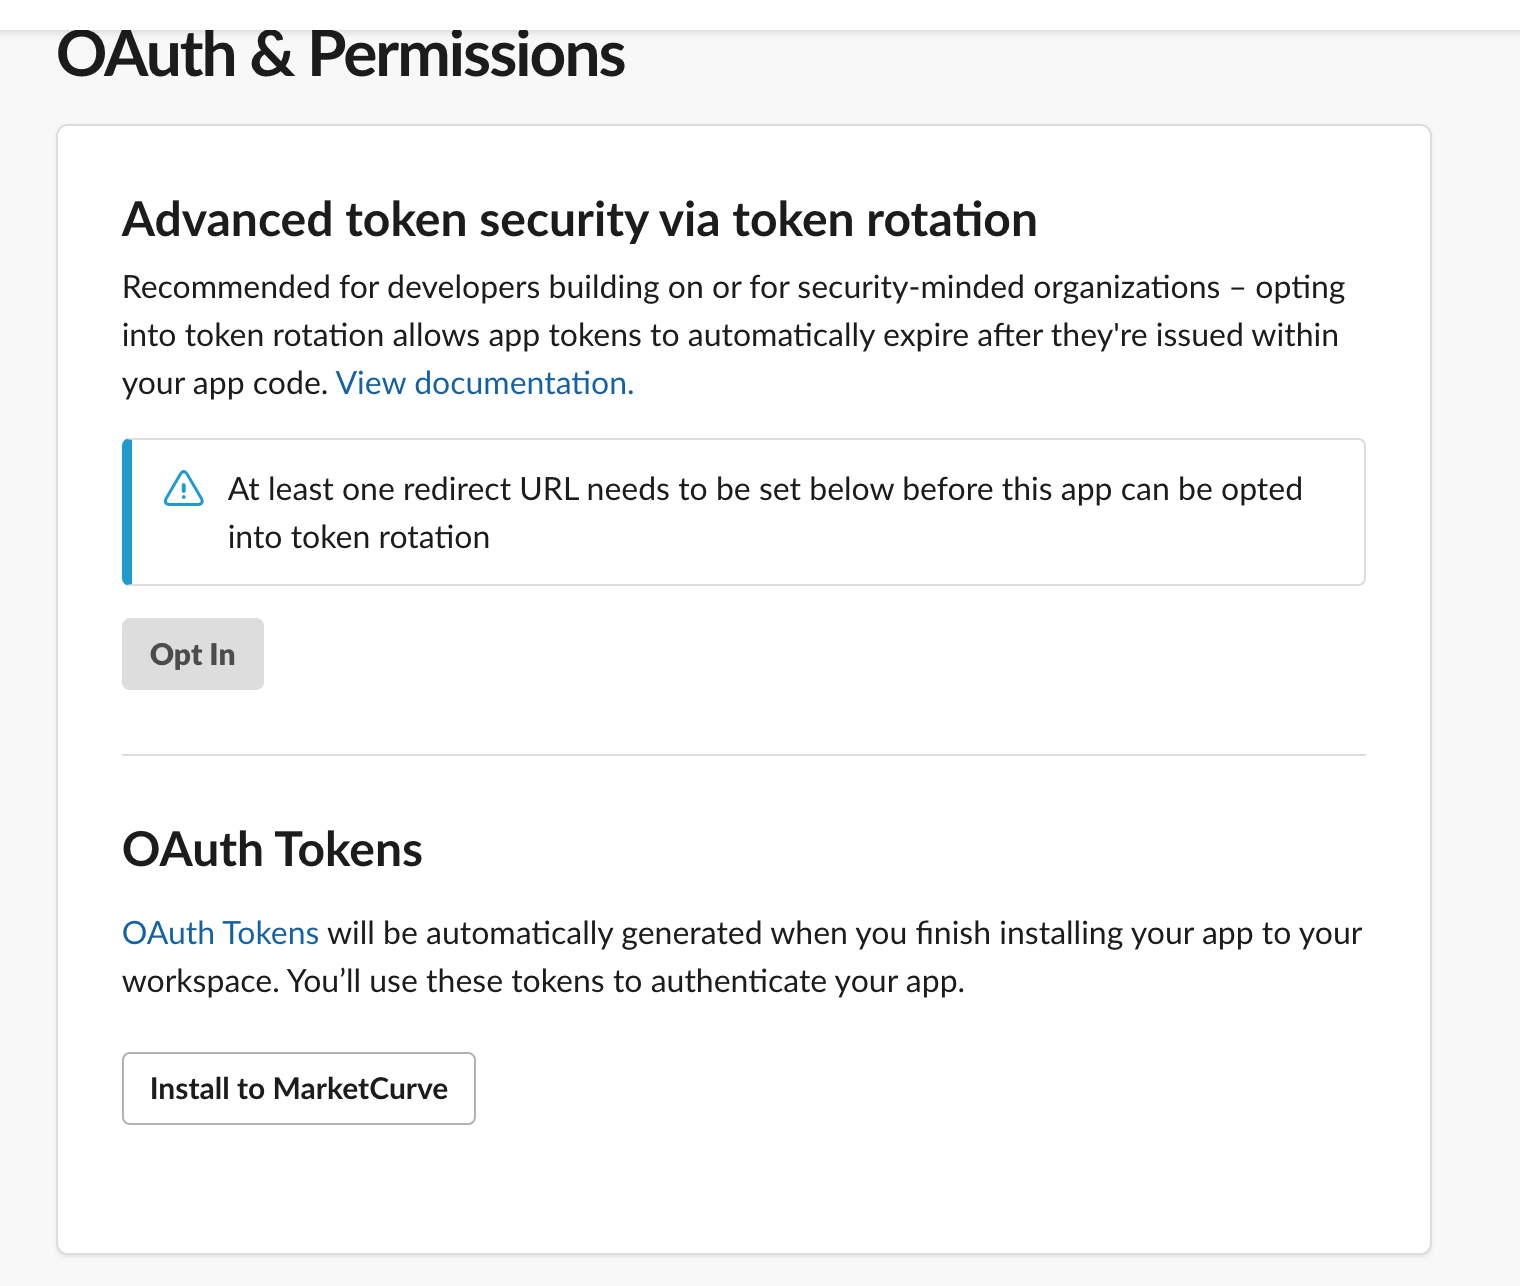
Then you install these to your workspace. Scroll up and you’ll see this:
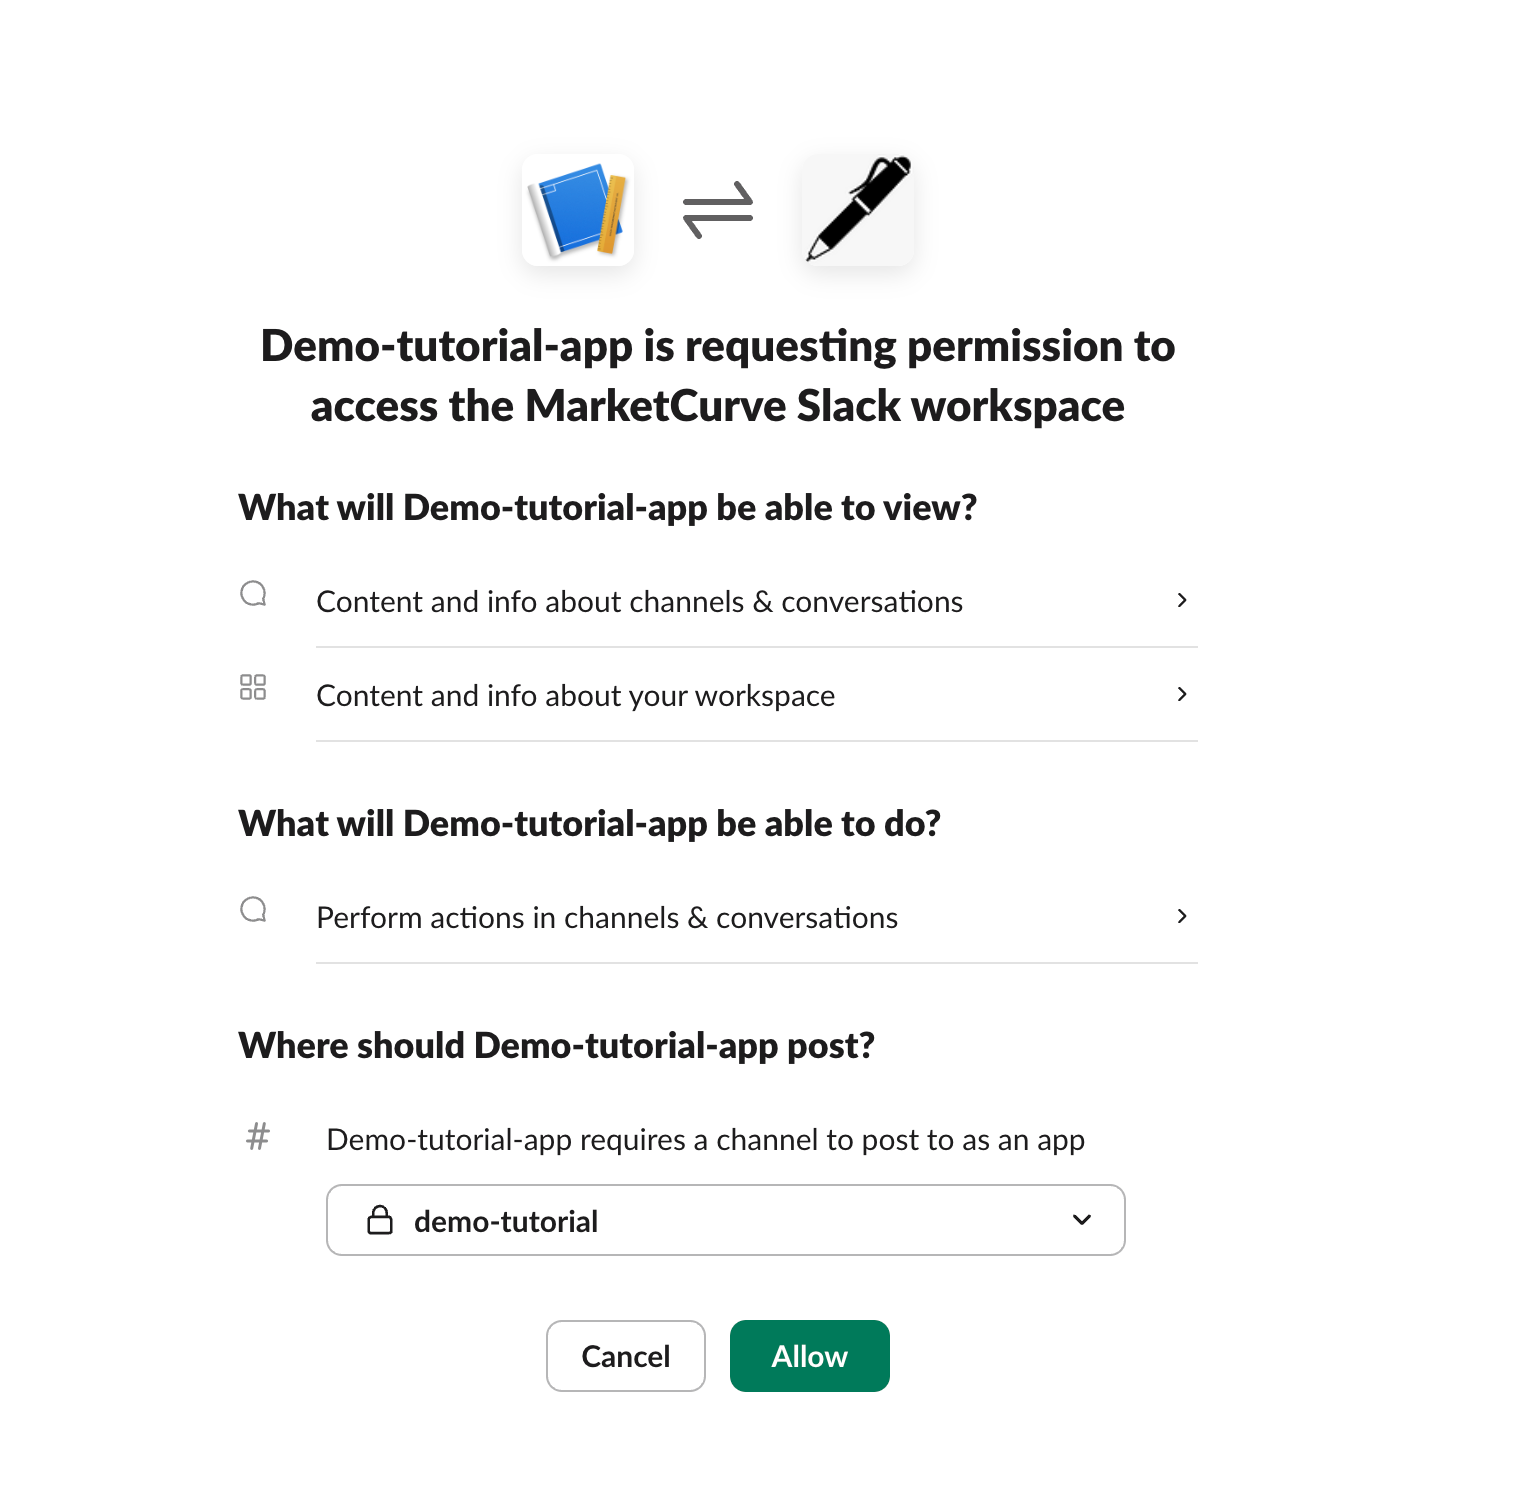
When you install, you’ll see this screen. Add your channel you created in the dropdown.
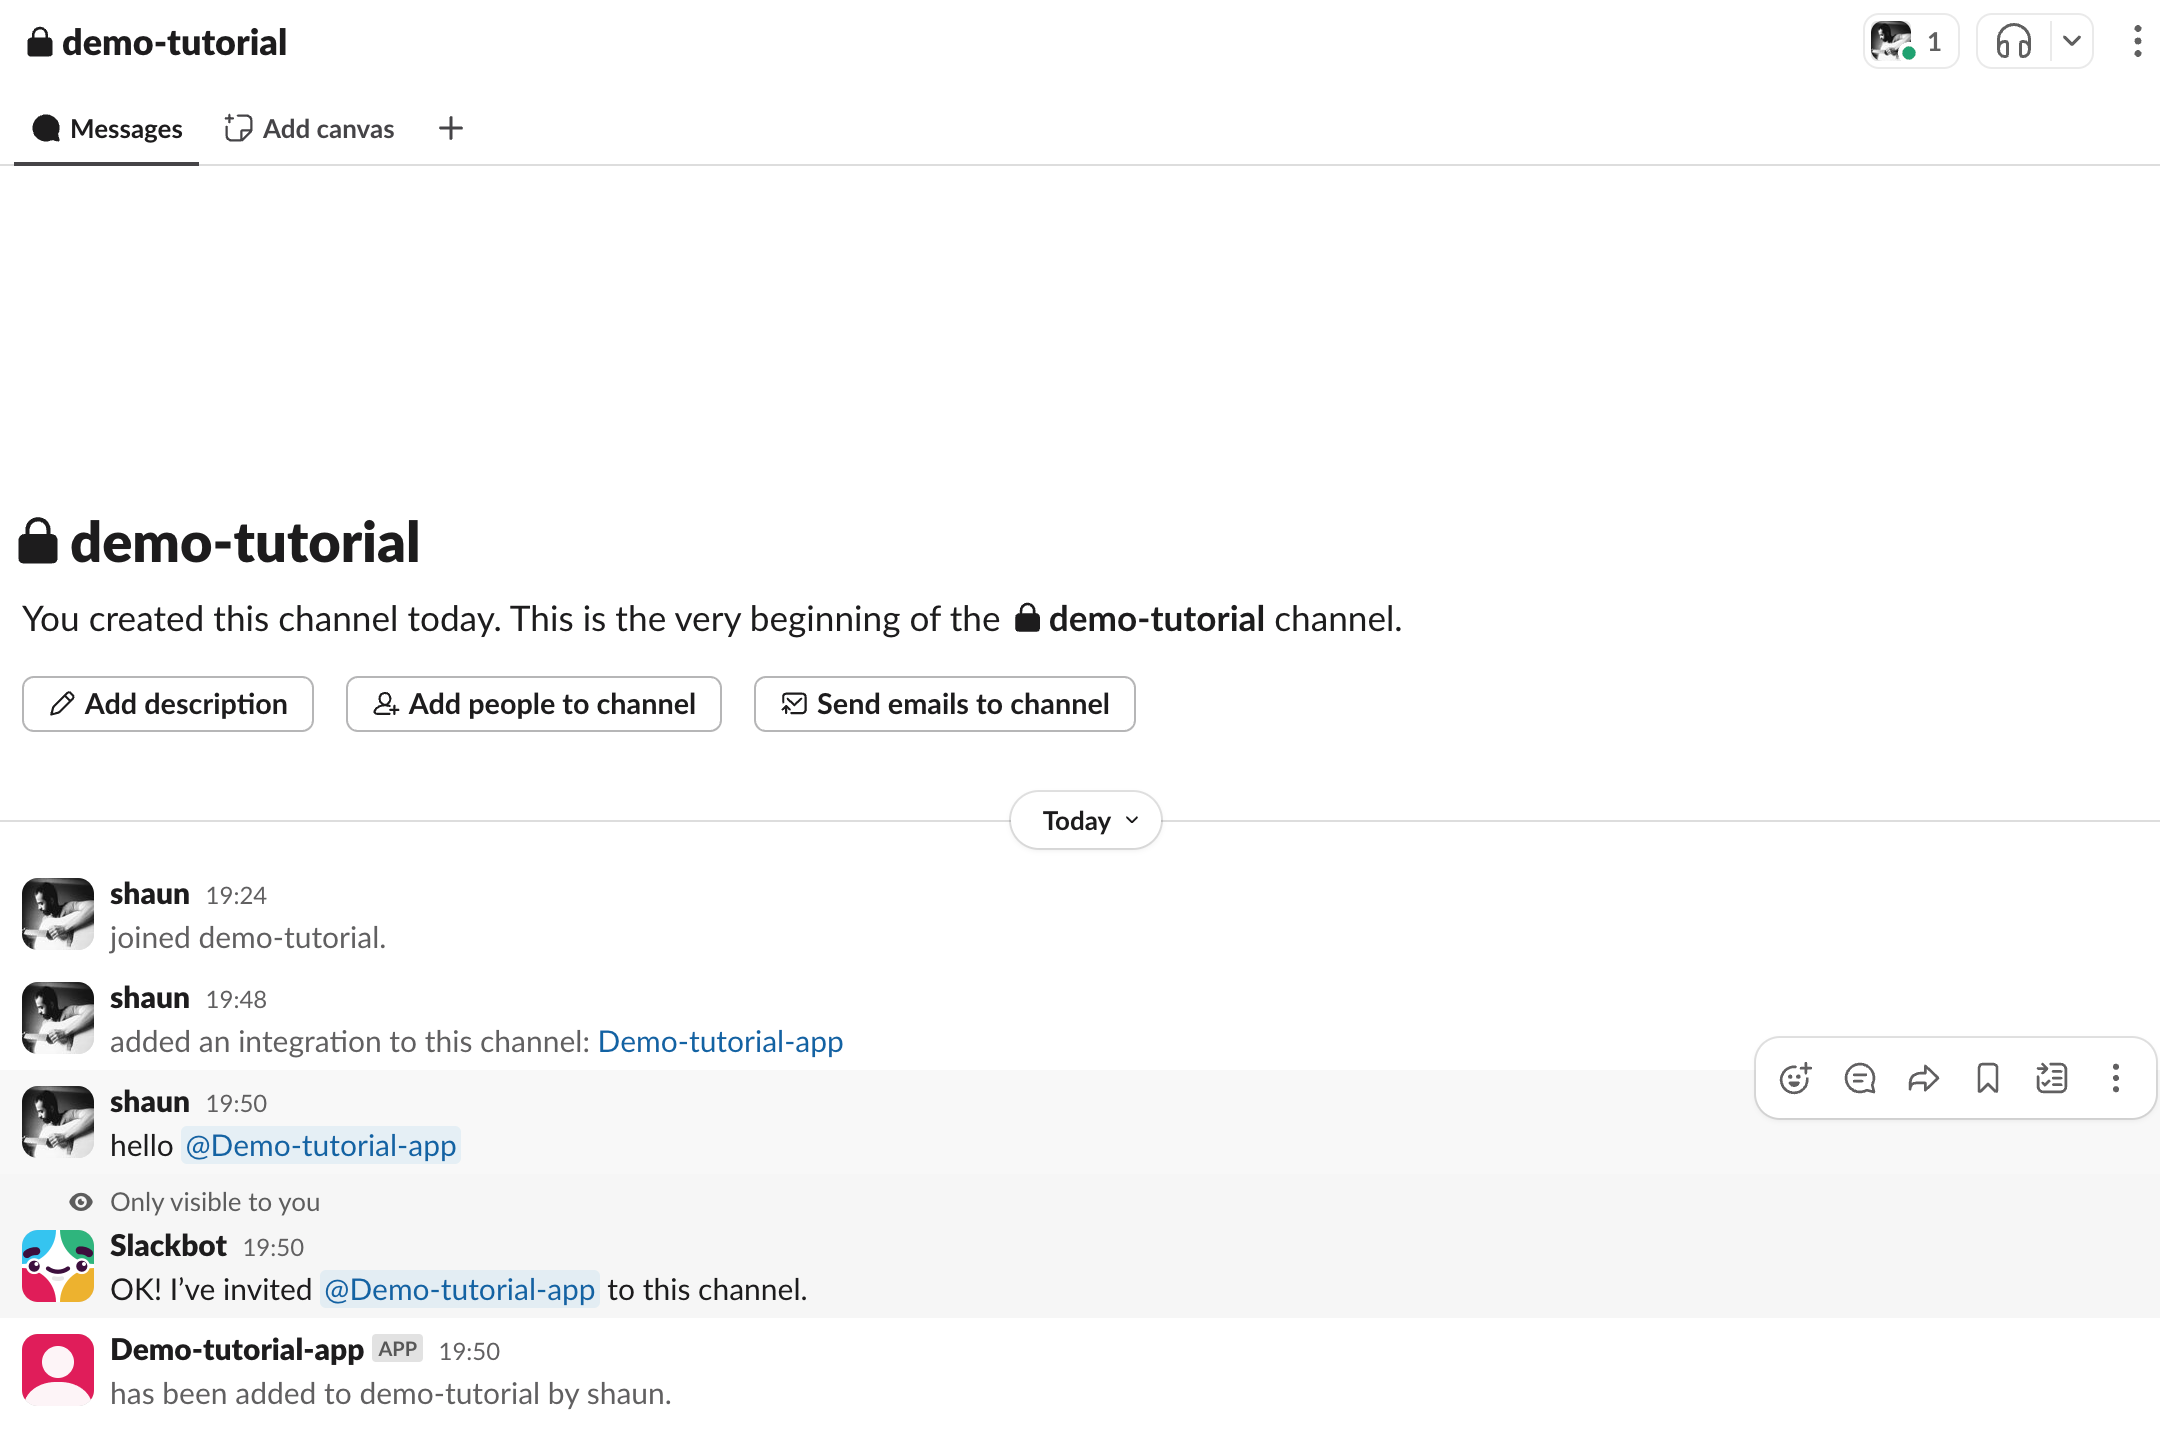
Then, you wanna add this app to your channel.
Go to your channel and tag this agent.
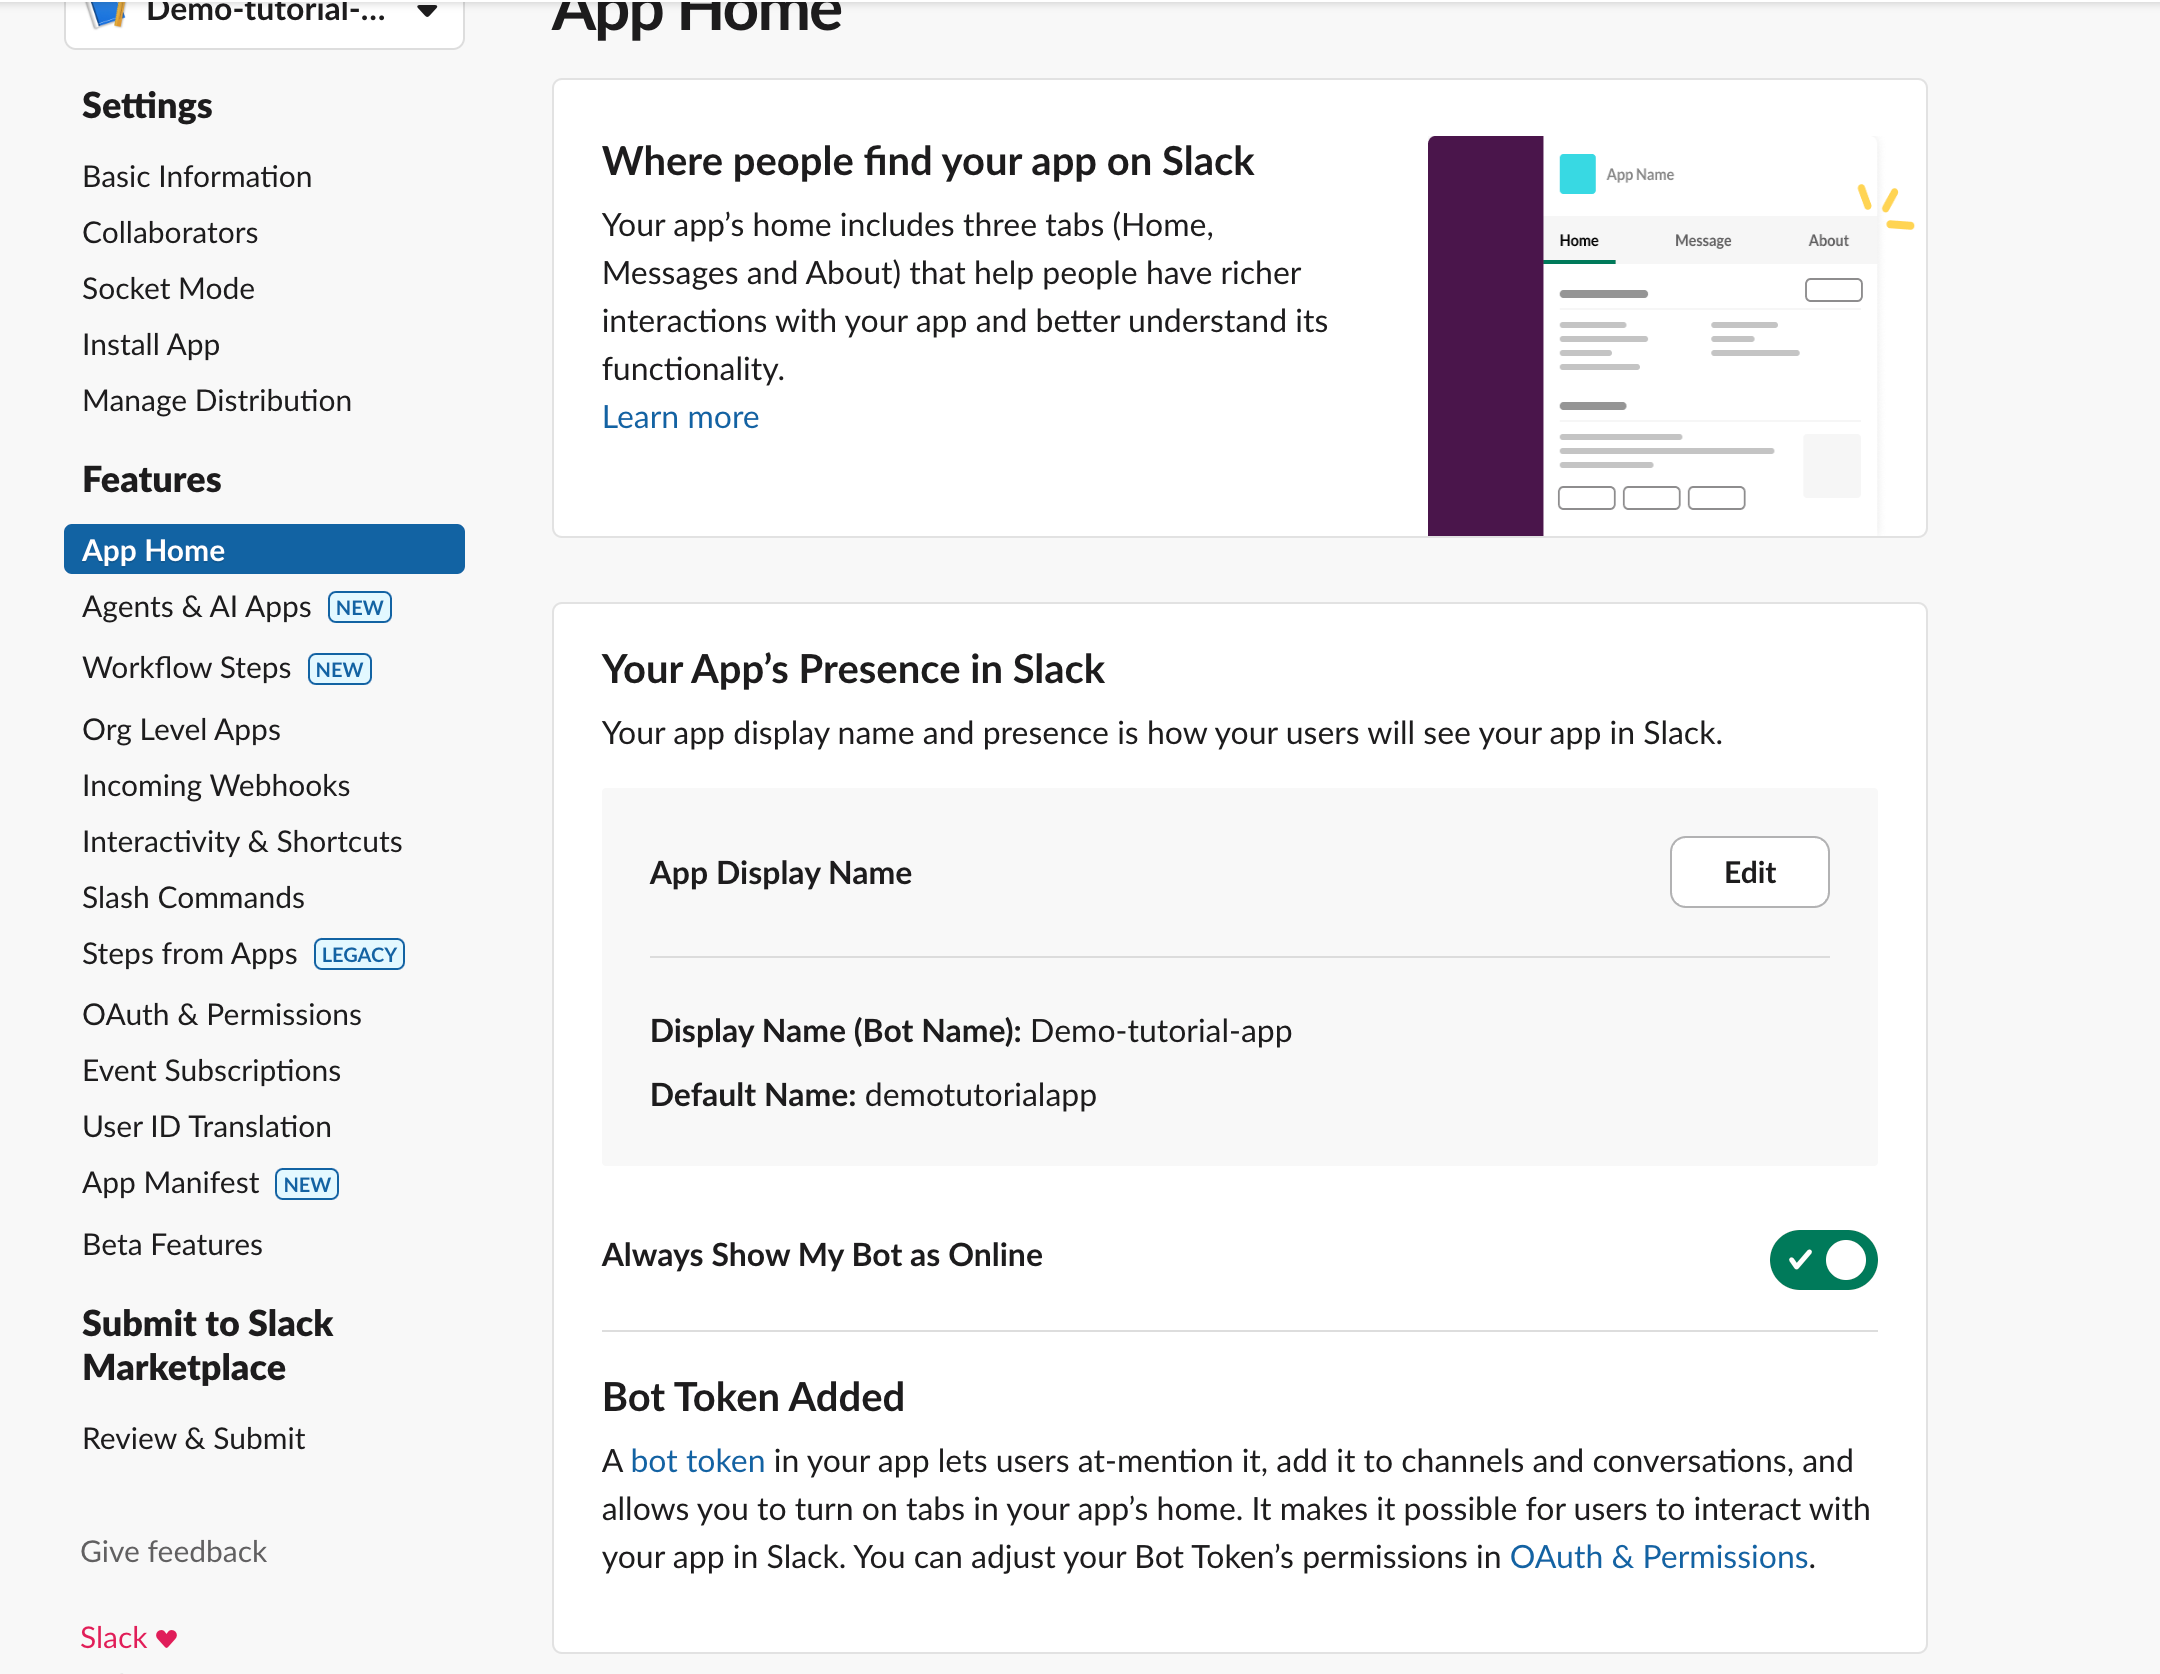
Go back to the API page & go to app-home.
Turn on the toggle so your app is always online.
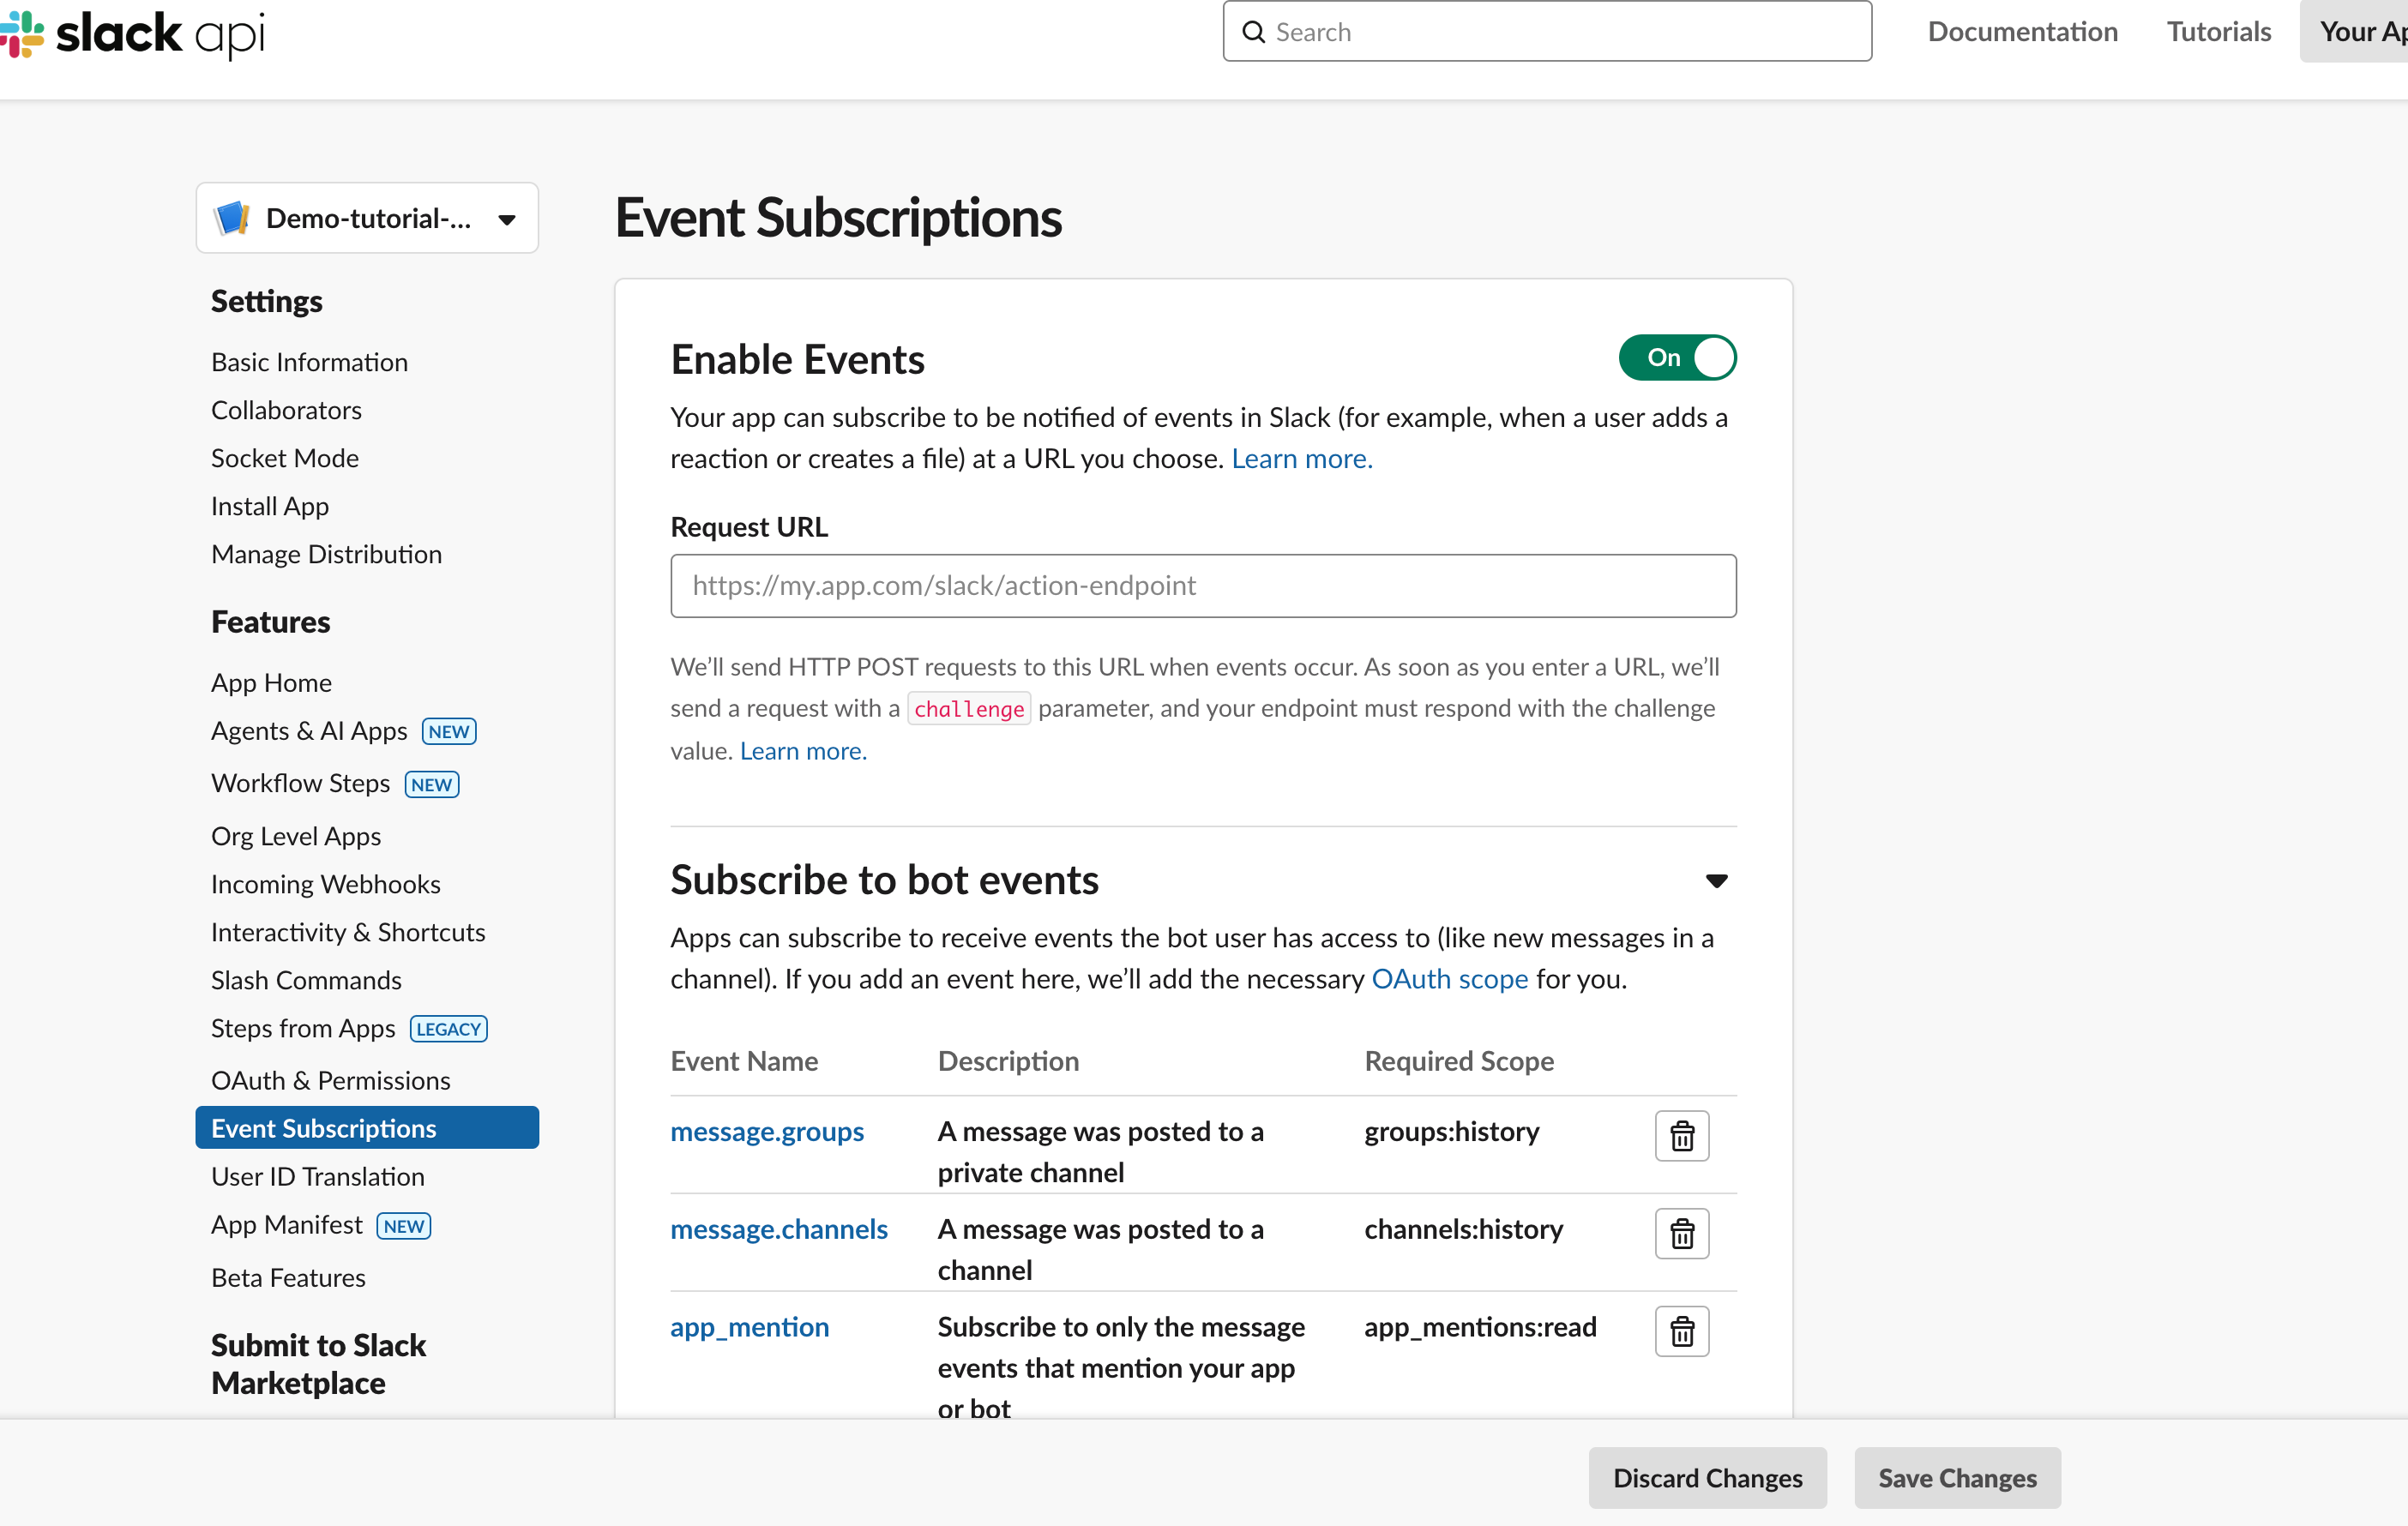
Next, go to Event Subscriptions on the left hand side & turn it on.
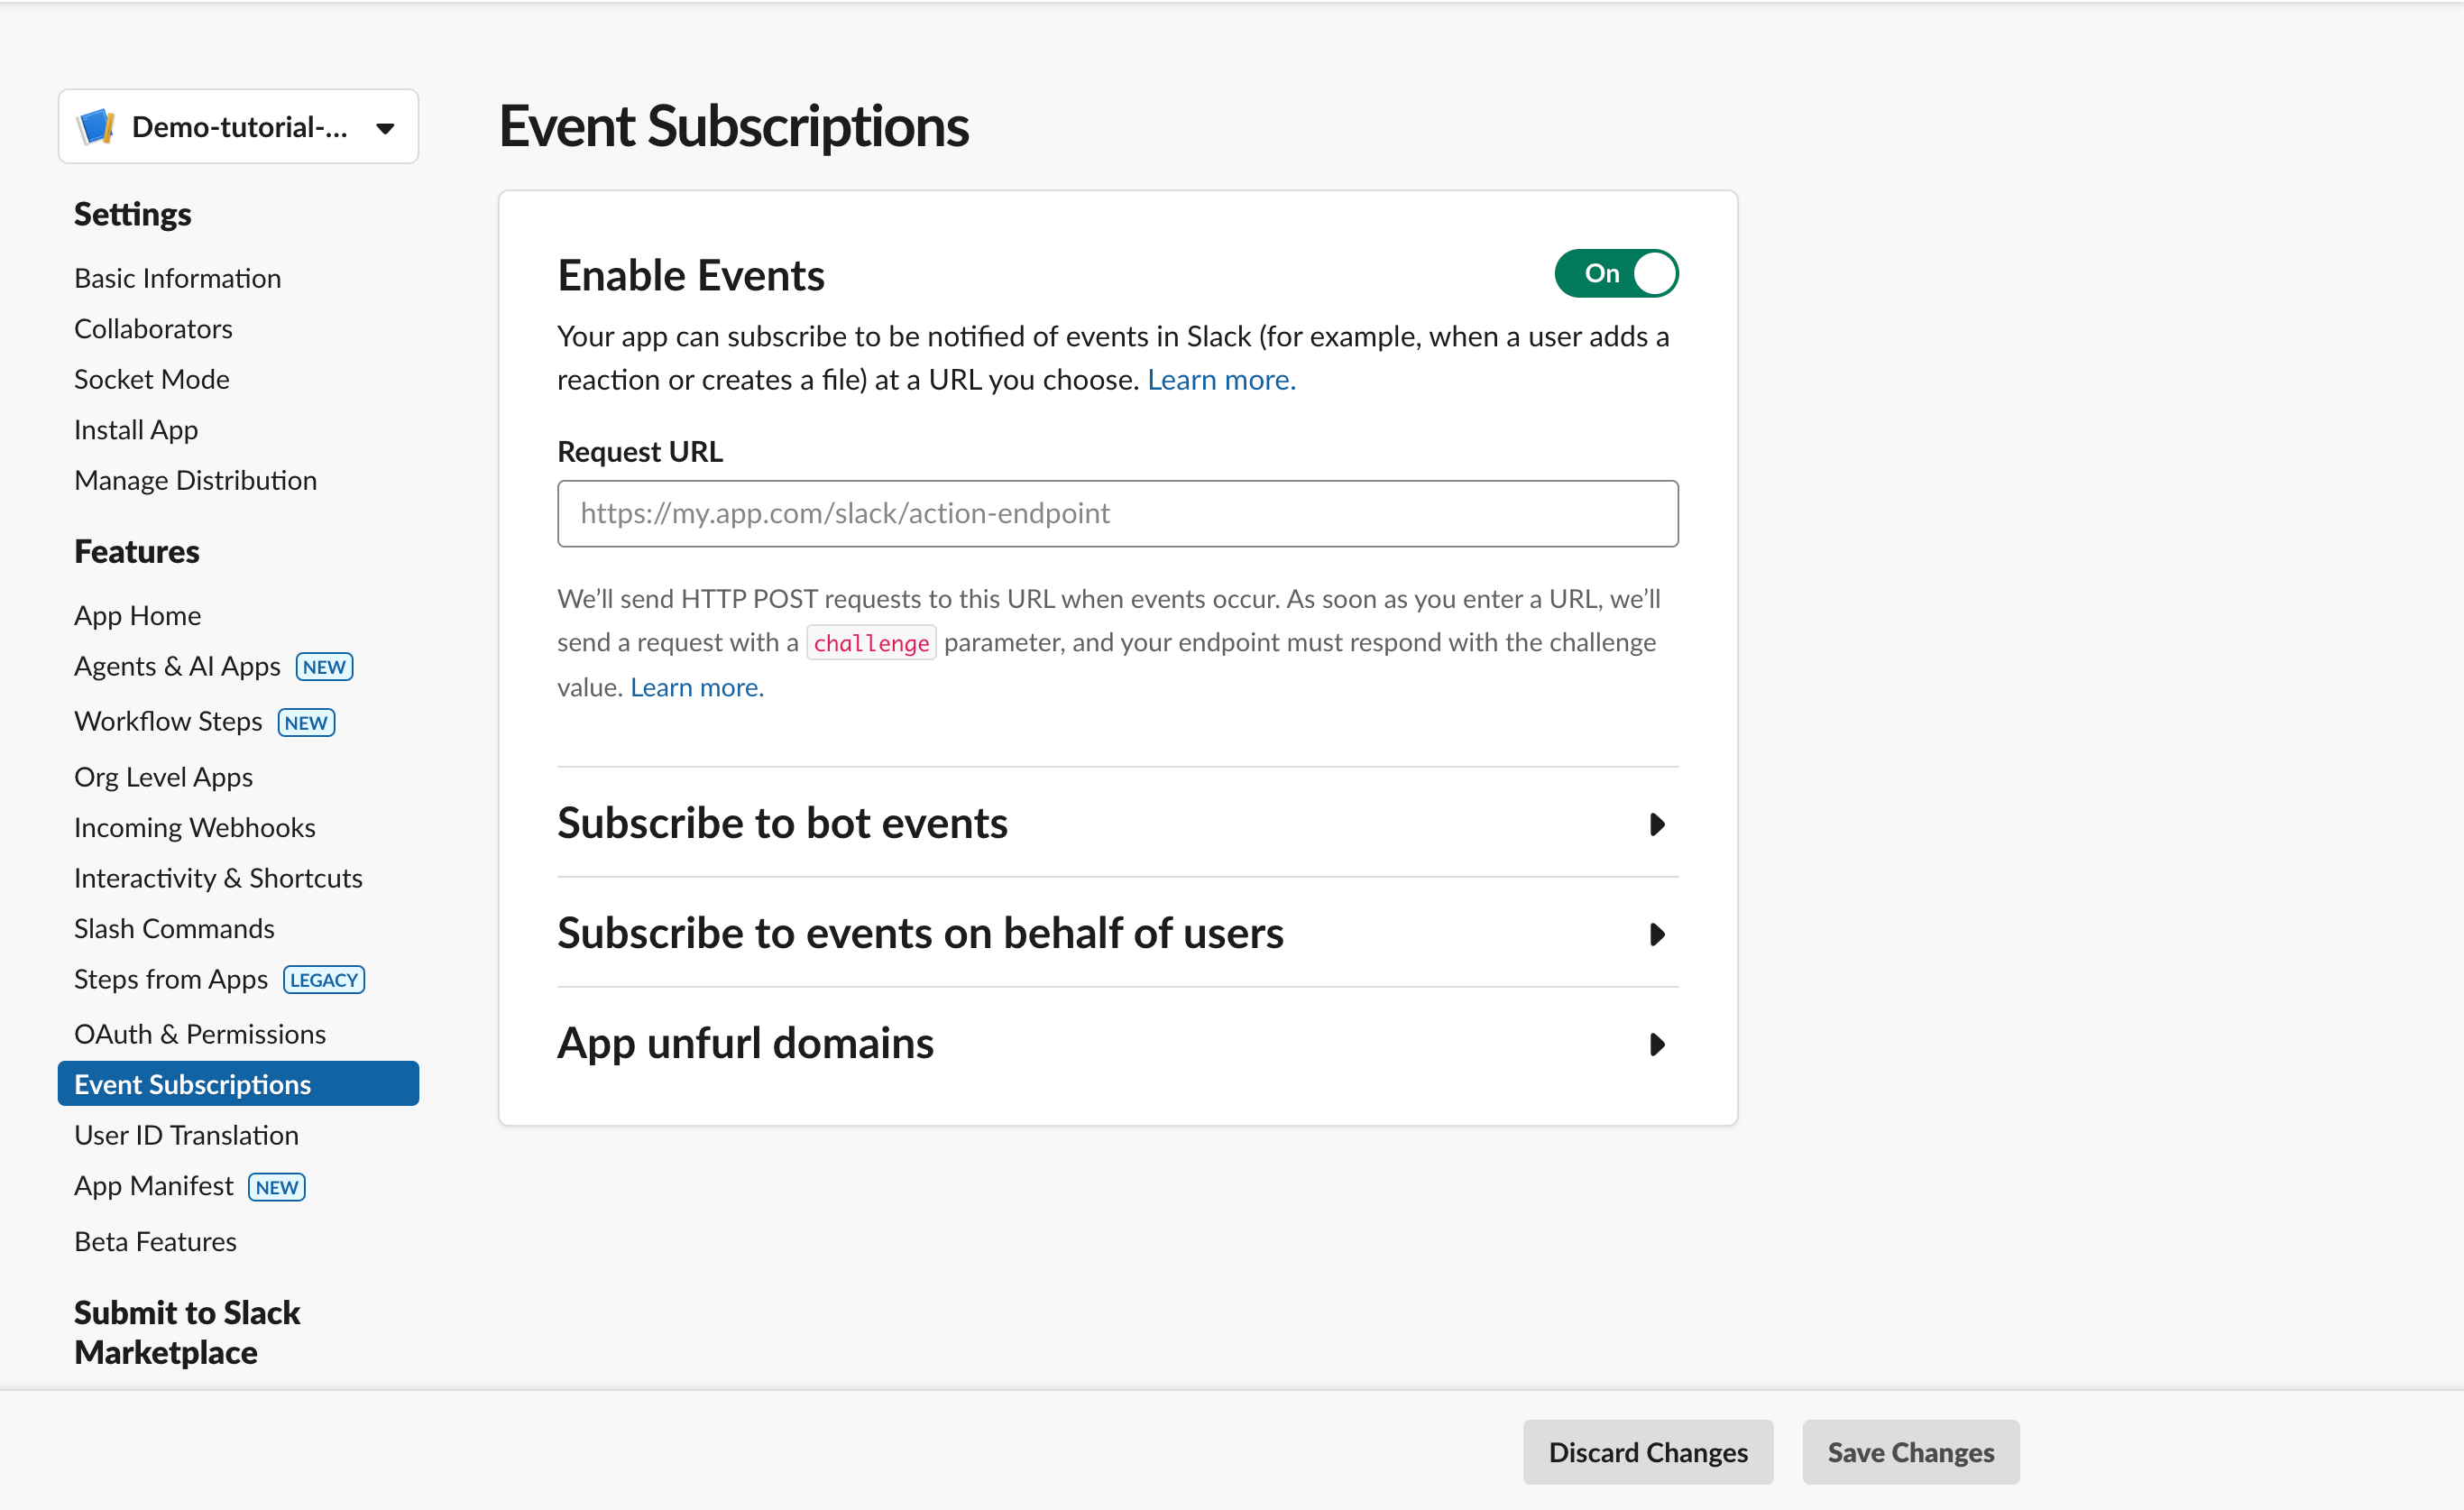
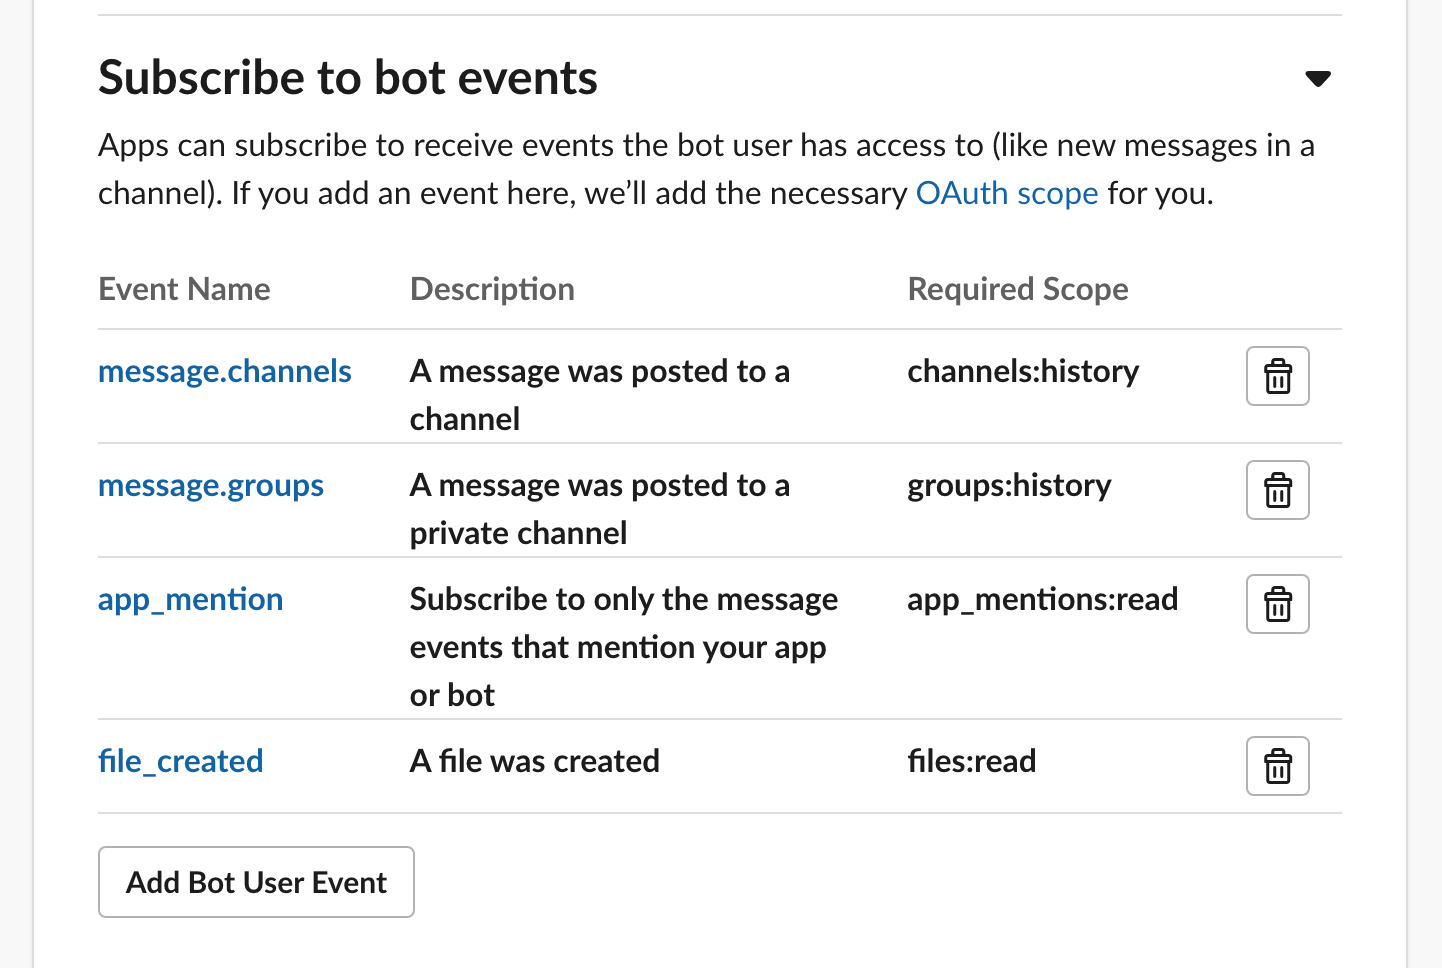
Click on the subscribe to bot events & add bot user events:
Go back to the Oauth page & grab your user token.

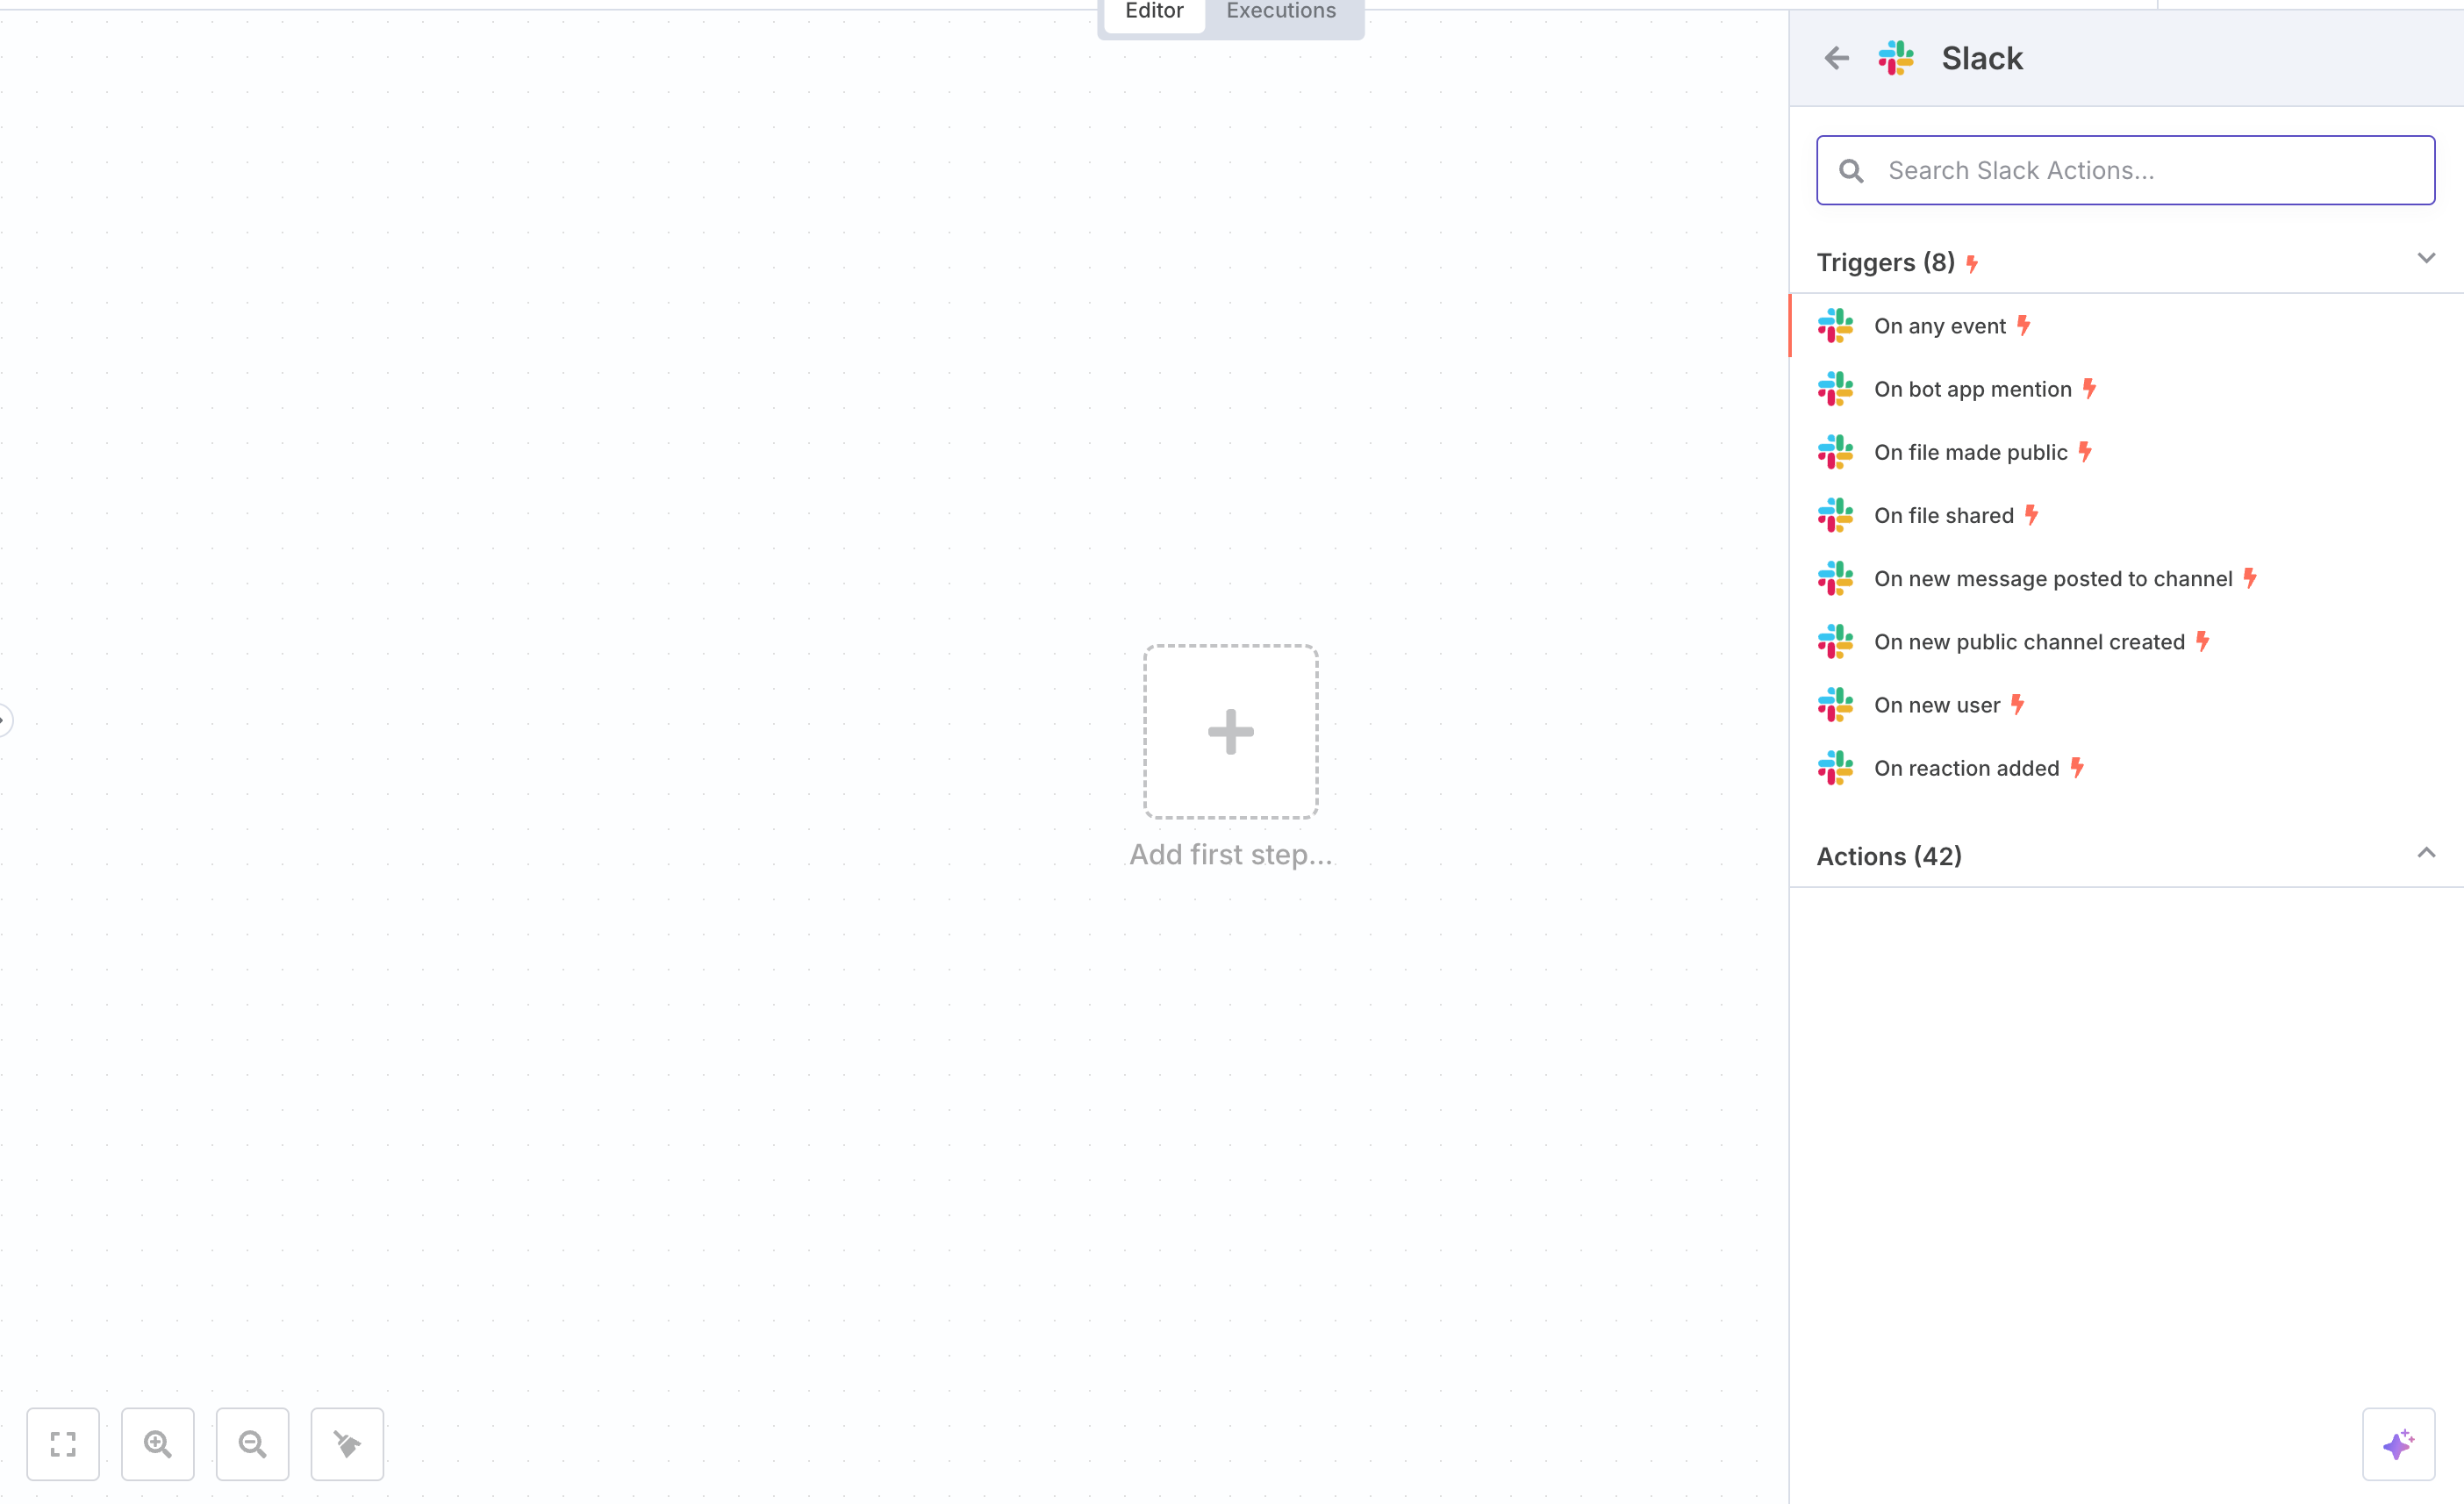
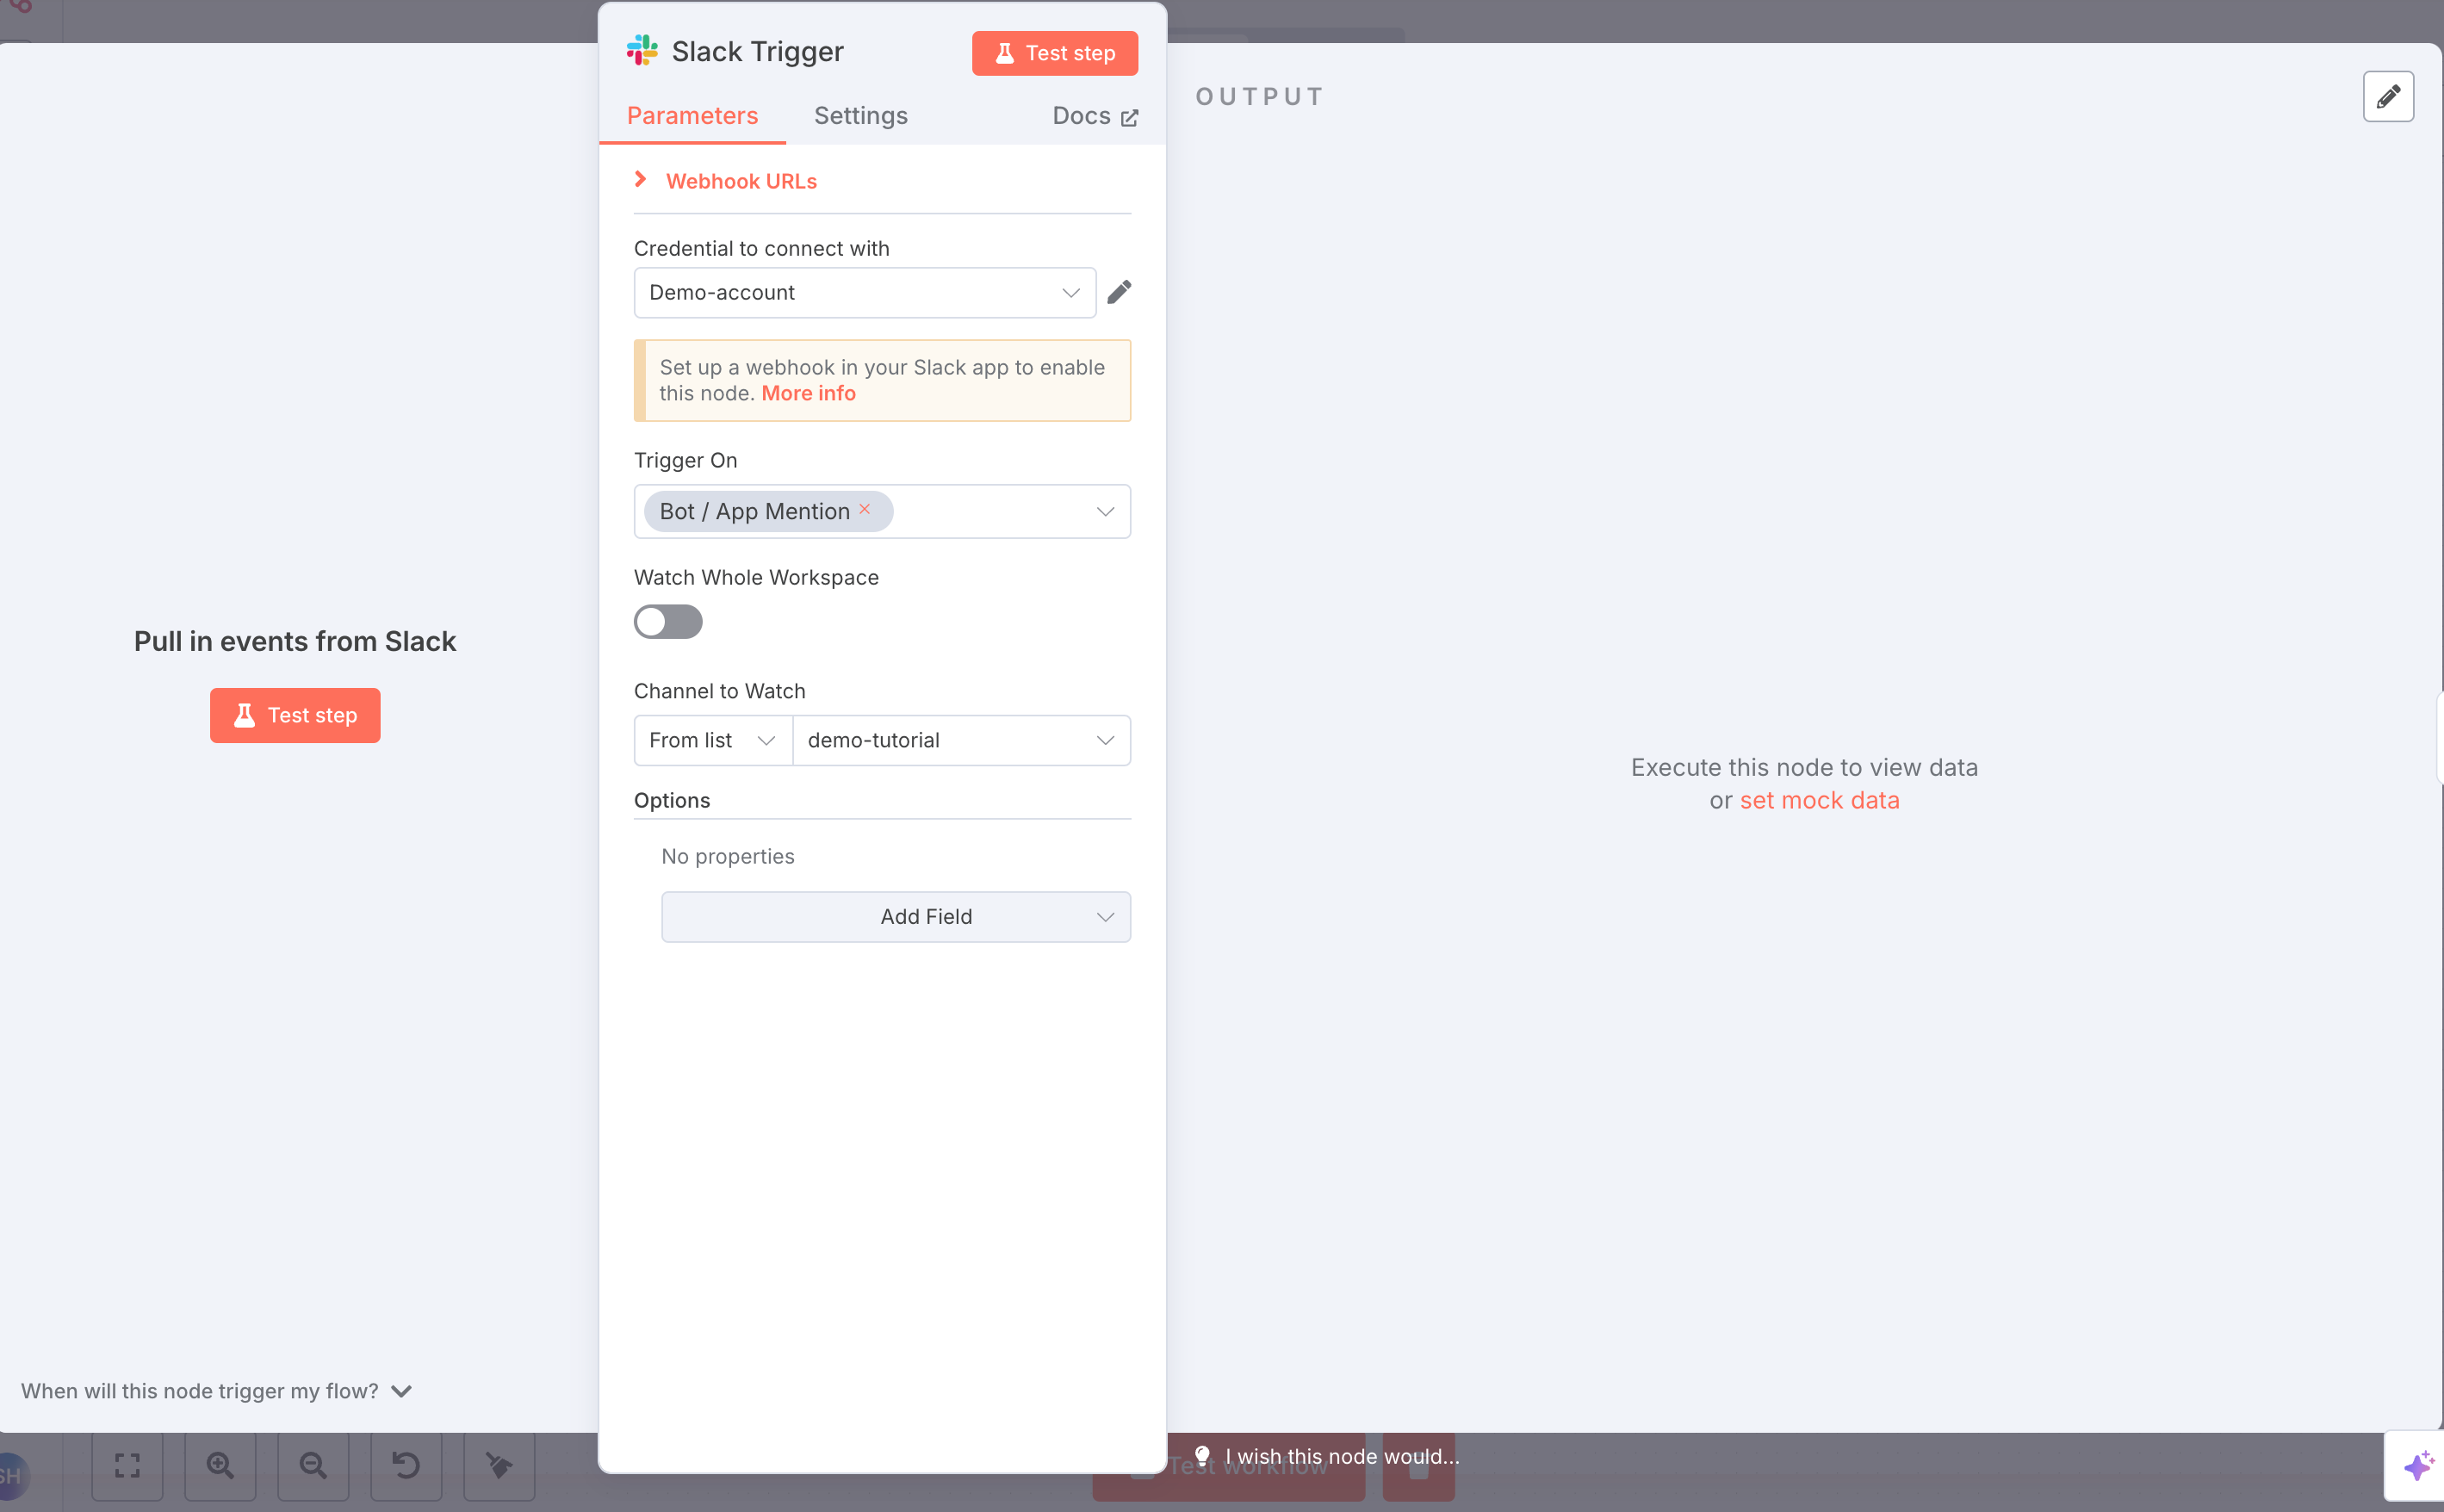
now go to n8n, create a new workflow & set up a Slack trigger & click bot app mention.
click on the node and set up your Slack credentials.

This popup will open up.
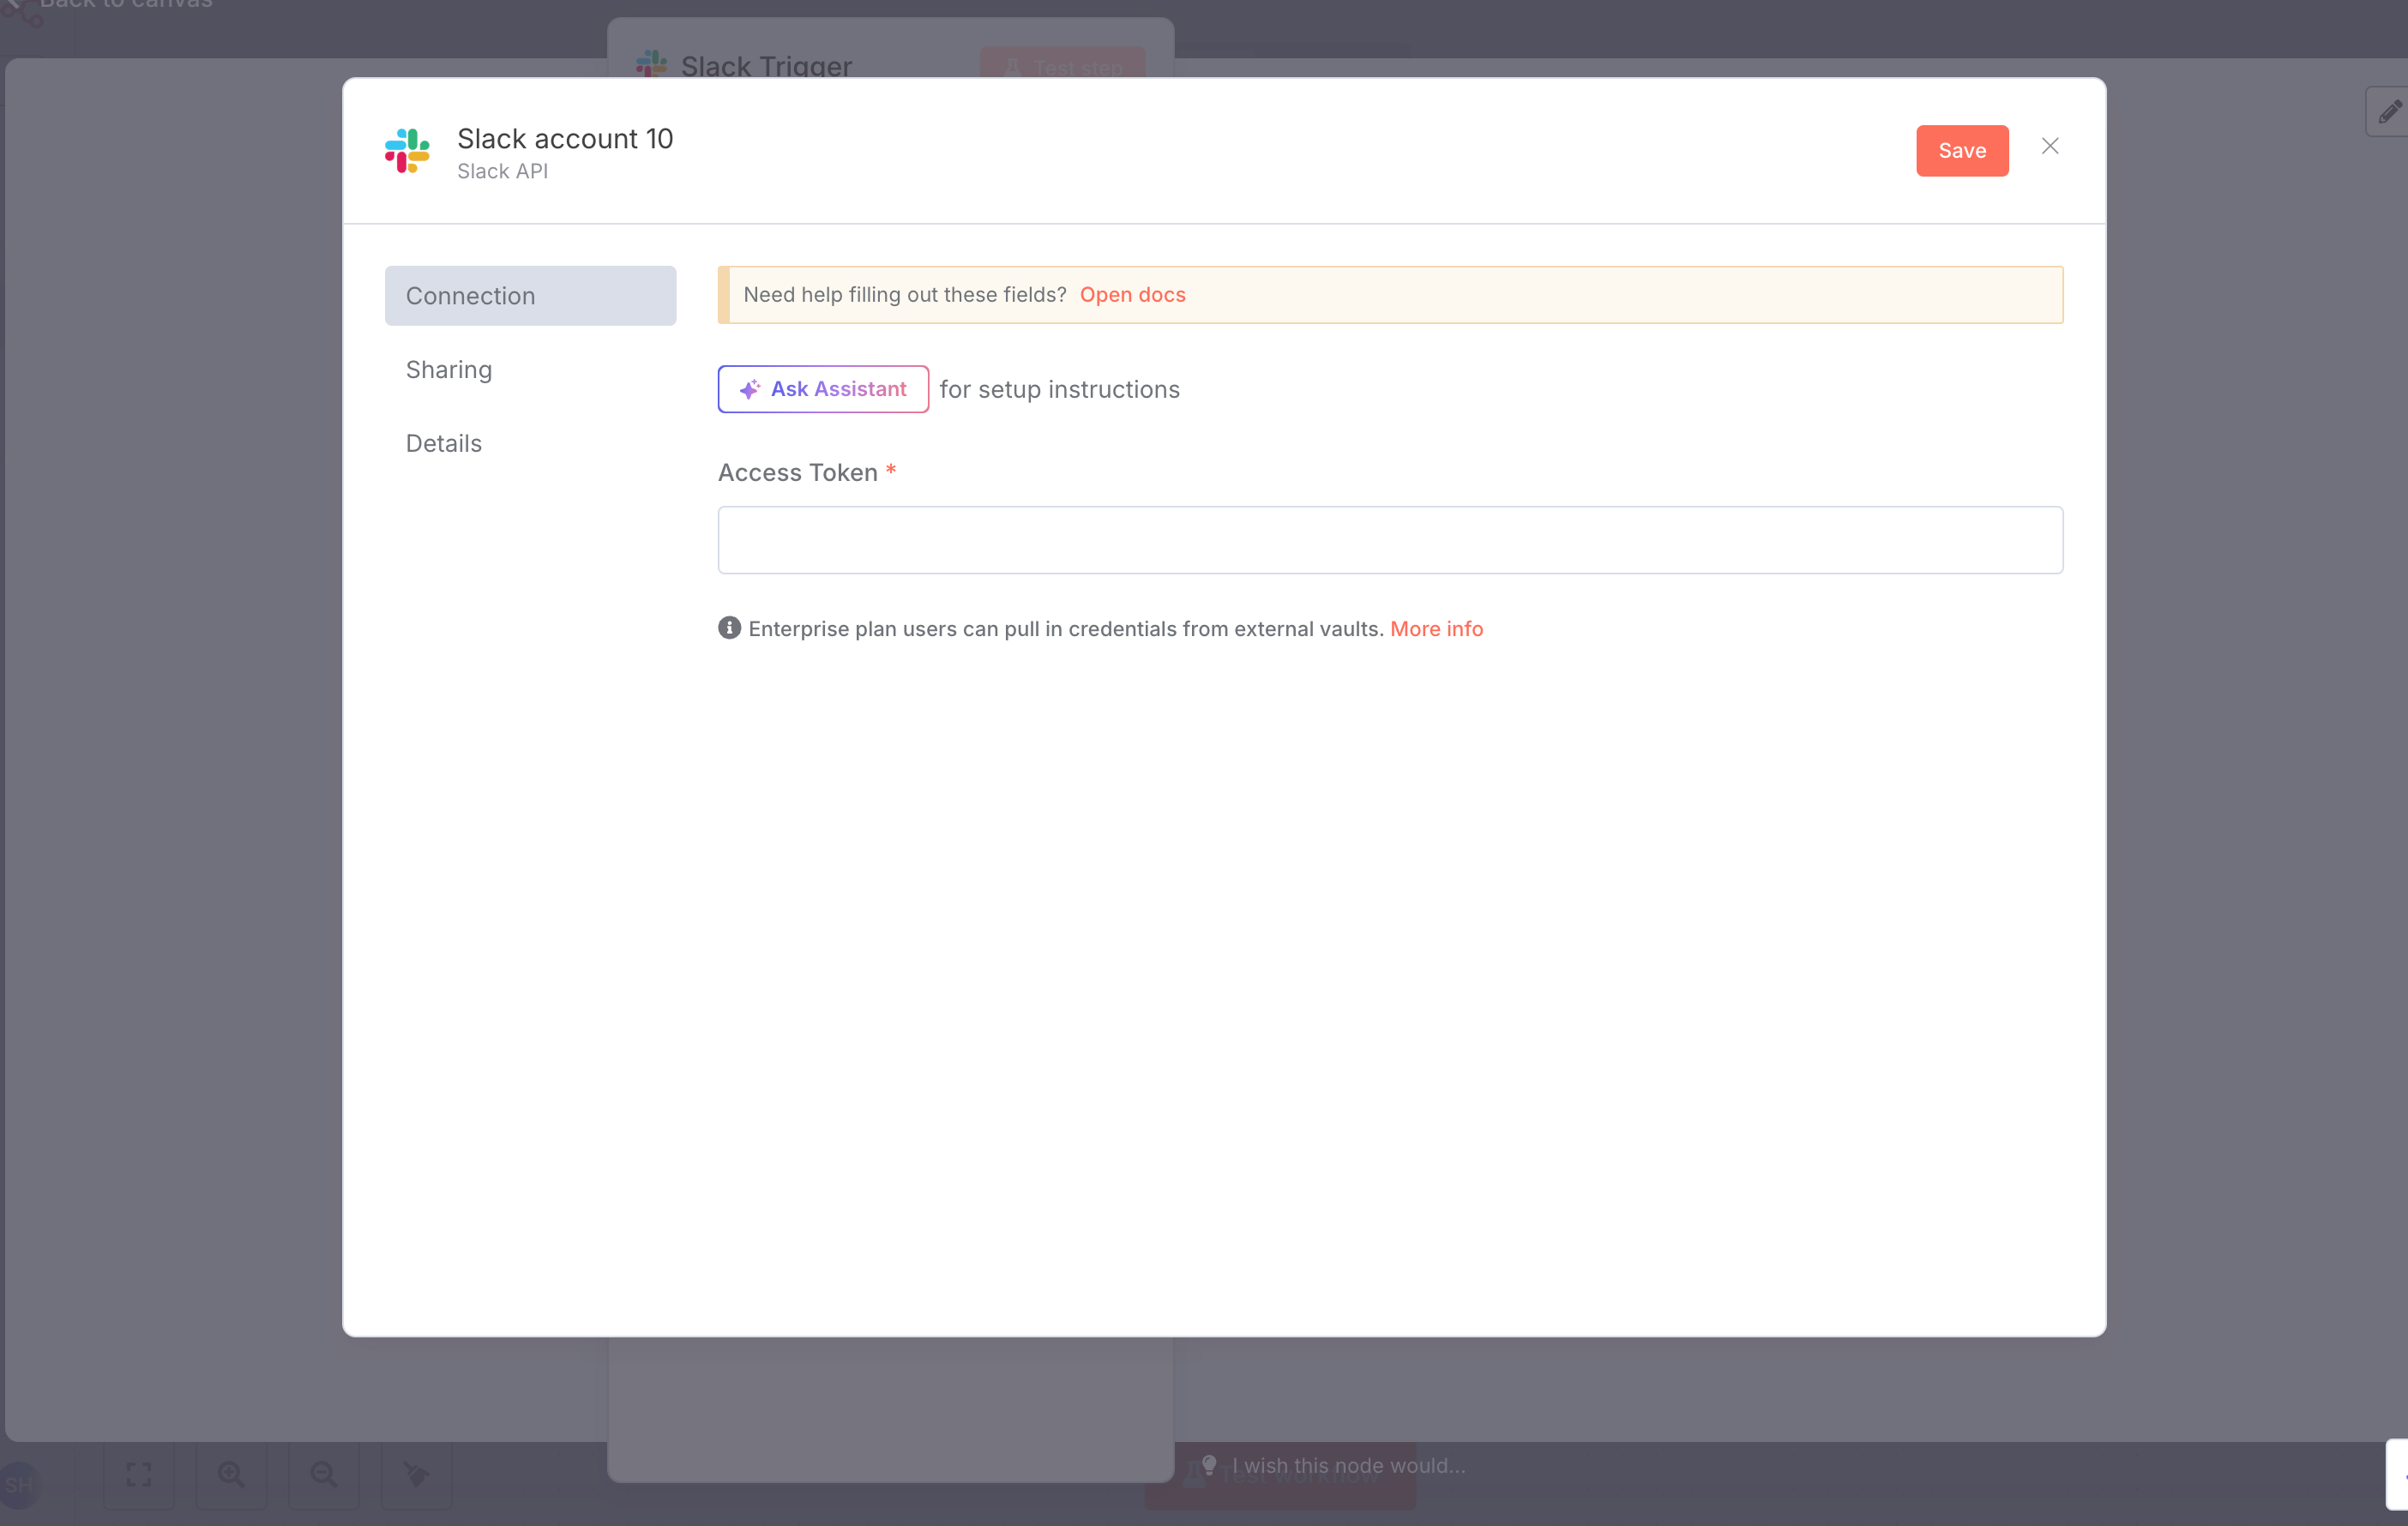
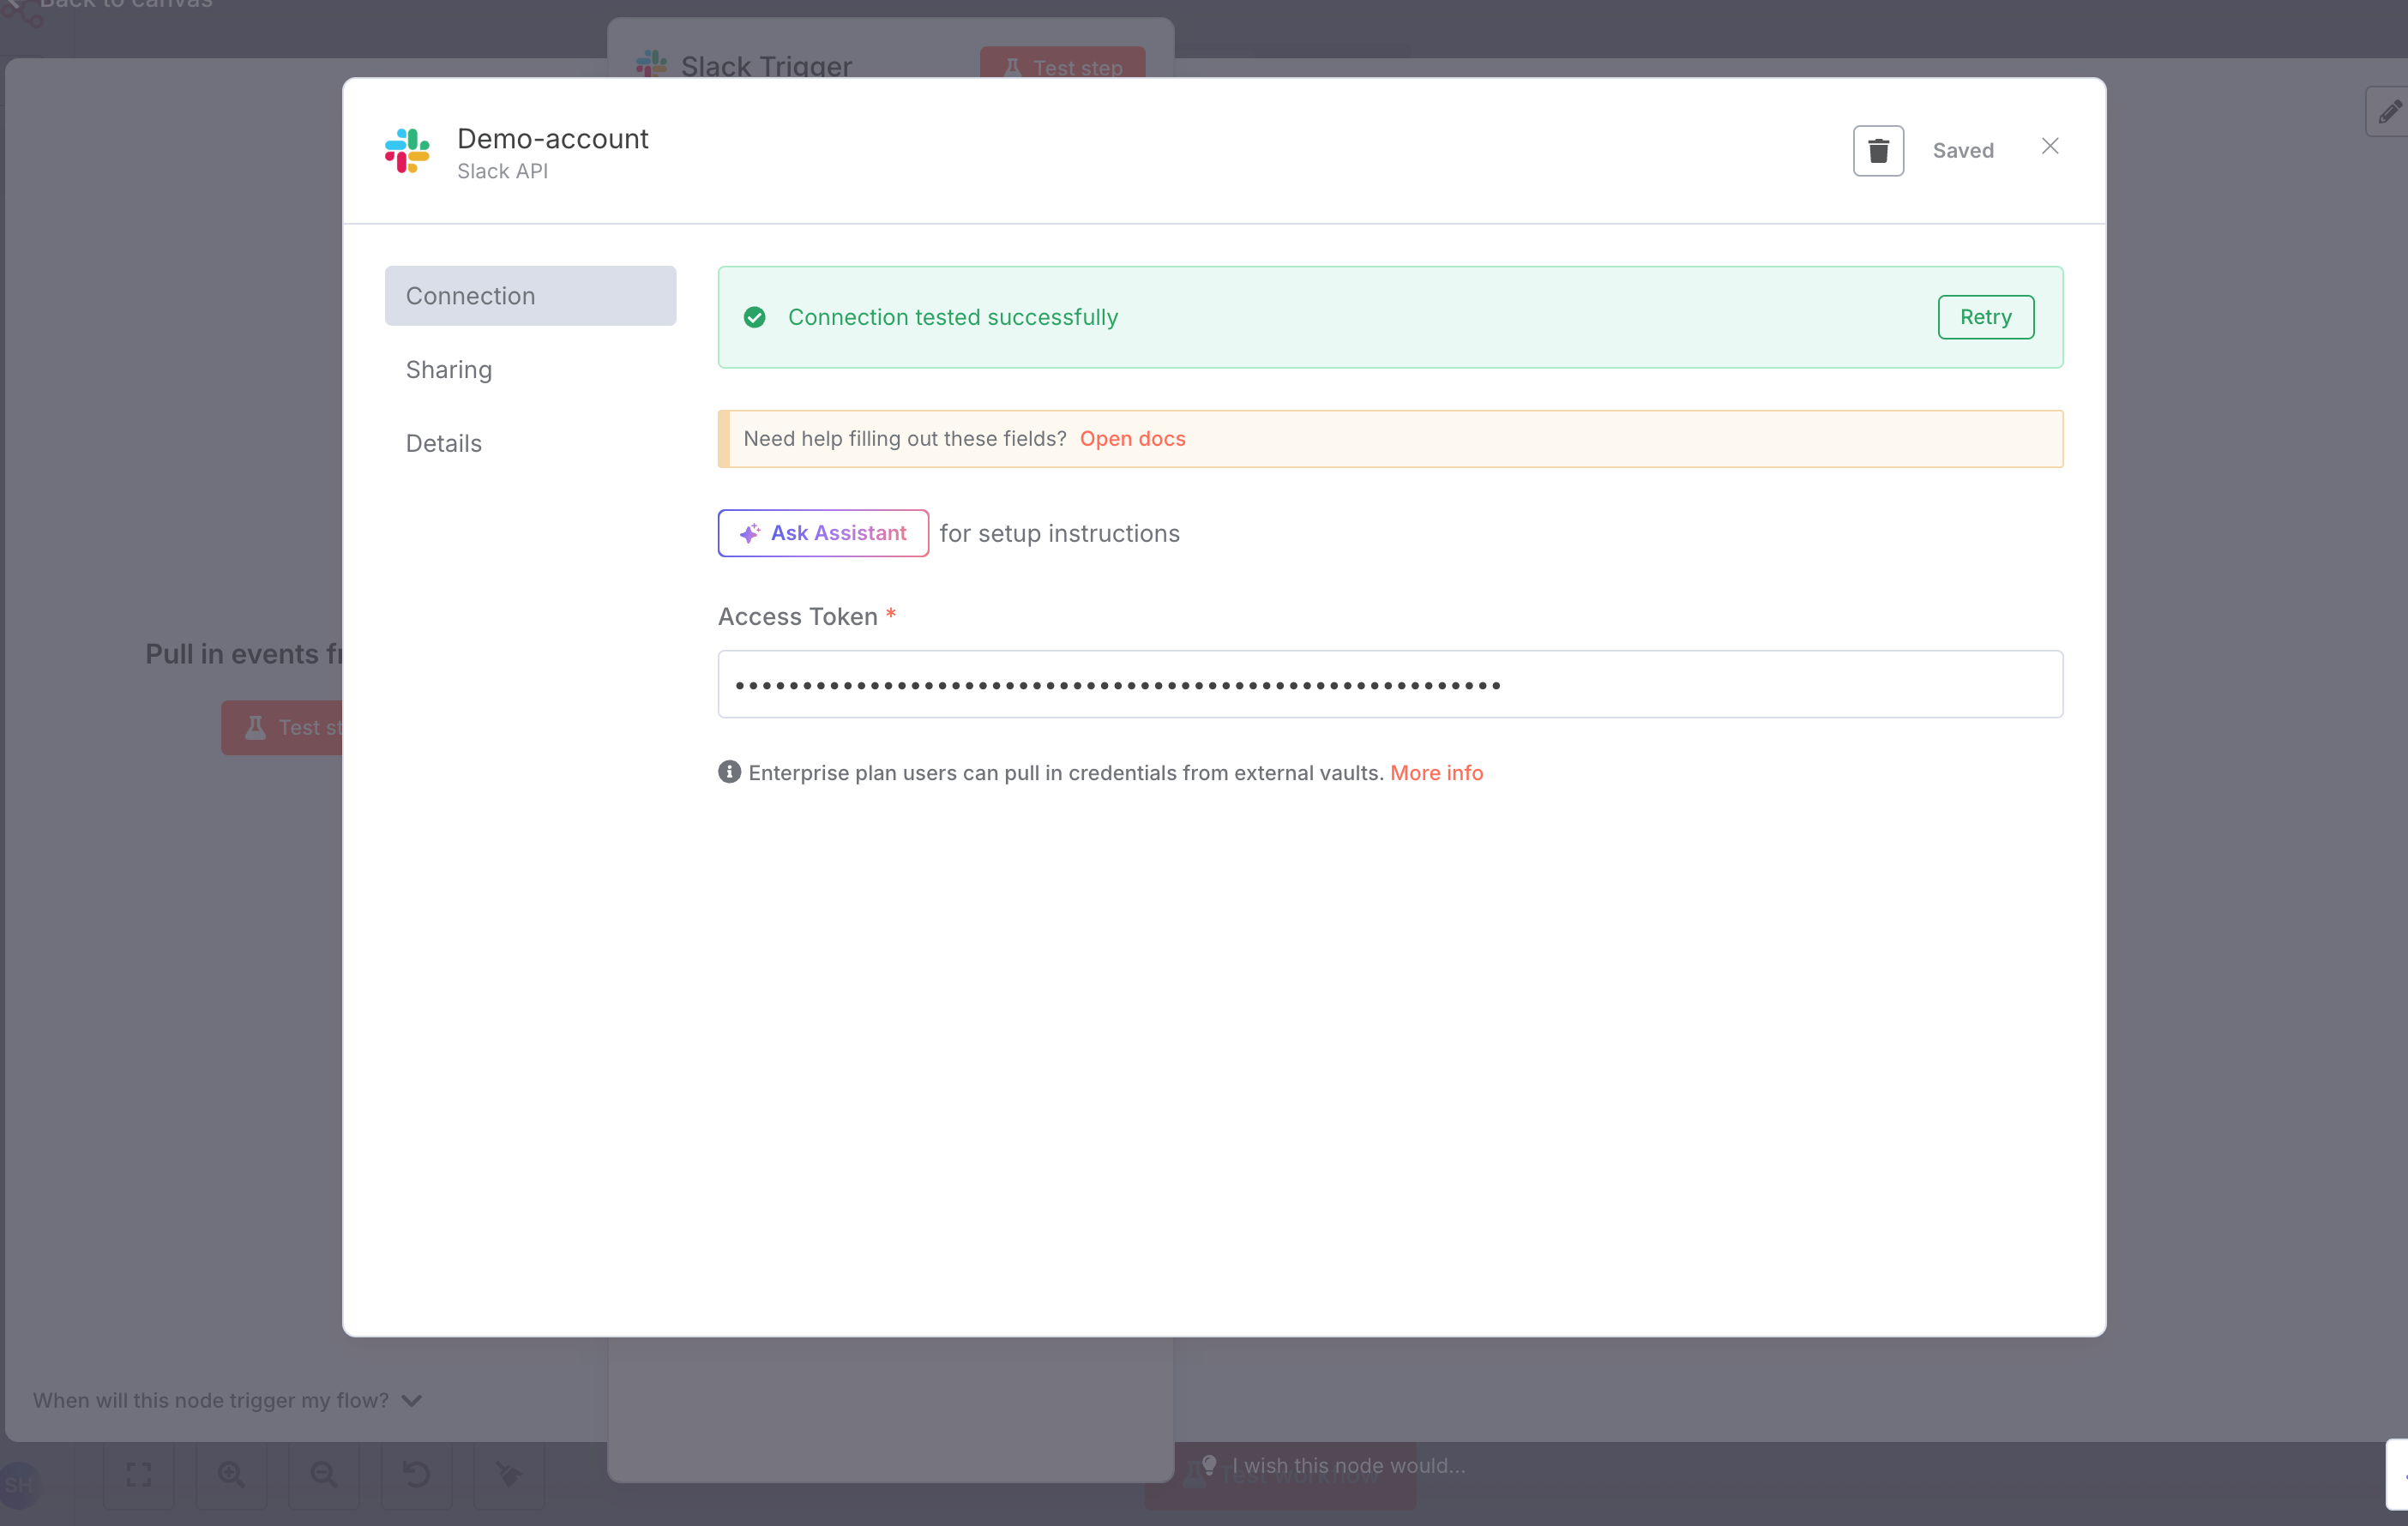
Paste in your OAuth token in here. If its executed successfully, you’ll see this screen.
Click on the Slack node again on n8n & go to the webhook section.

Copy the webhook test URL.
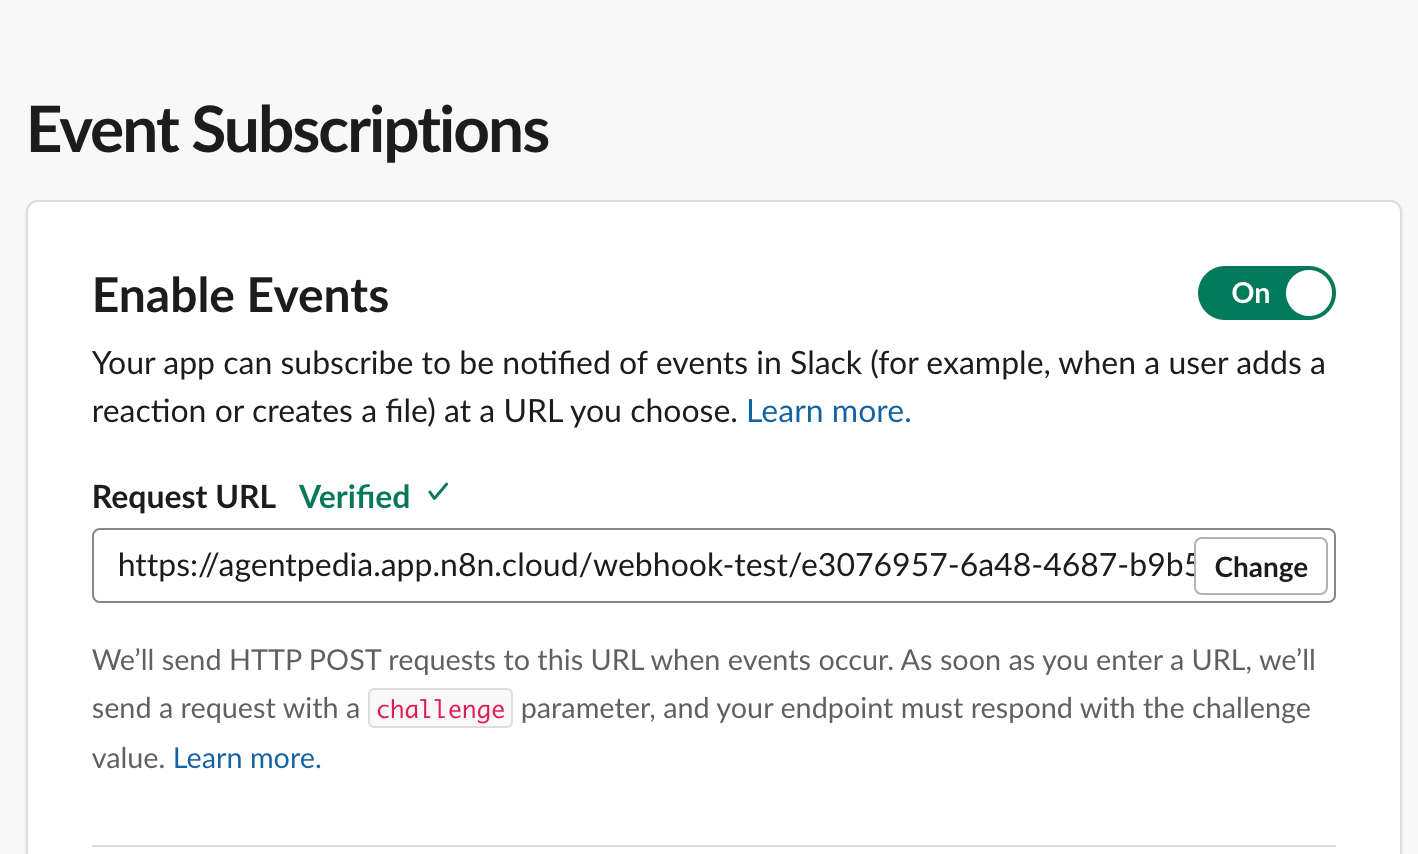
Go back to Slack and go to event subscriptions.
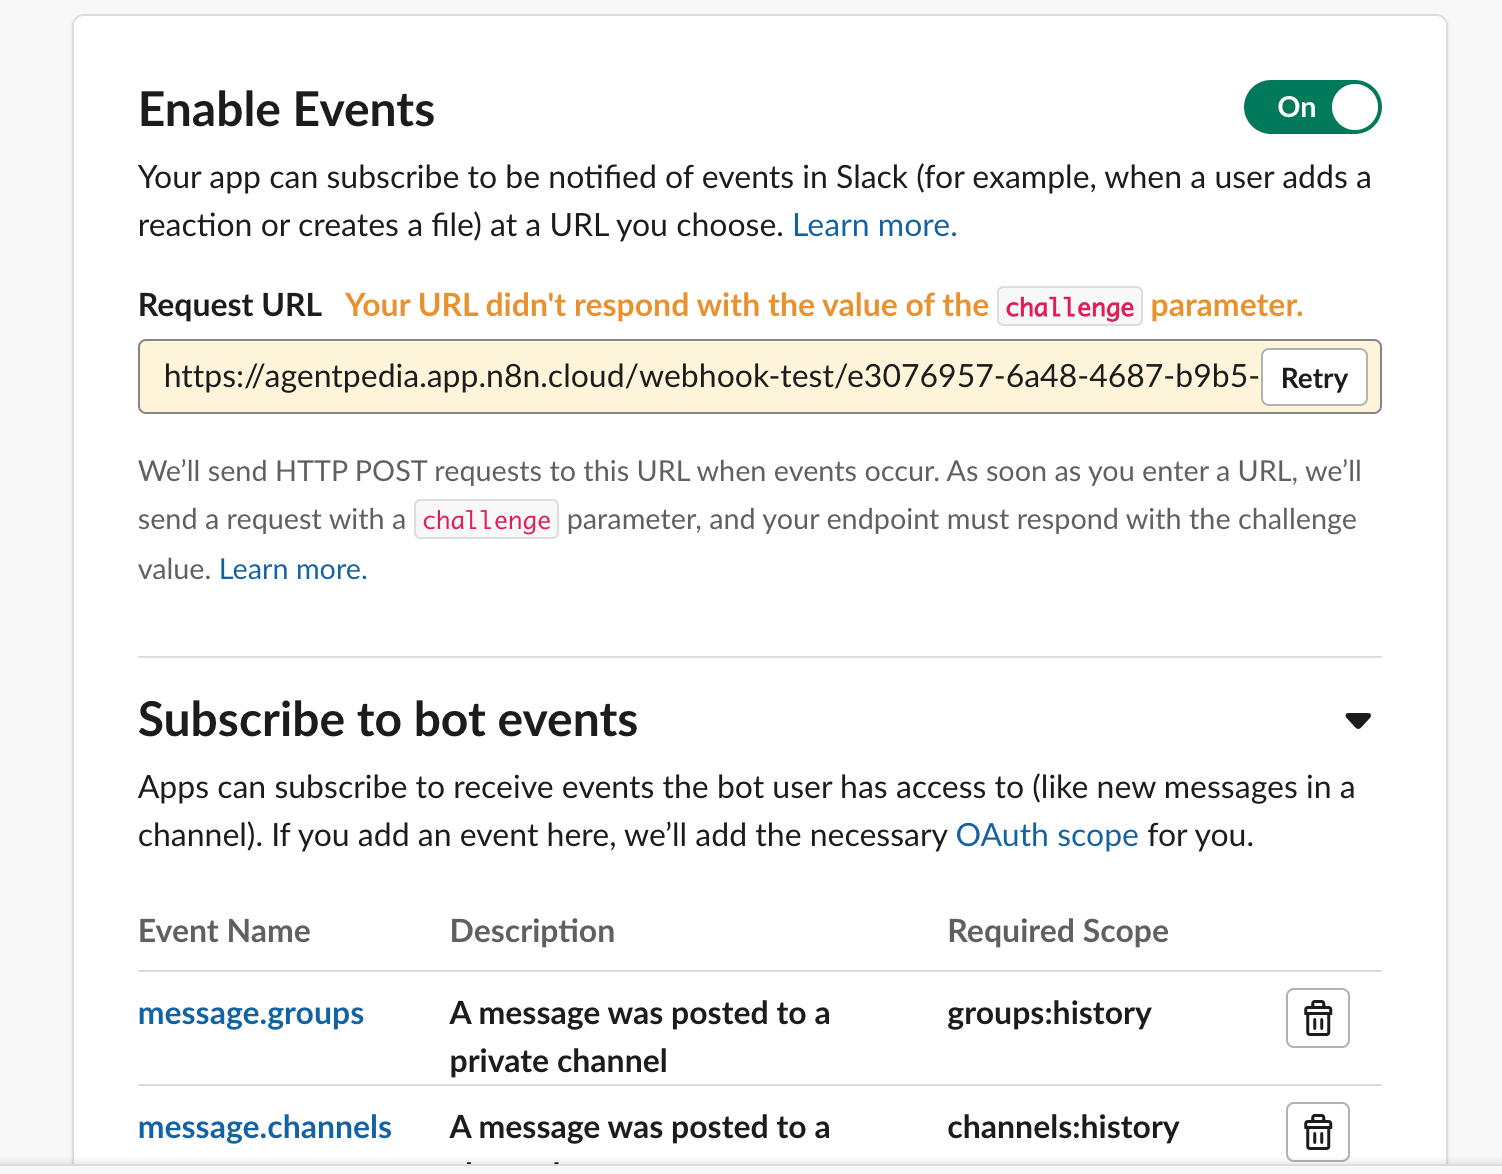
Paste in your webhook URL to the Request URL.
You will see an error message.
Go back to n8n.
And connect a simple Slack node that can send messages. Connect your slack credentials.
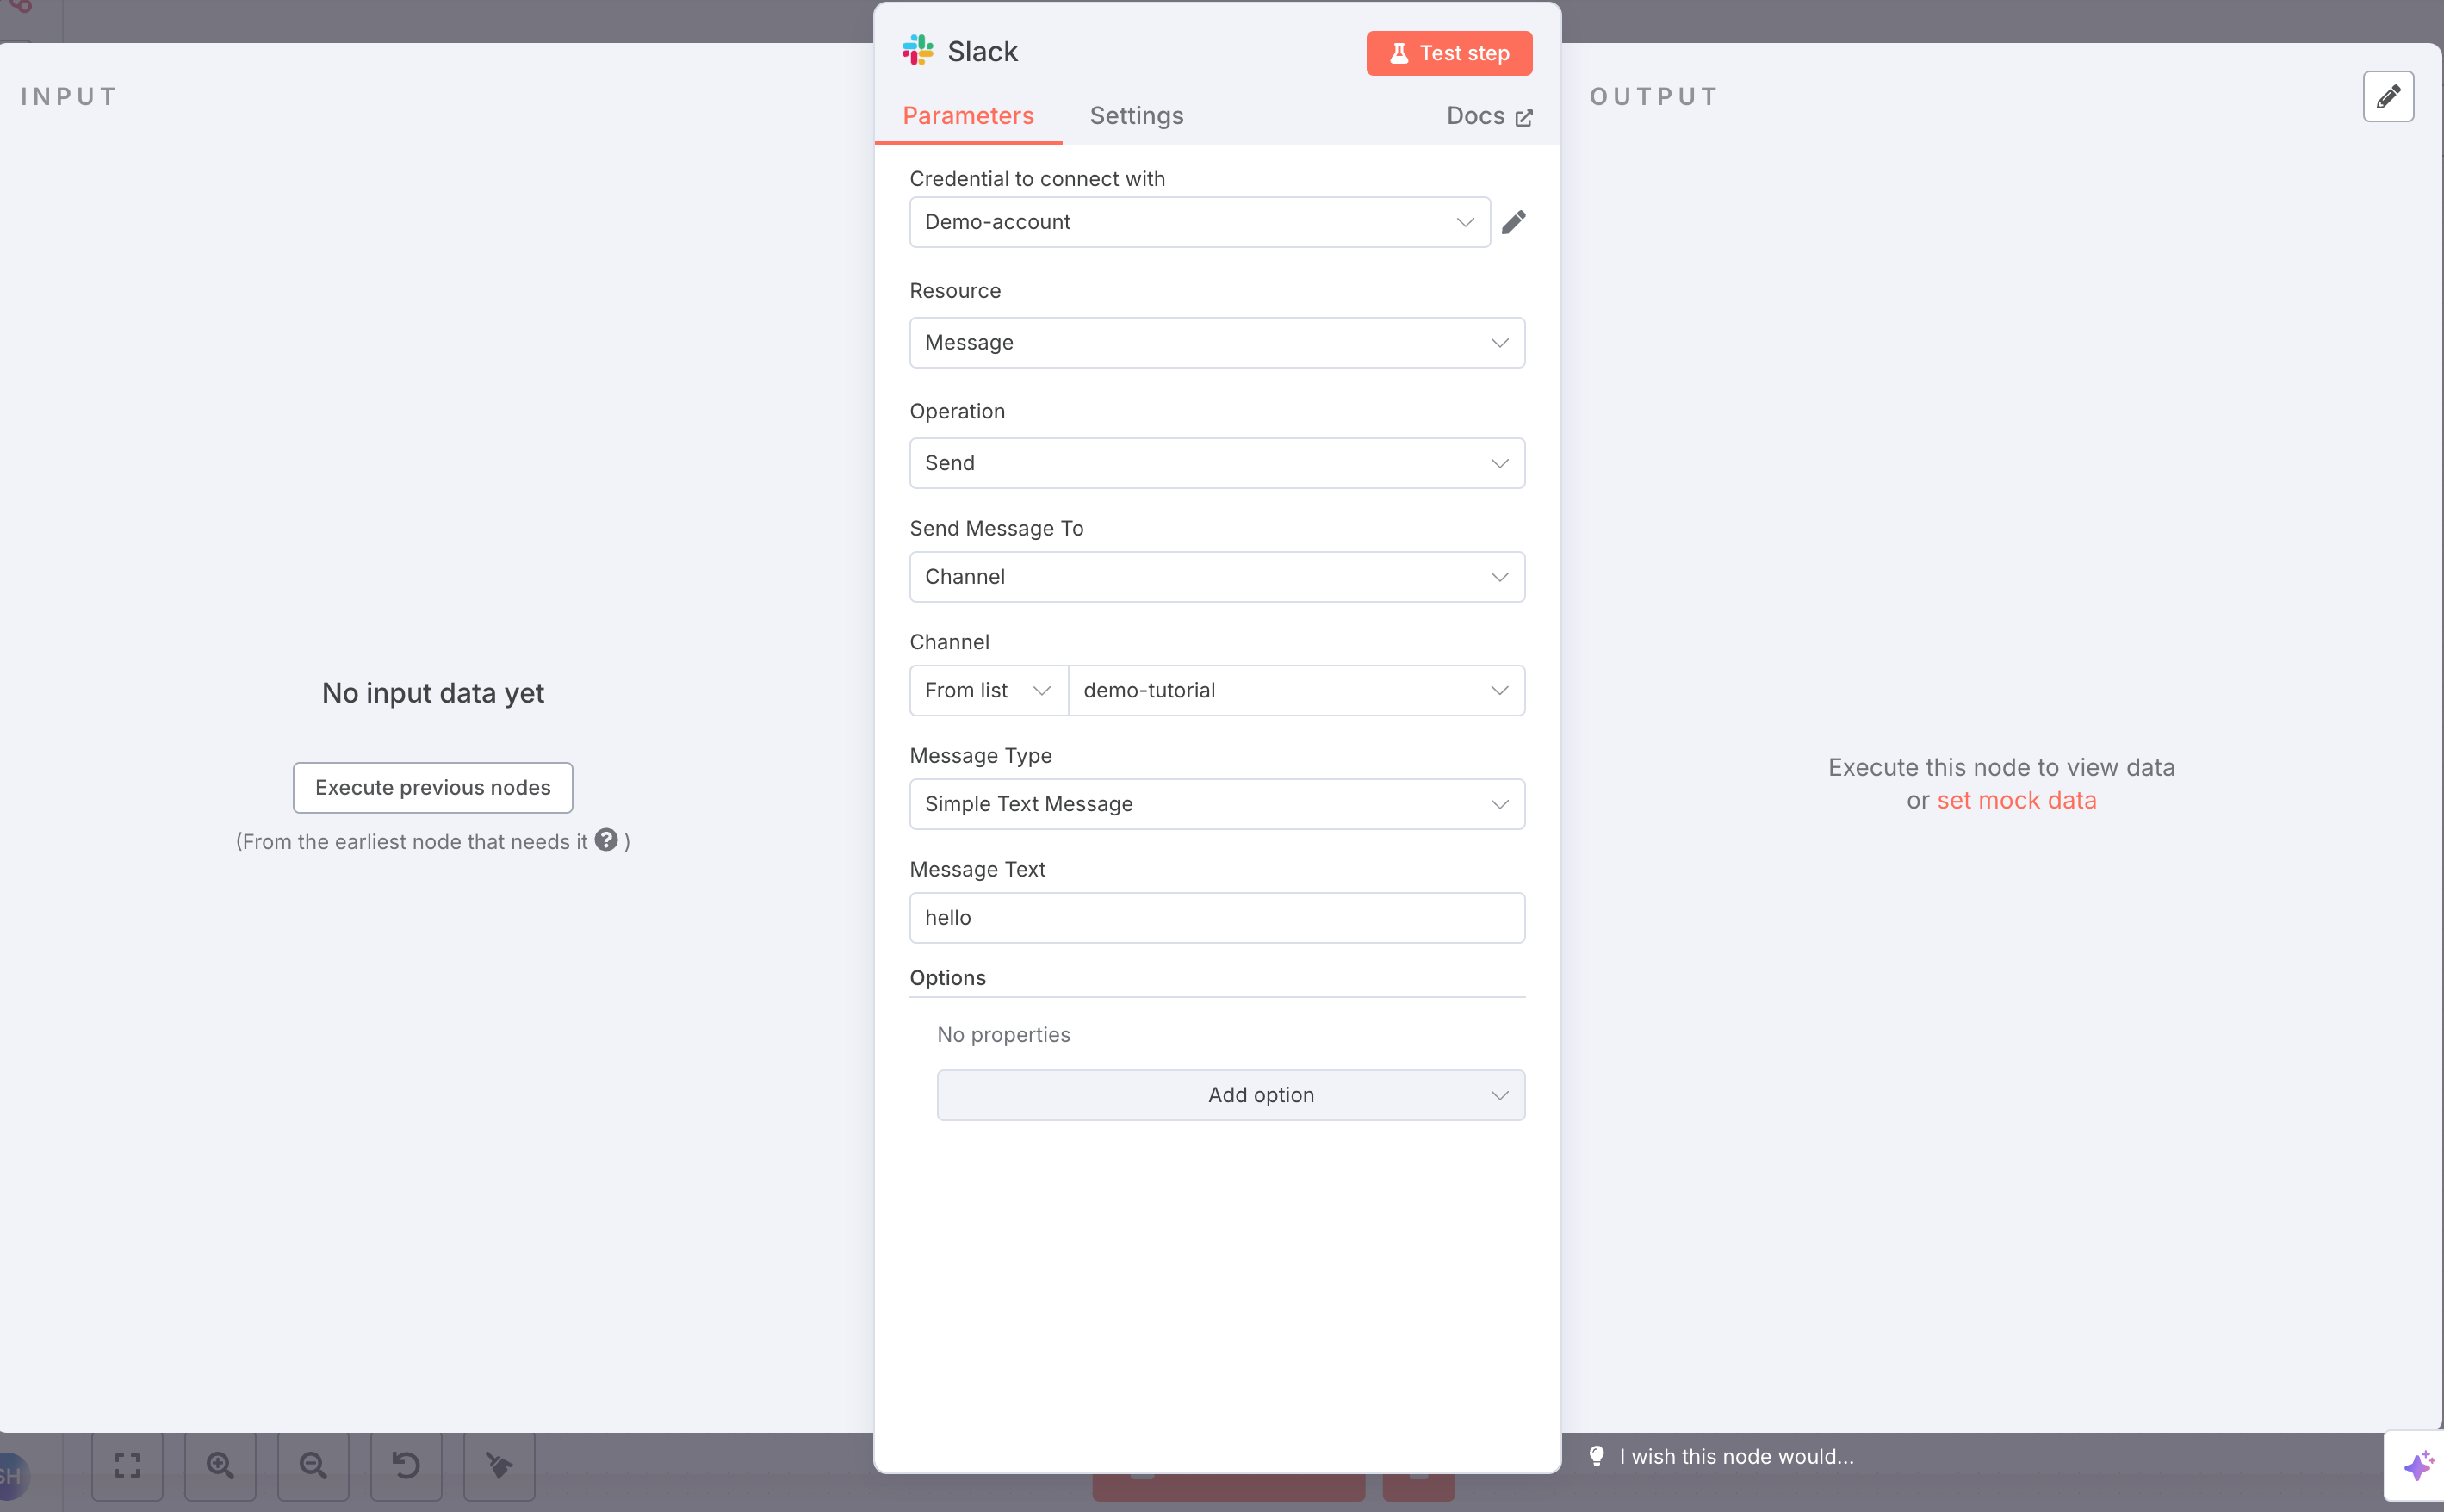
do the same for the Slack trigger node:
Save the workflow and run test workflow.
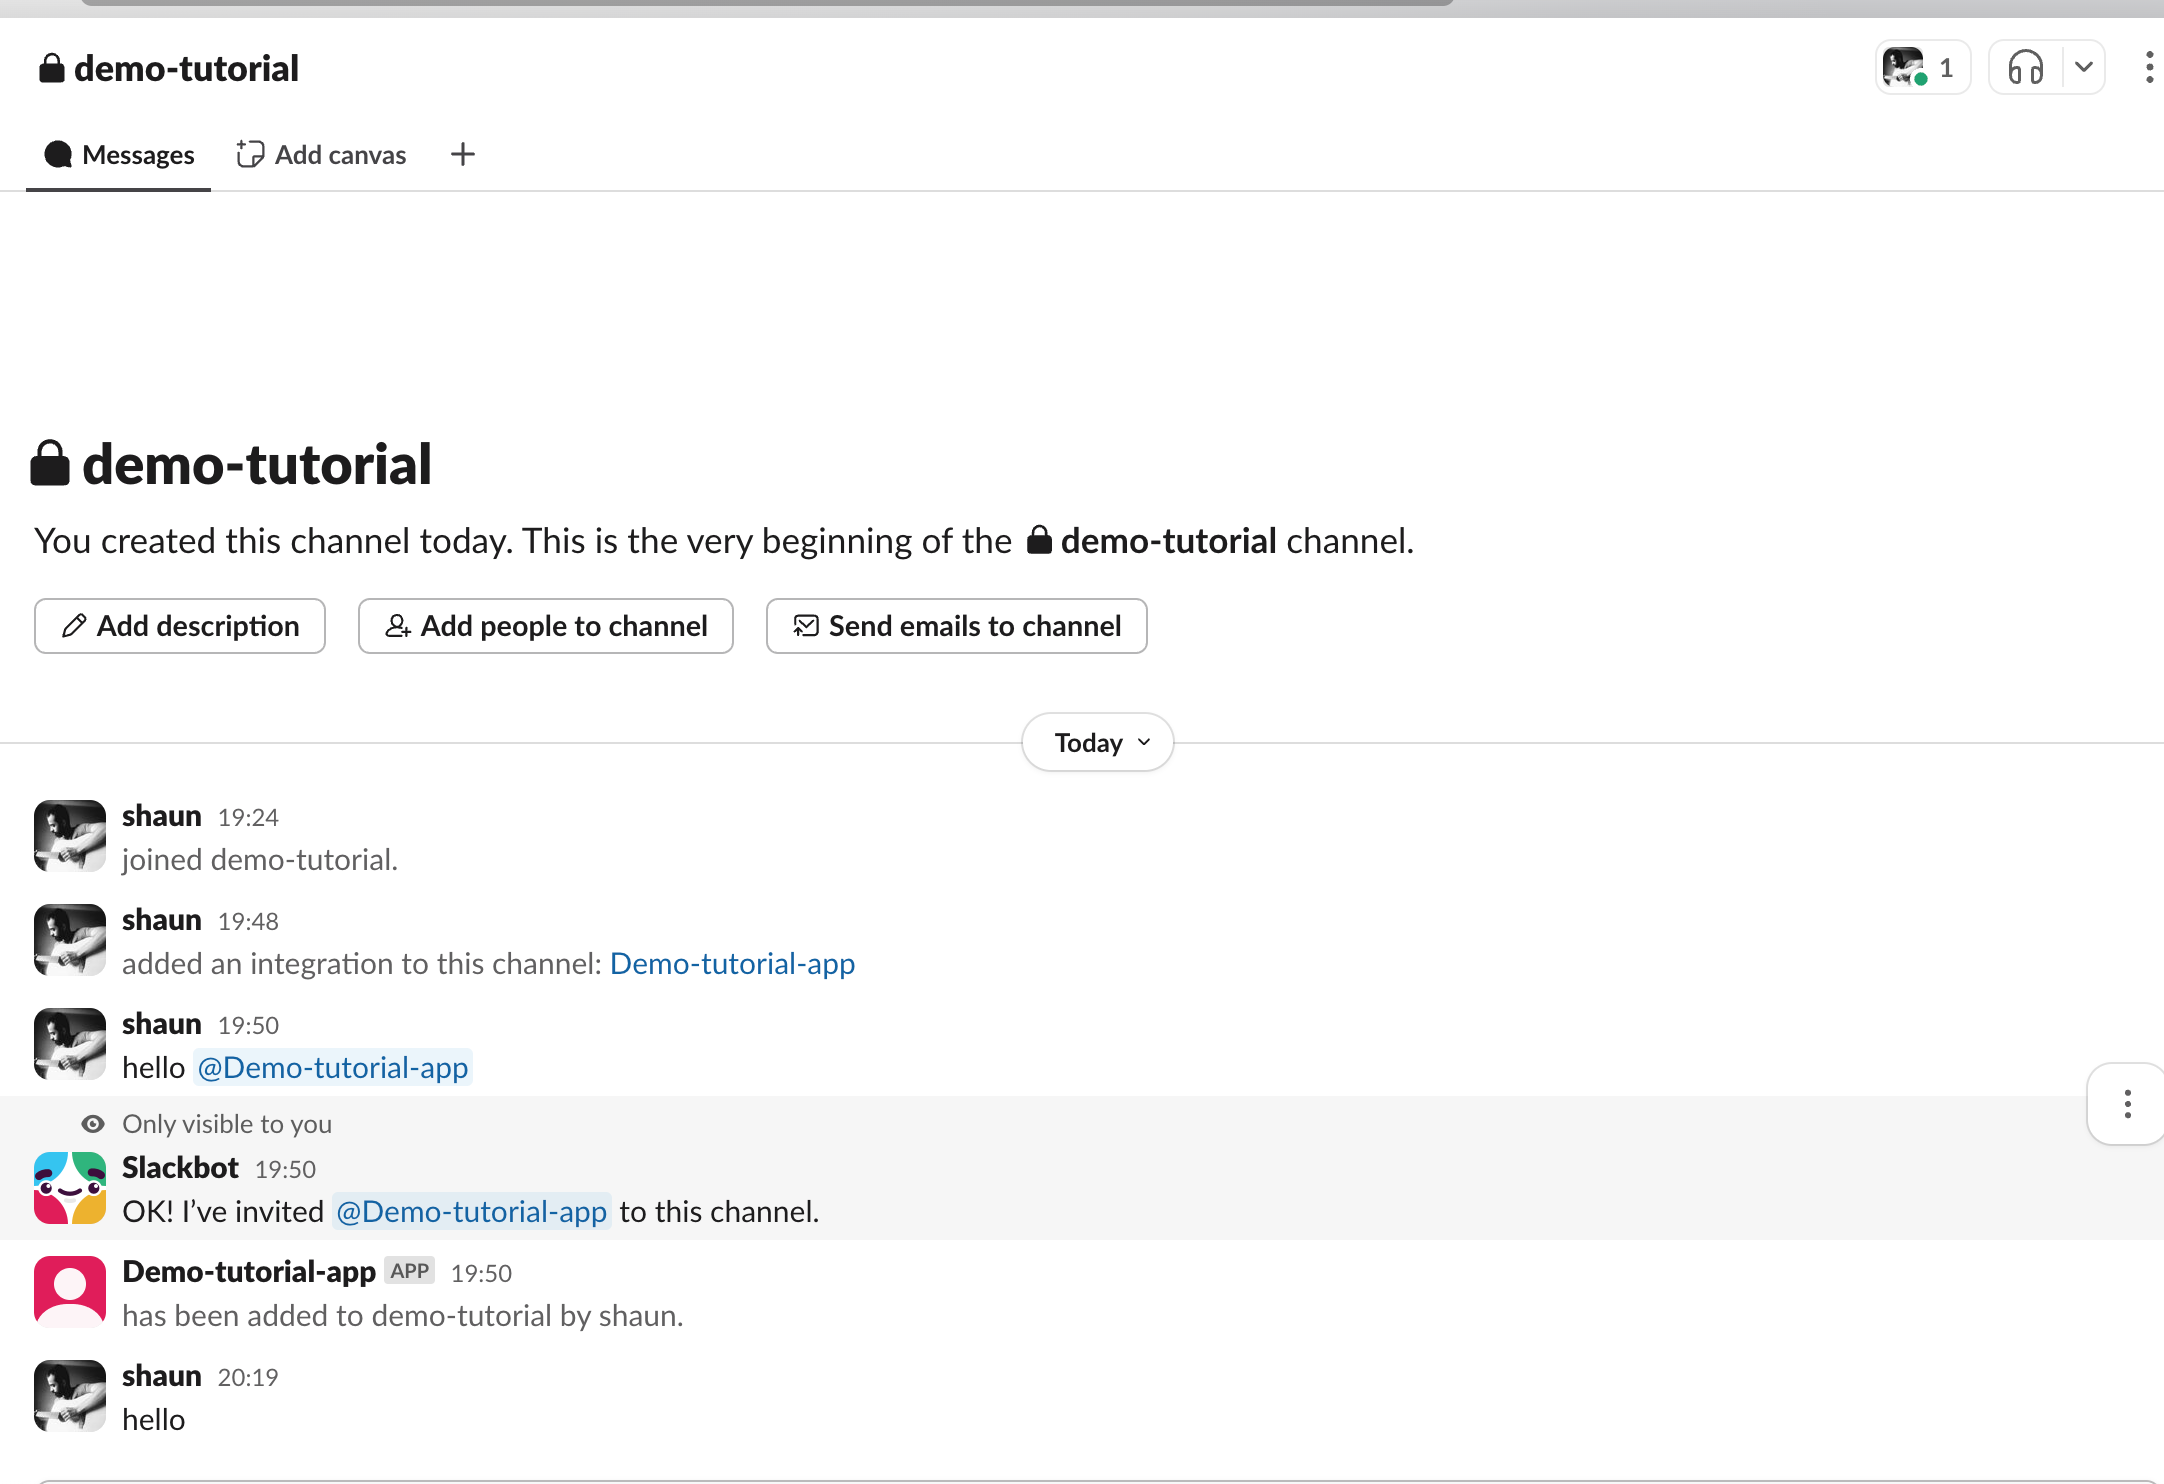
Go to Slack channel and type in anything like hello
Then go to the Slack API page & hit retry on the request URL. The error will be resolved.
Hit Test the workflow again in n8n & go to the Slack channel and type in anything like hello world.
And now the n8n workflow should work.
And you will see a message in your Slack channel as well.
Your slack is now connected.
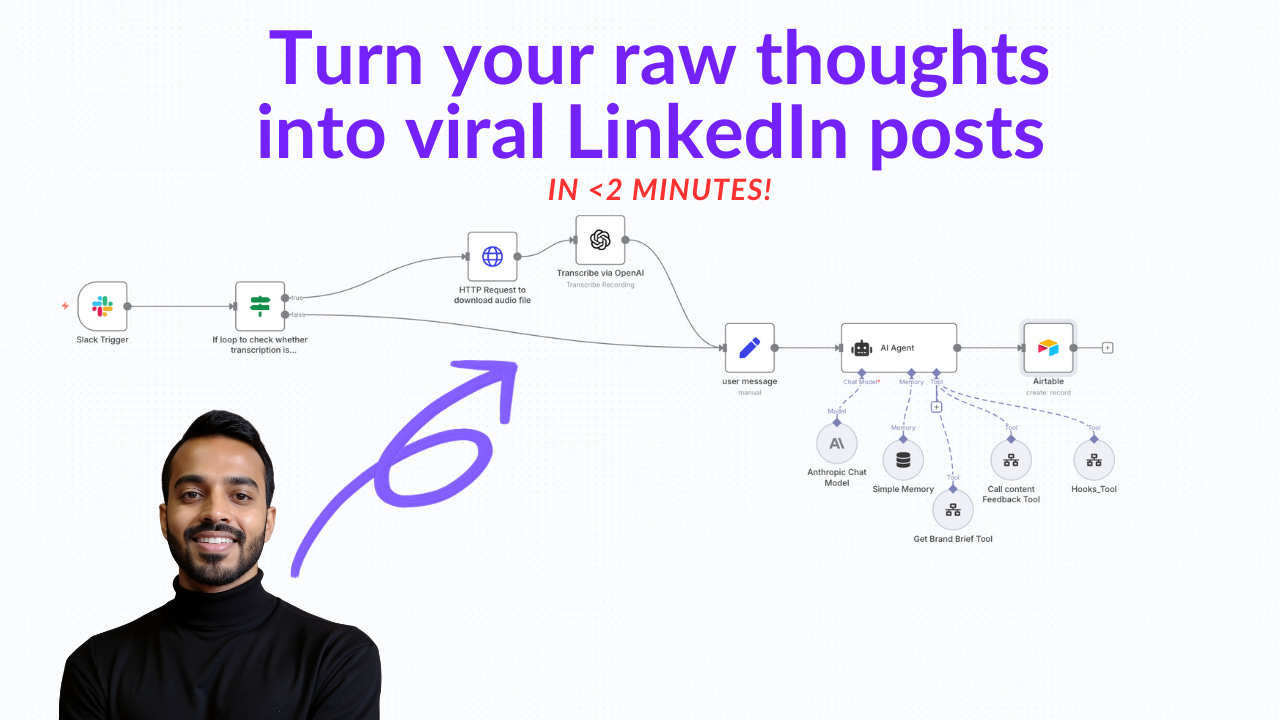
Step 2: Building the AI workflow
The workflow will basically be something like this:
Take input via text or voice in Slack
Run an ai agent
send it to a dashboard.
Step 2a - take input via text or voice in slack
now that Slack is connected, first thing to do is create an if node. This if loop checks whether transcription is processing. Add an if node to the Slack trigger
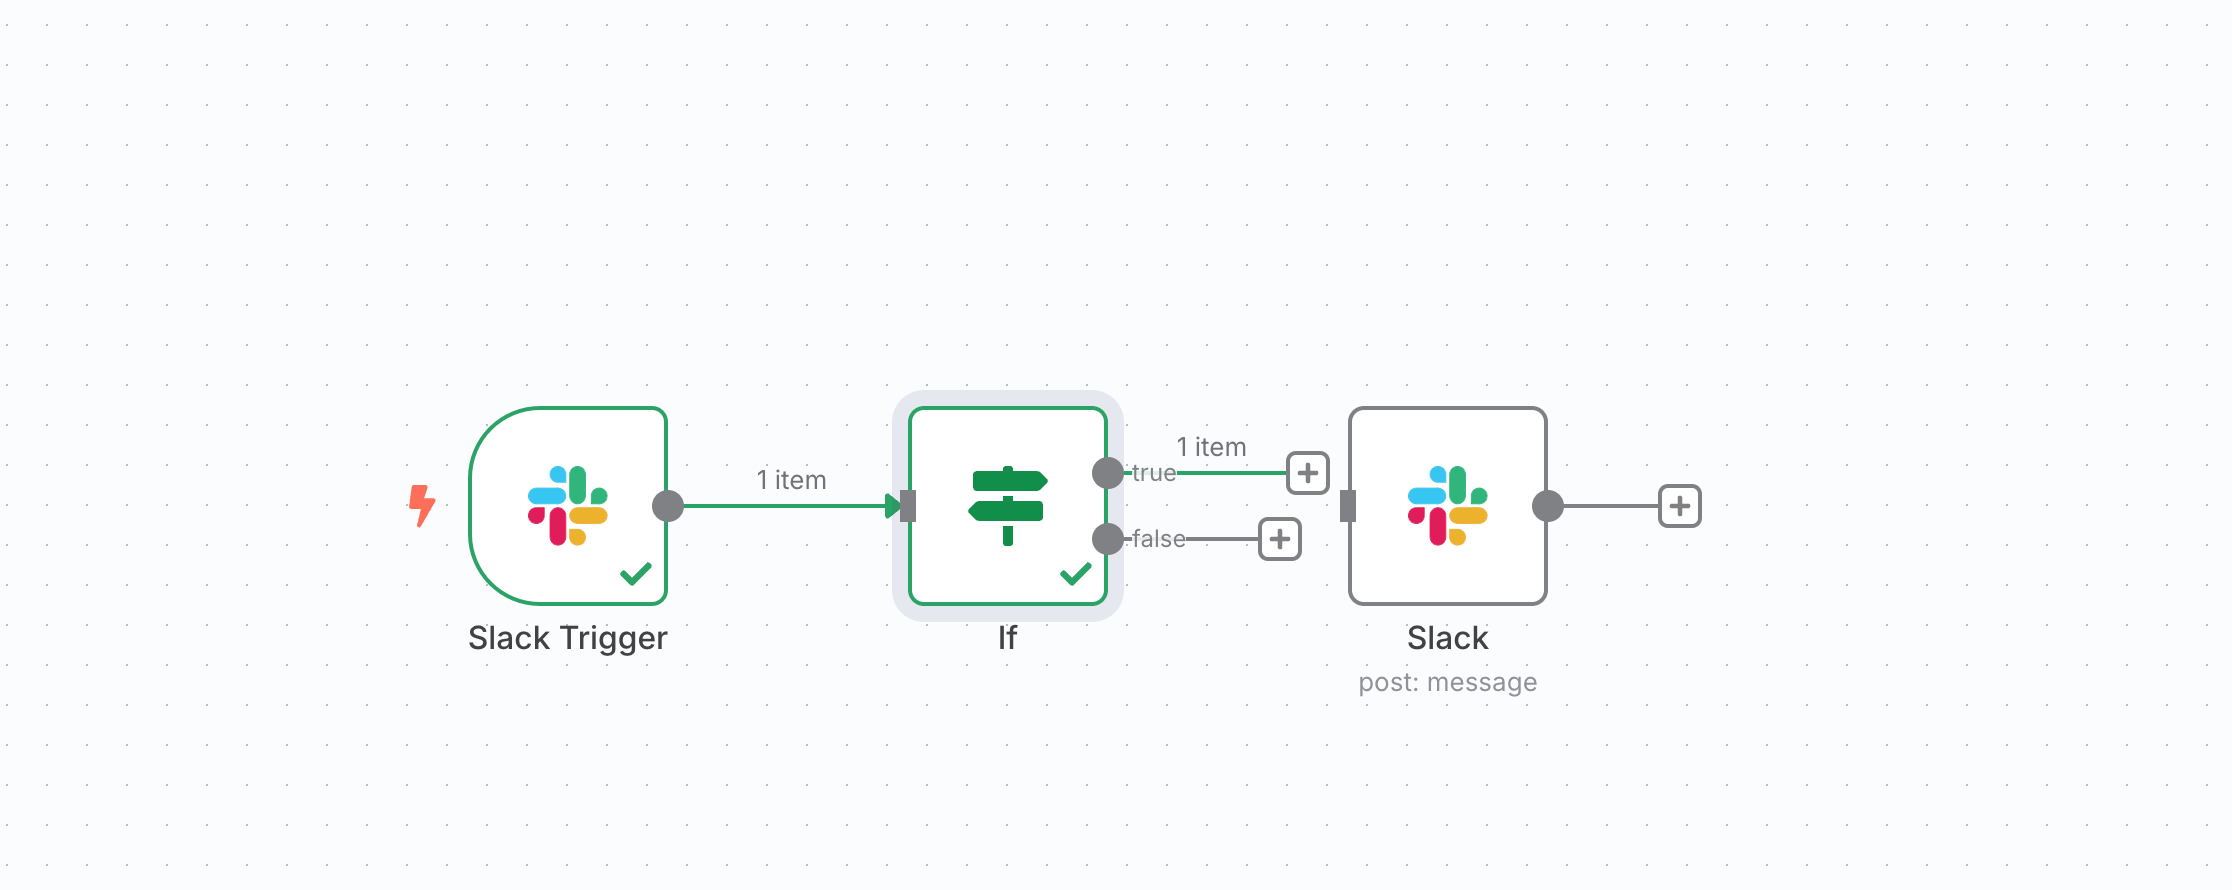
Test workflow and go to Slack tag the agent and drop in a voice note - you will see the 2 nodes turn green.
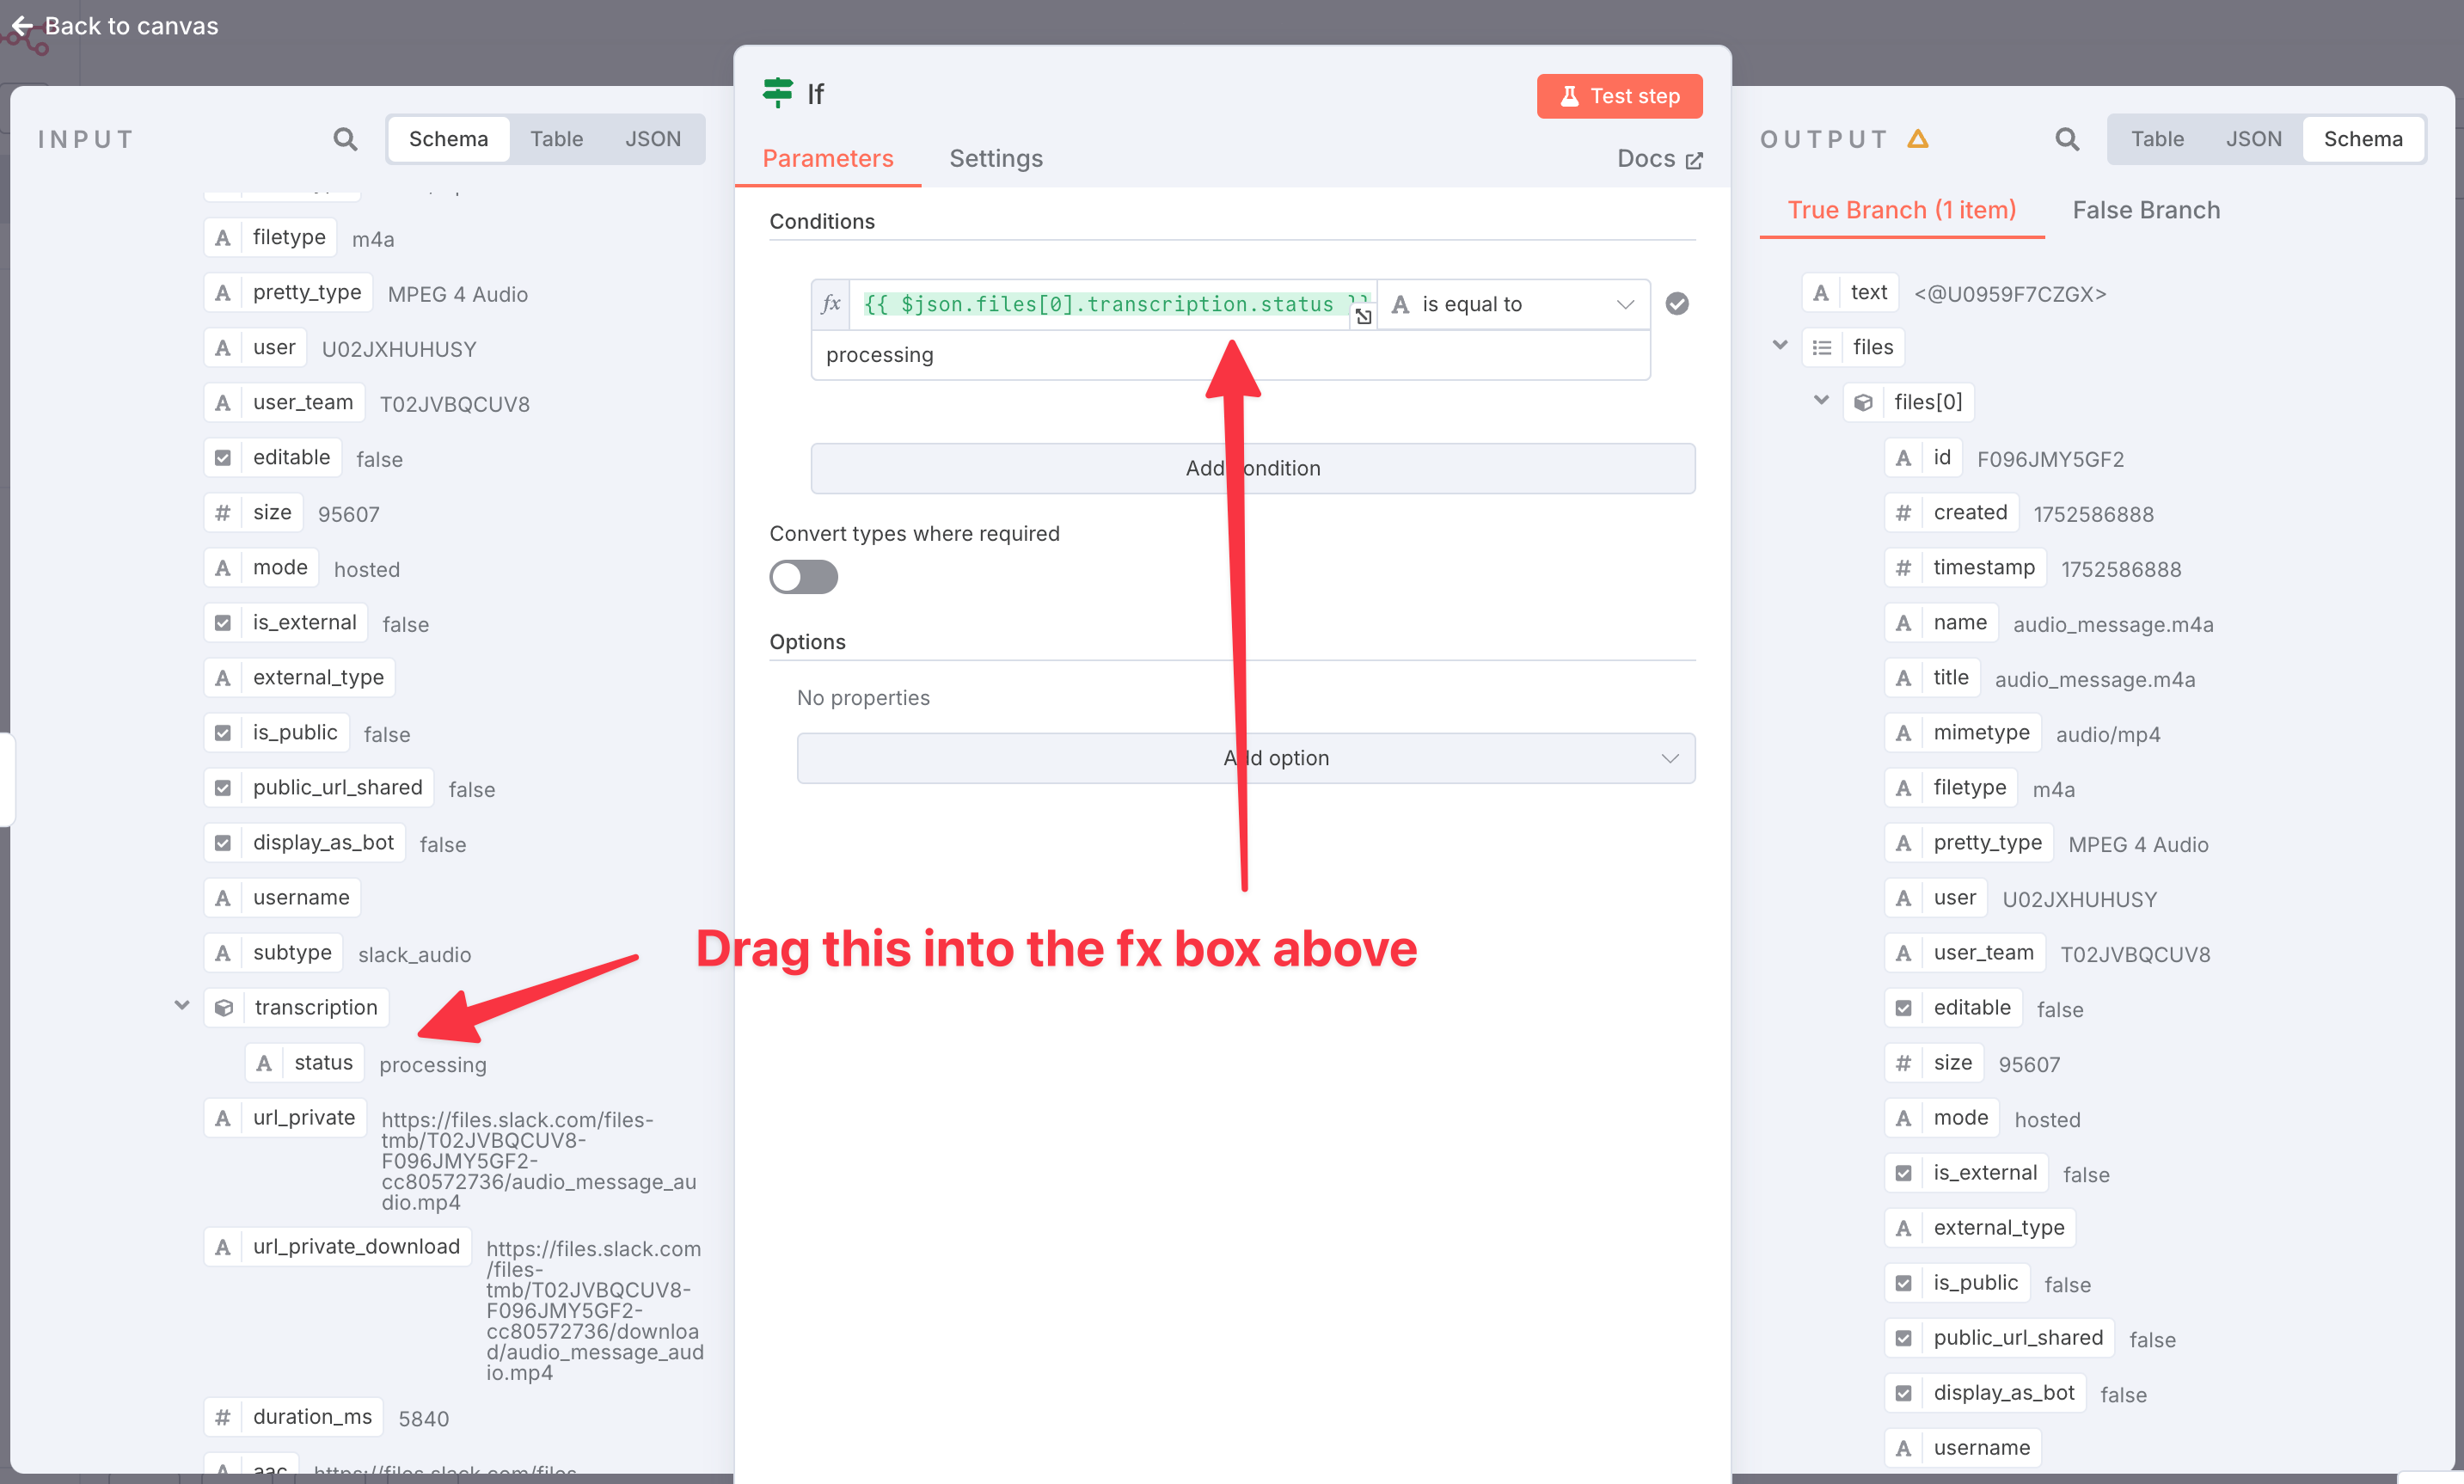
Click on the If node and drag transcription status and set the condition to “processing”
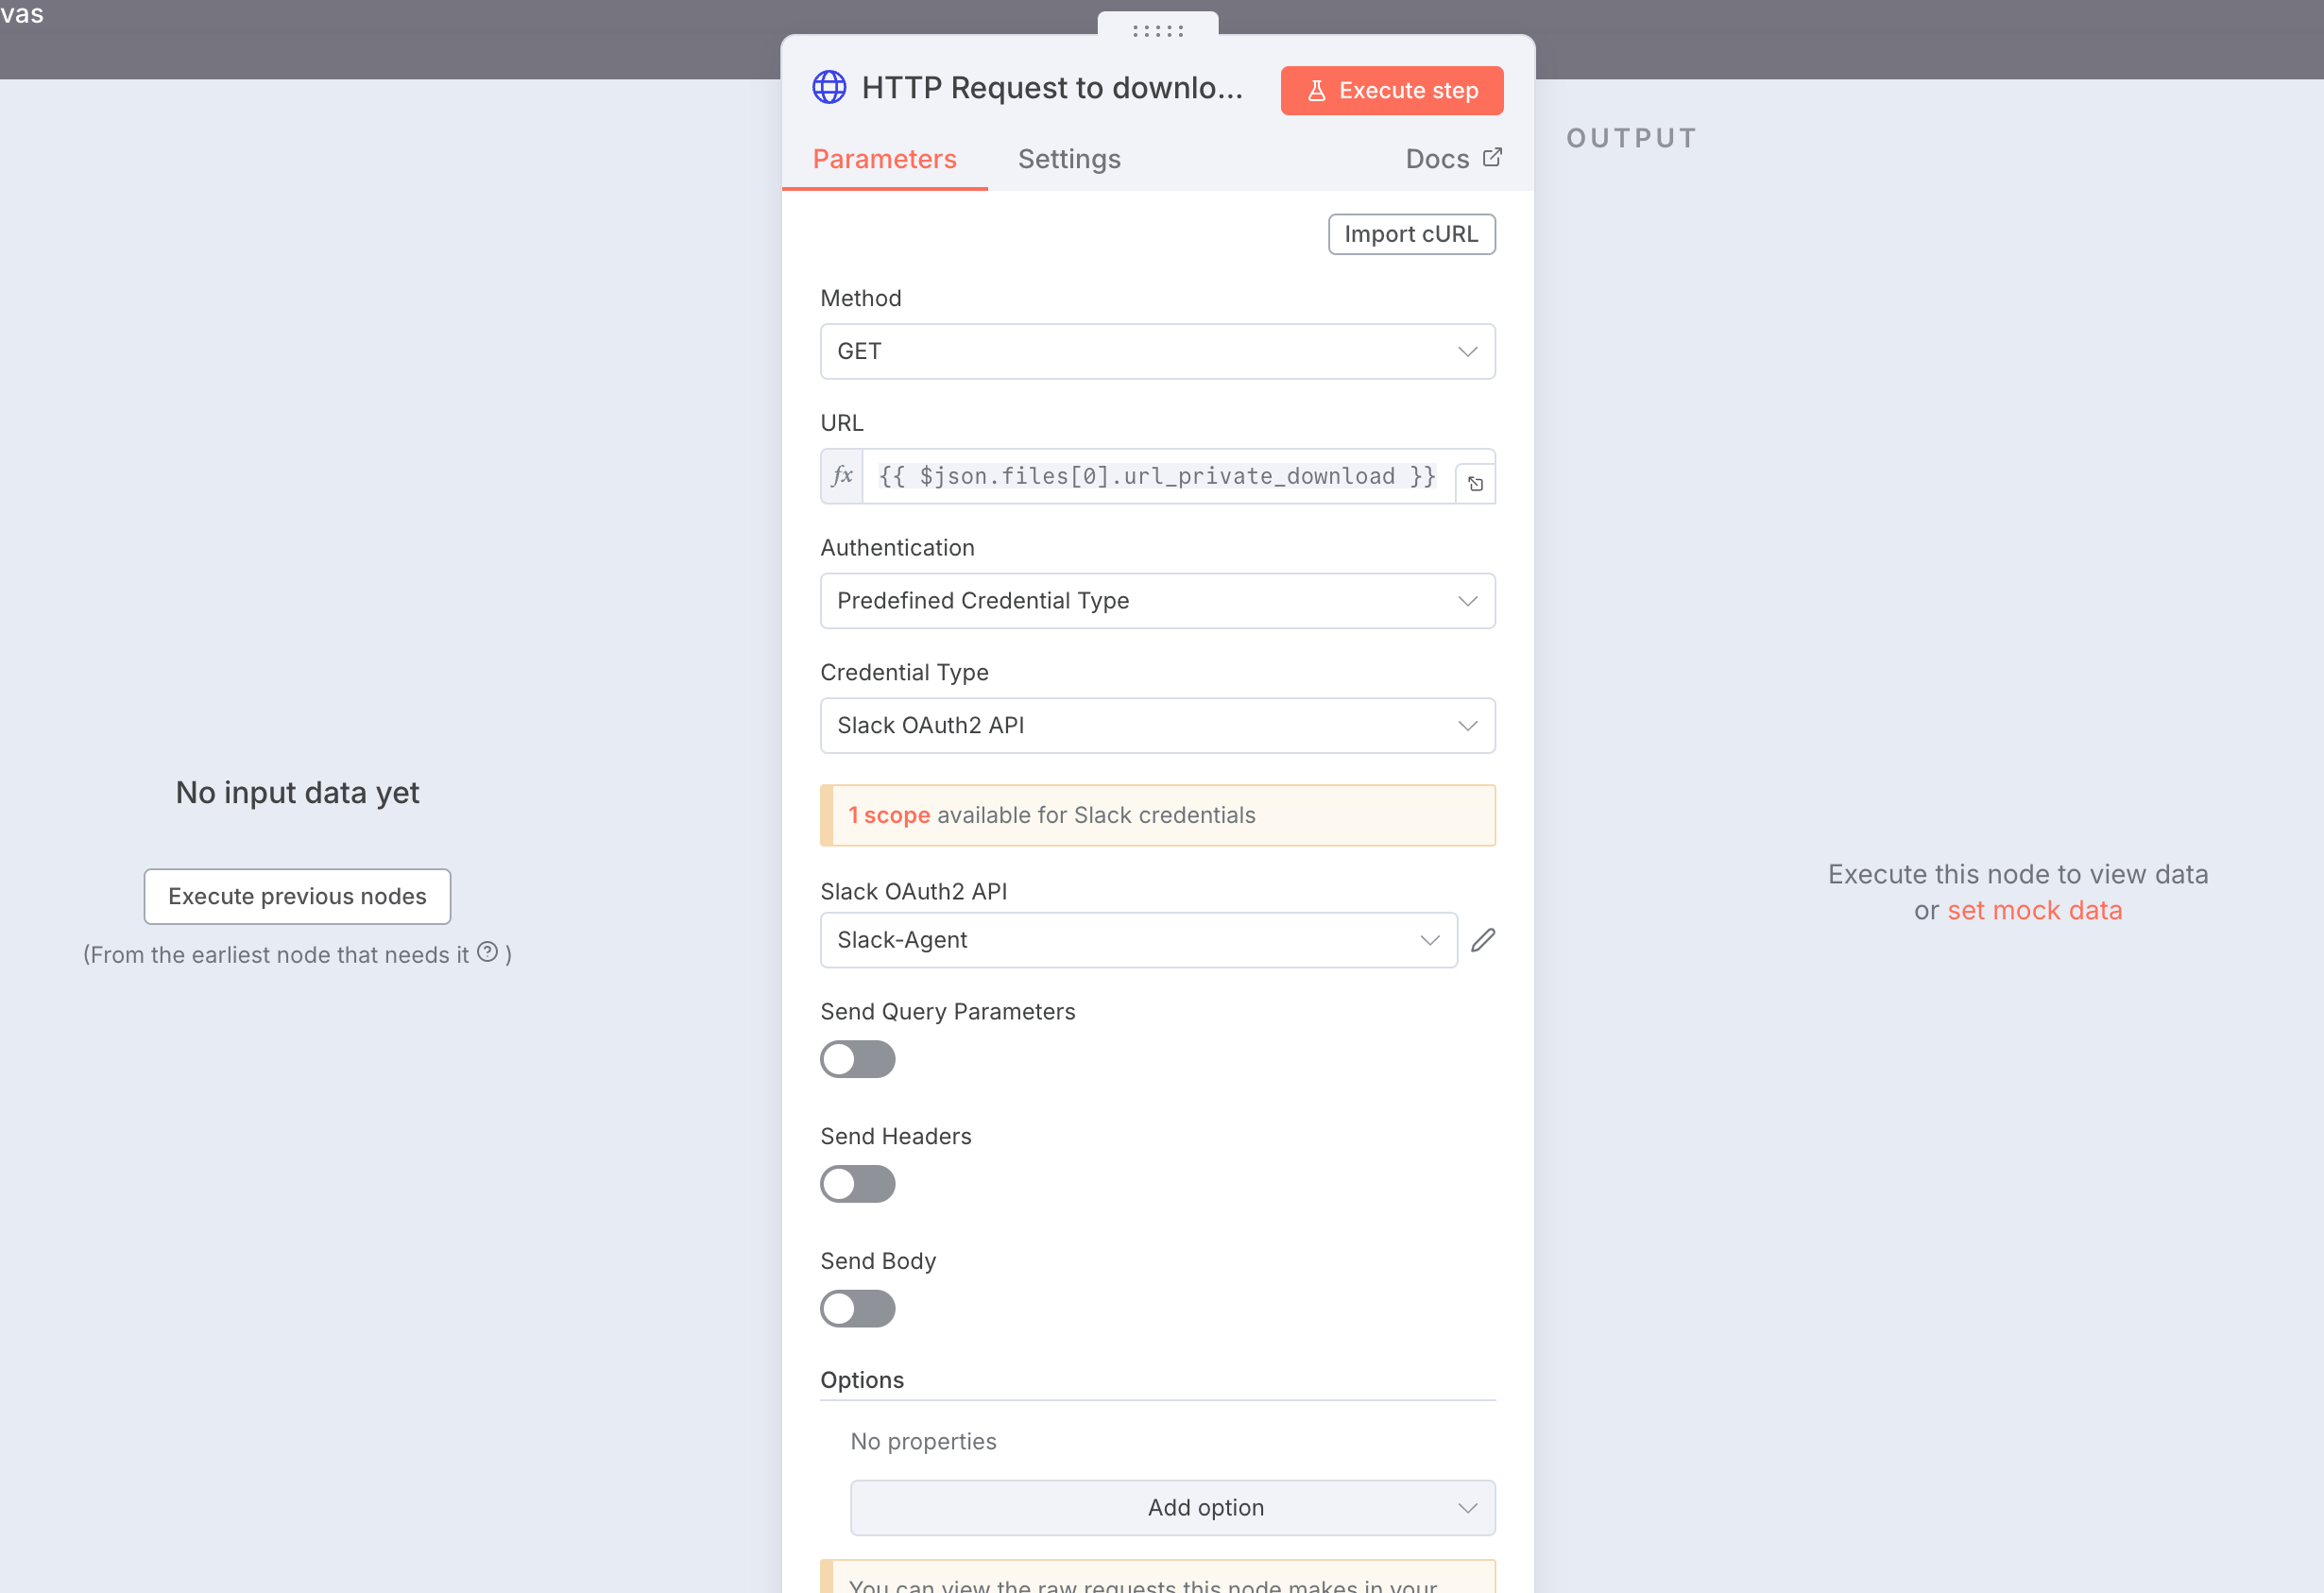
For the true path, create a http request to download the Audio file. You will see this node pop up. In the previous image, you can see there’s a URL private download file. Drag this into the HTTP URL. And connect your Slack via the OAuth2 API.
Step 2b - Transcribe via Open AI
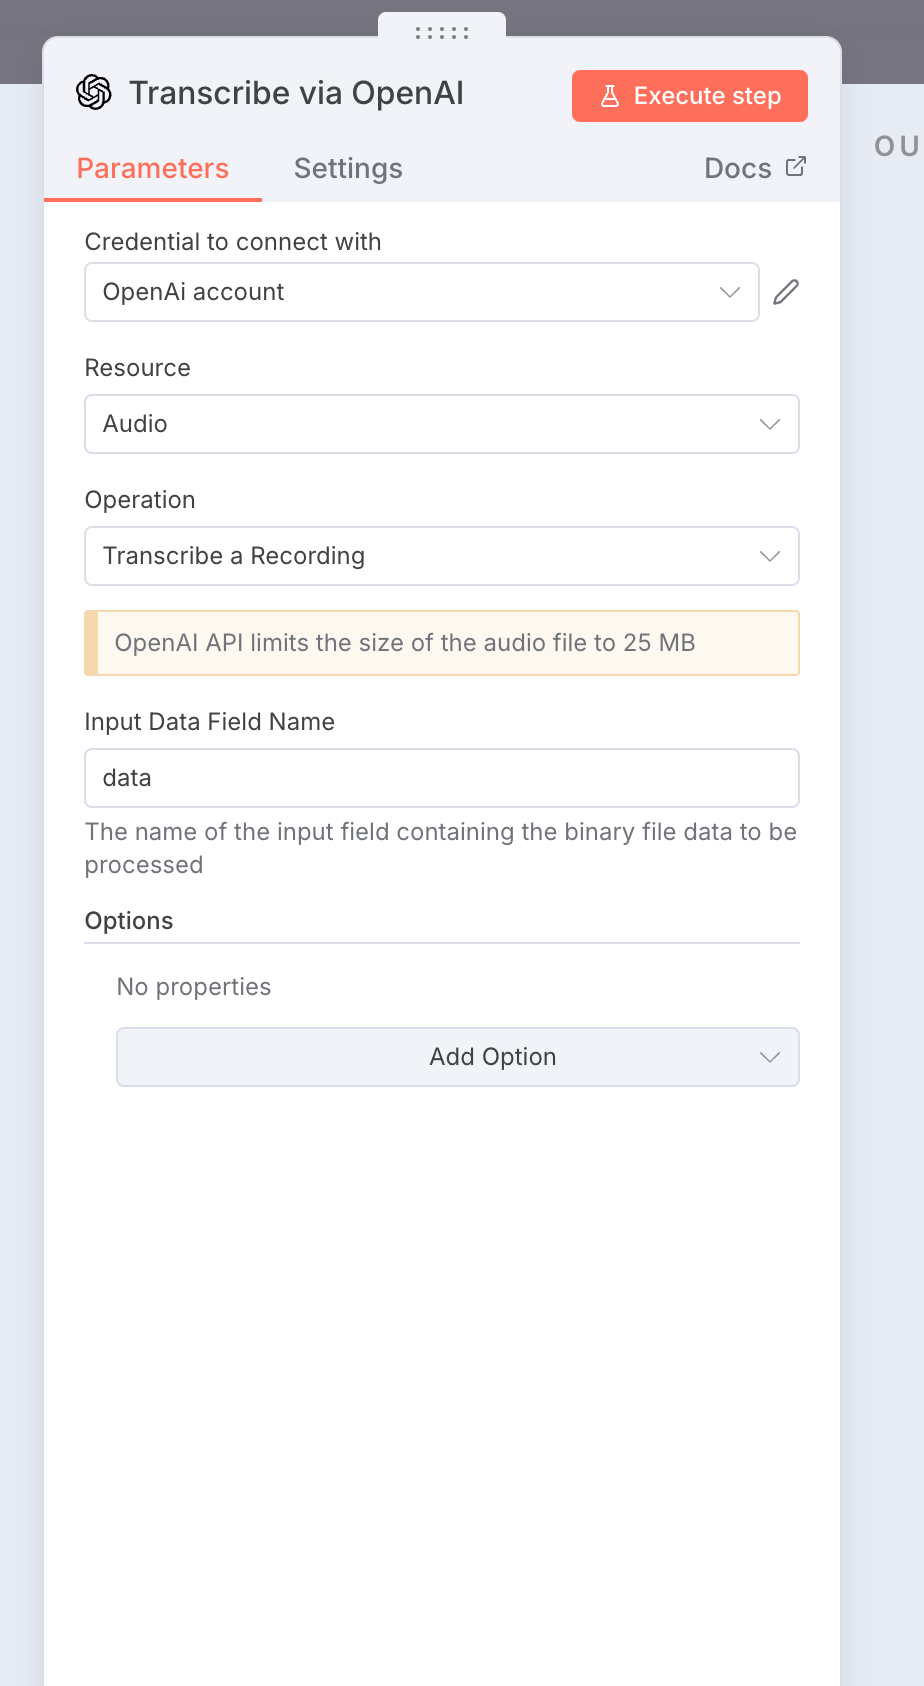
This is easy. Just choose the Open AI transcription node and connect your Open AI credentials.
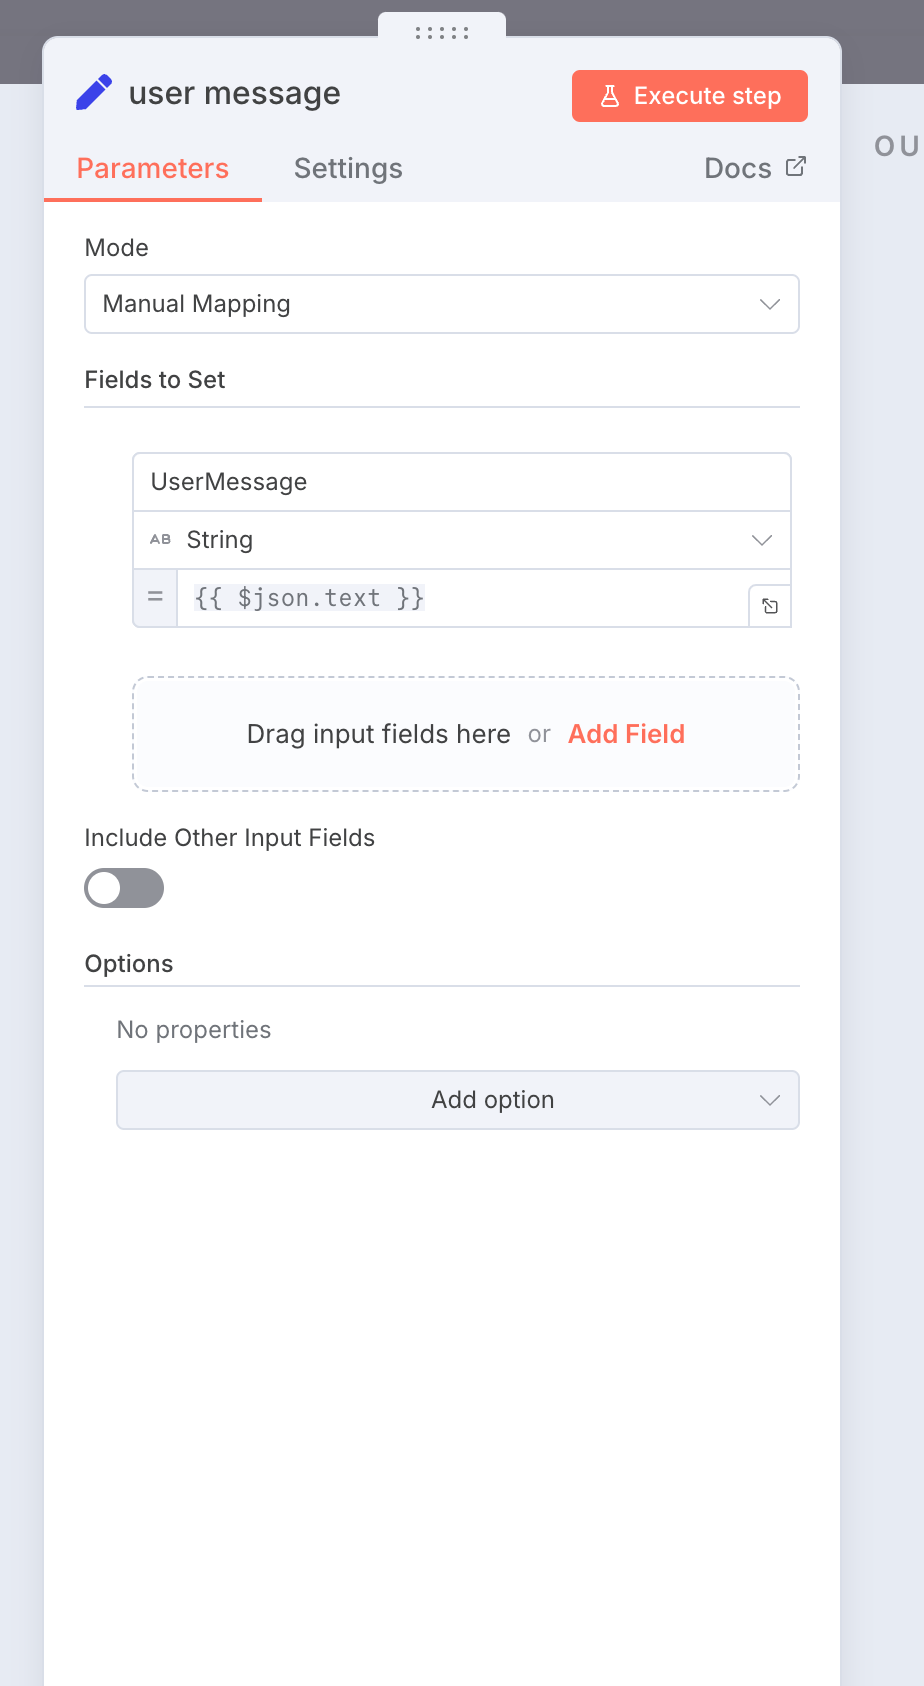
Then, you simply bring both the voice and the texts you sent from Slack into an edit note and output it as the “user input” via json.text.
Step 3: Creating the AI agent team:
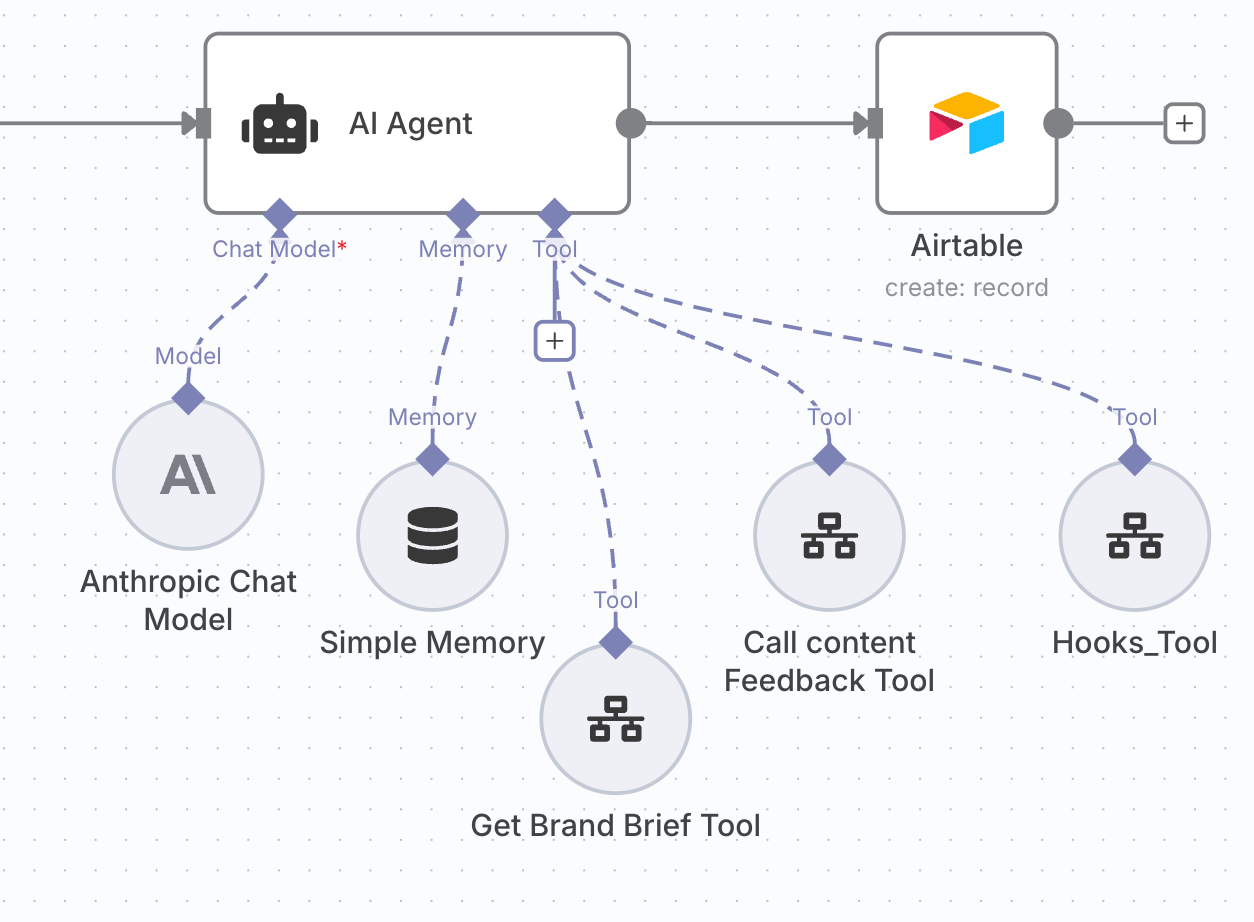
Every Agent has 3 components - the LLM, the tools and the memory layer.
Here’s the system prompt for the AI agent:
You are a helpful content creator for <Your name>'s personal brand. Use the below steps to create content:

Steps:

1. Always start by getting the brand brief using the Get_Brand_Brief tool.

2. Create a post on the requested topic when given the input via {{ $json.UserMessage }}. Make sure it aligns with the brand brief.

3. Write the hook (the first line of the post) by using the Hooks_Tool to make sure the hook is of a high quality.

4. get feedback and a score on the post you created in step 2 using the Get_content_feedback tool.

5. if the score is less than 0.8, use the feedback from step 3 to refine the post. Then repeat steps 3 and 4.

6. The final output should be the approved post.

7. make sure to not include any words at the top like "here's your post" or "here's the generated post" or even ends like "the post fufils your requirements" or something like that. There should be ZERO of these introduction or concluding phrases. Just output the main post, that's it. Nothing more, nothing less.
Pro tip - Save this to Lexi and copy paste it whenever you’re building something similar.
For the LLM, we are using the Claude Anthropic model. Connect your API key and you’re good to go, and connect the simple memory layer. Now it’s time for our tools.
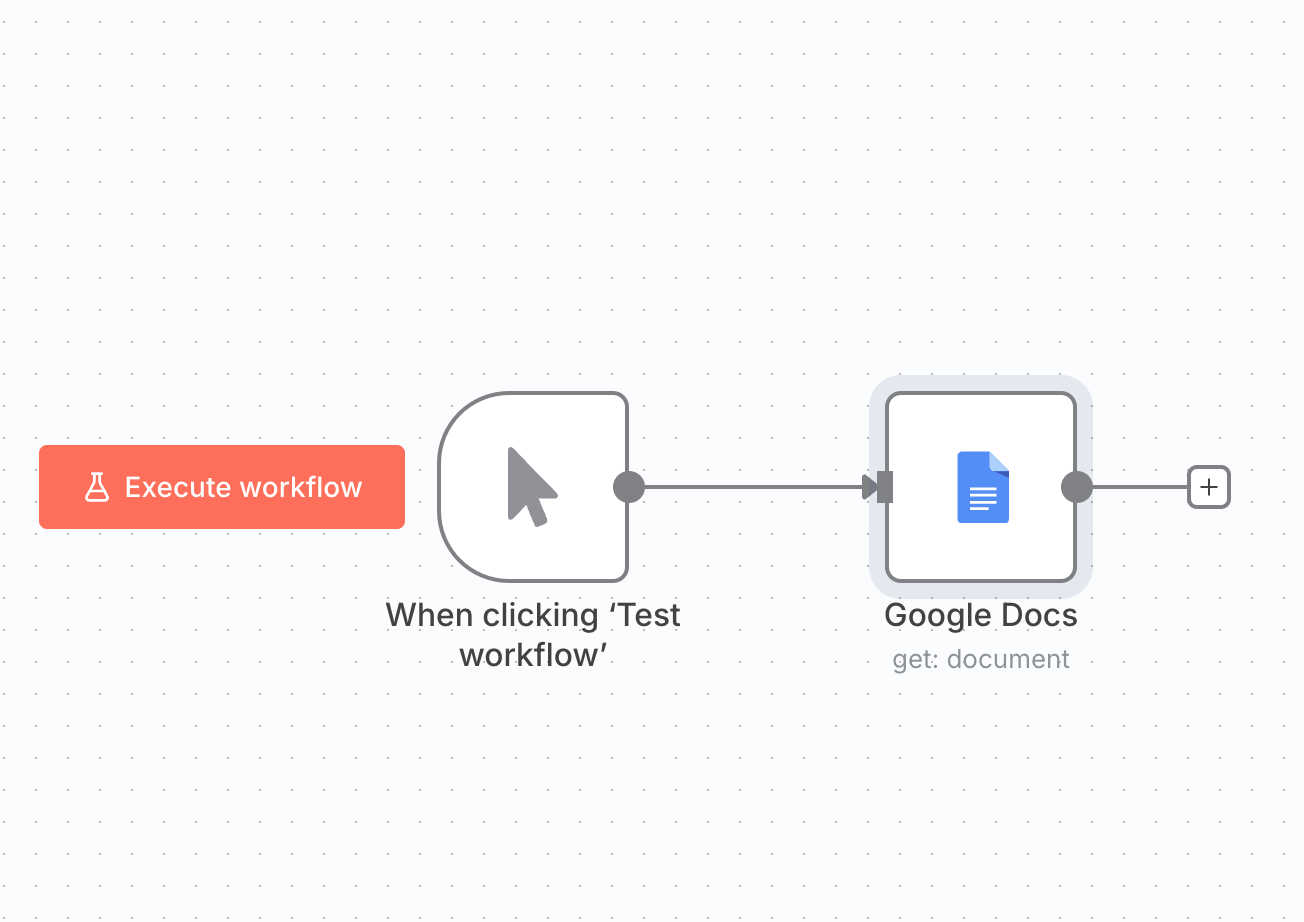
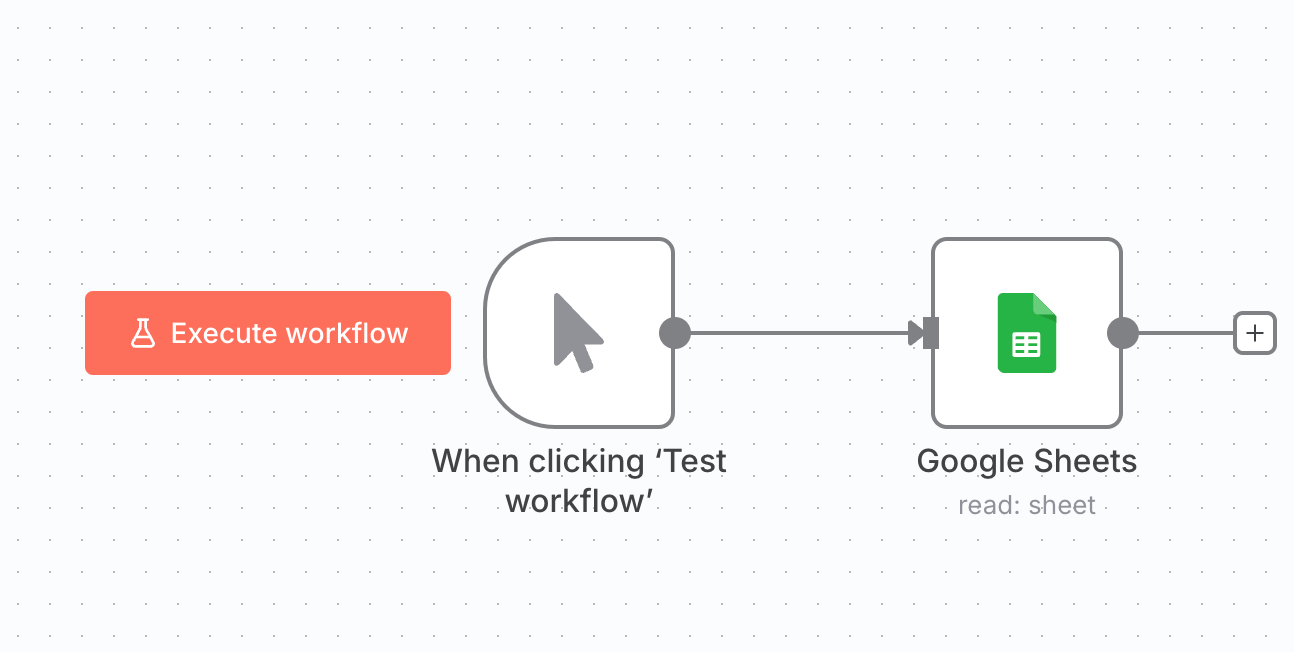
Step 3A: Building the Brand Brief Tool:
This is a simple workflow that gets triggered when we call the main parent workflow. It’s a simple Google Doc that contains all the information related to the user’s brand and his ICP and his tone of voice and stuff like that.
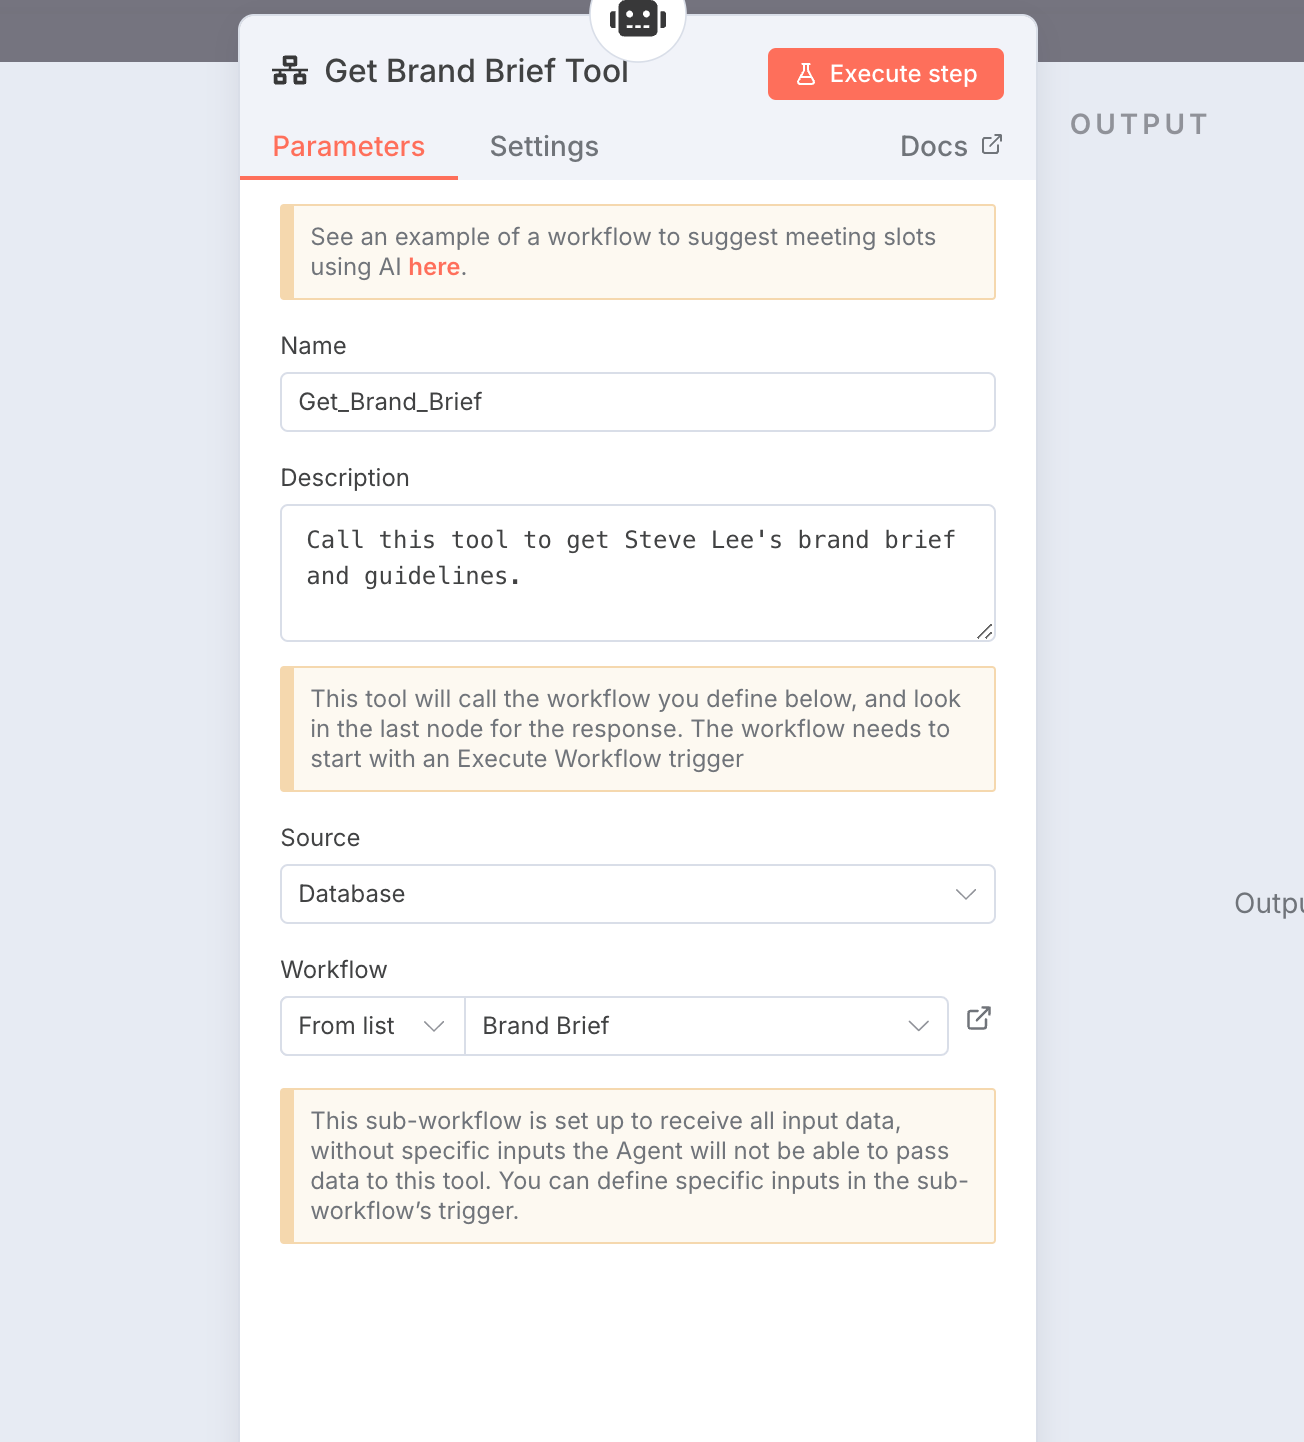
back in the parent workflow, this is what the brand brief tool will look like connected to the AI agent:
Step 3B: Building the Content Feedback Tool:
Now let’s look at the content feedback tool. It helps you edit the particular content and give feedback so it has a baked in feedback loop built in and what this essentially means is that it will take in any generated content and give feedback on it rate on a score of 1 to 10 and if it falls below a certain threshold which is 8/10 then it sends it back to the writing agent to rewrite the entire post. This is what it looks like:
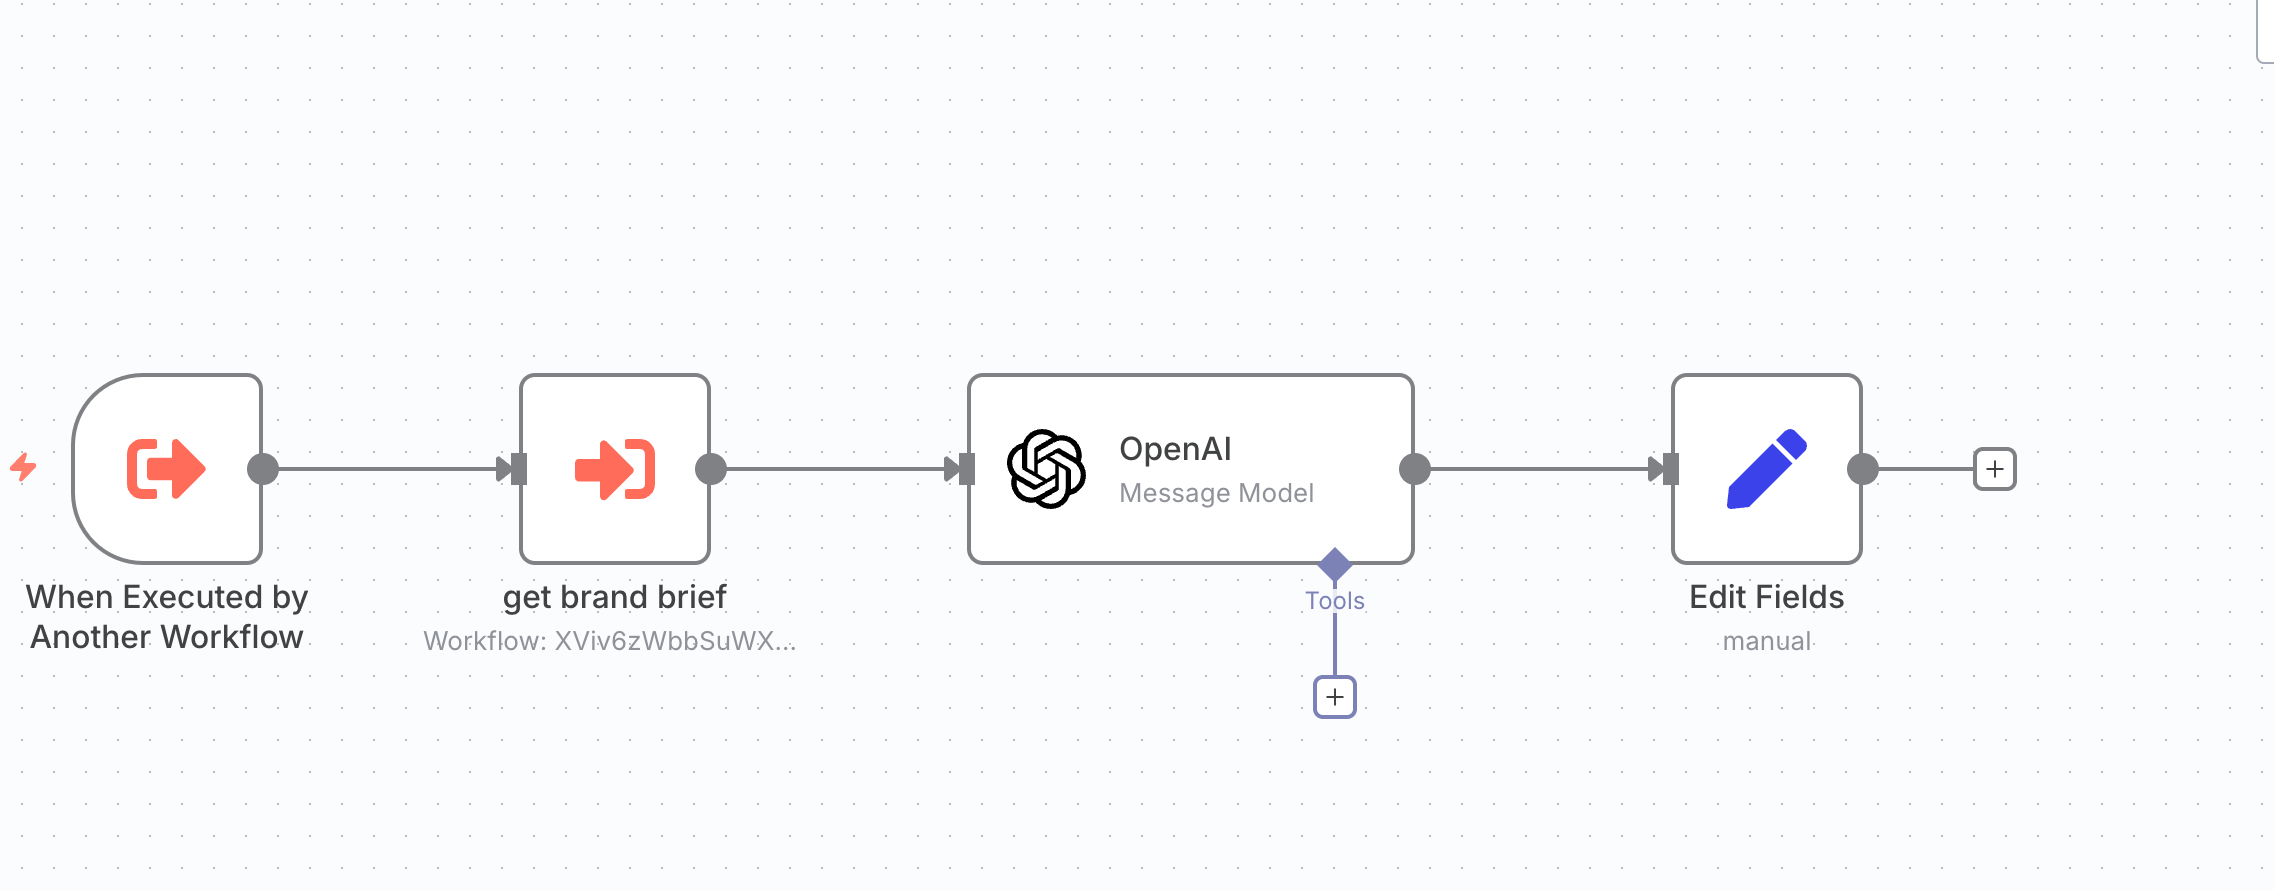
This workflow gets triggered when the parent workflow is running. After which, it gets the brand brief which acts as a reference text for the agent to give feedback on. After which it sends it to the open AI model that has a system prompt to give feedback on the copy that was generated by the writing agent and it then outputs that via an edit fields node.
This is the prompt the AI is given to give feedback on:
## Rules:
You are tasked with evaluating a piece of content written for <Person>. Your role is to assess how well the post aligns with <person'>s personal brand, using the following brief as your guide:
Please analyse the post based on the following criteria:
- does the post have unwanted artifacts like "let's try again" or "here's your new post" or the title of the post?
- does the first line of the post have a title of the post rather than the hook?
- Does the content reflect X's core values, voice and style as described in the brief?
- Does it engage X's audience as described in the brief?
- Does it showcase X's expertise and domain authority as mentioned in the brief?
- is the tone, messaging and approach consistent with the brief's objective and positioning?
- is the hook or the first line strong enough to capture attention of the readers? Is it scroll-stopping for the reader so that he wants to read more of the content?
Rule of thumb for a good hook:
- Hooks have to have storytelling baked in
- They are curiosity driven.
Here are some examples of good hooks:
- 90% of onboarding problems have ONE thing in common - they try to do too much all at once.
- Before you try to fix your onboarding, the FIRST thing you must do is define your problem. Here's what I mean:
- Early stage founders, if you're thinking about hiring someone to work on sales, read this
- One thing as a marketer I never understood (still don't TBH) is why sales teams LOVE a one pager
- in 2003, Parker was broke in his garage and humiliated. 2 years later, he had a billion dollar company.
- X may be a Unicorn today but 7 years back, it had 0 dollars to its name and didnt have any customers. Here's the one thing they did that helped them make 8 figures in 12 months.
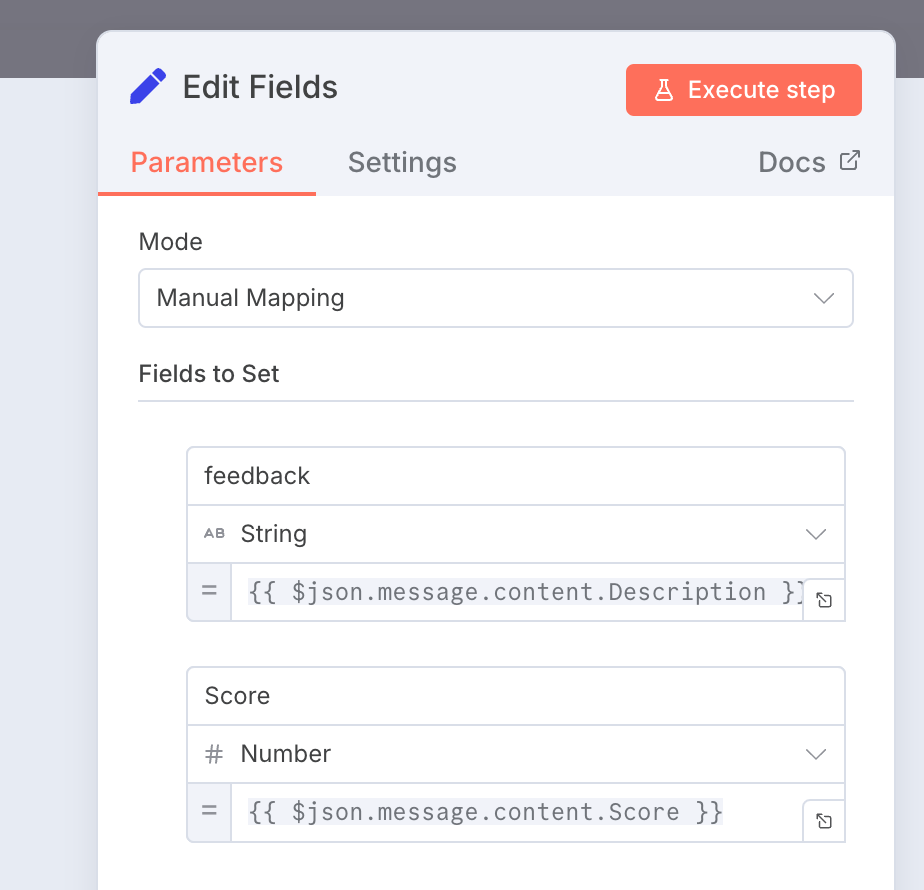
After evaluation, output a score between 0 and 1, representing the alignment between the post and the brand brief and the scroll stopping nature of the post. The score should be output in the following JSON format:
{
"Description": "[short description here]",
"Score": [insert score here]
}
## Brief:
{{ $json.content }}
Pro tip - Save this to Lexi and copy paste it whenever you’re building something similar.
And then the Edit fields node just outputs the main two data points which is : the feedback Description and the score.
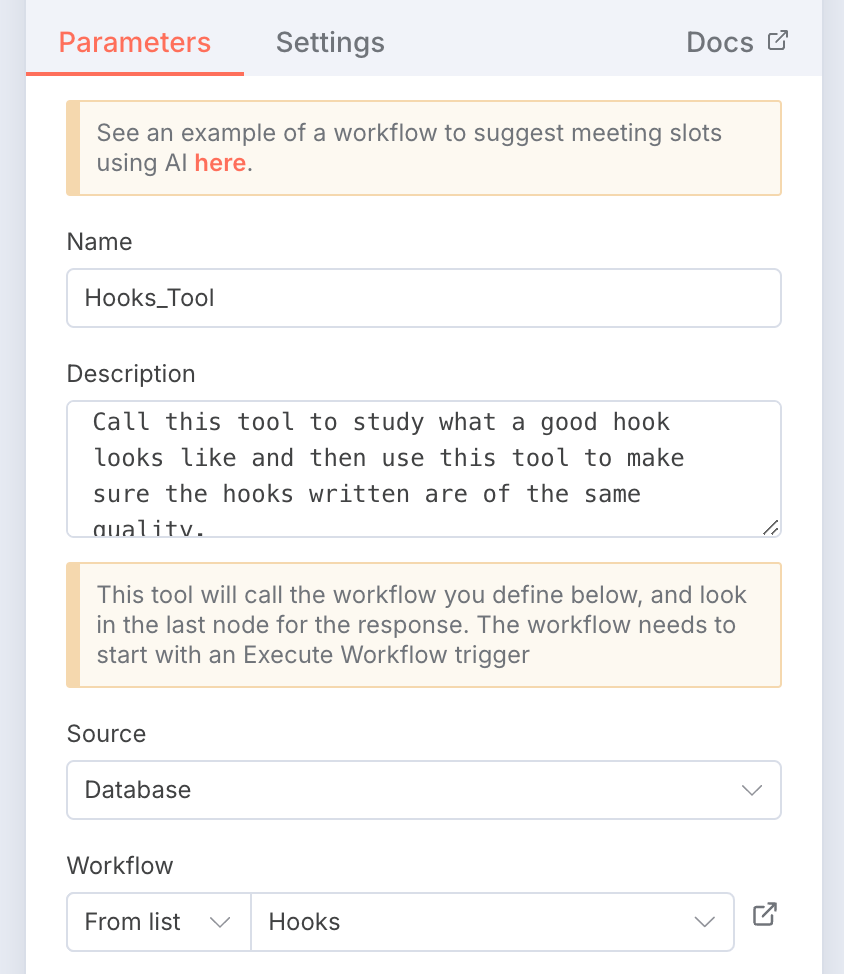
Step 3C: Building the Hook Writer Node:
The hook writer node is essentially a workflow that contains a database of the most well-written hooks in LinkedIn.
We now know that hooks are the most important part to getting your content visible on LinkedIn.
And so we need to create a system that writes hooks that get visibility on LinkedIn, which is what this node is for. So when the user drops in a voice node via Slack, this workflow, this hookwriter agent will write a hook based on the voice notes, the voice ramblings that are going on.
It’s a simple database of LinkedIn hooks that is updated daily. To call this tool, we need to just send a command like this to the Agent.
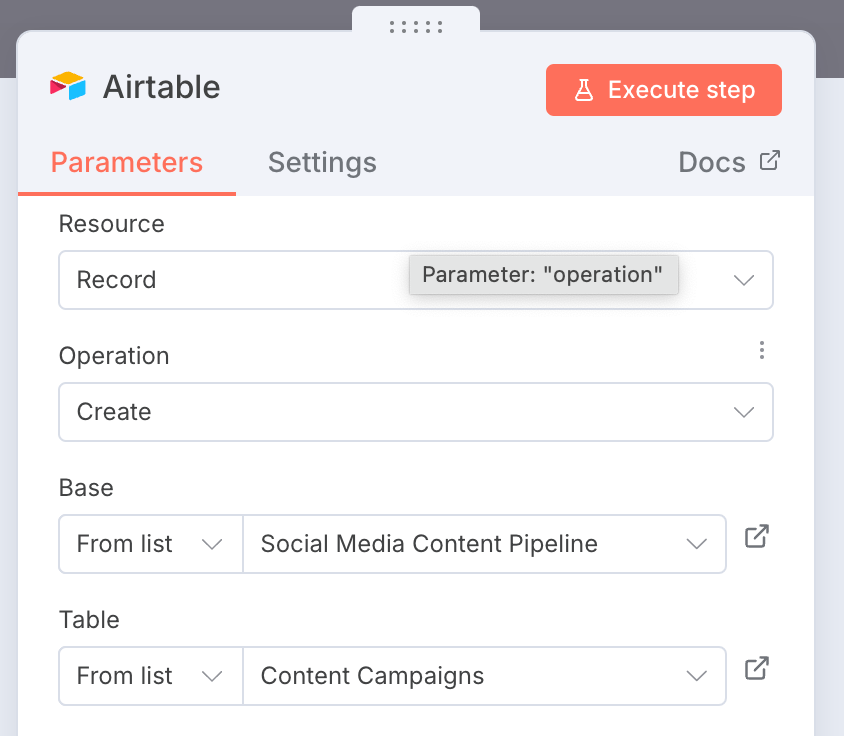
Step 4: Sending it to Airtable:
I use airtable to manage my content. So I set up an airtable account where all the posts get stored directly within airtable.
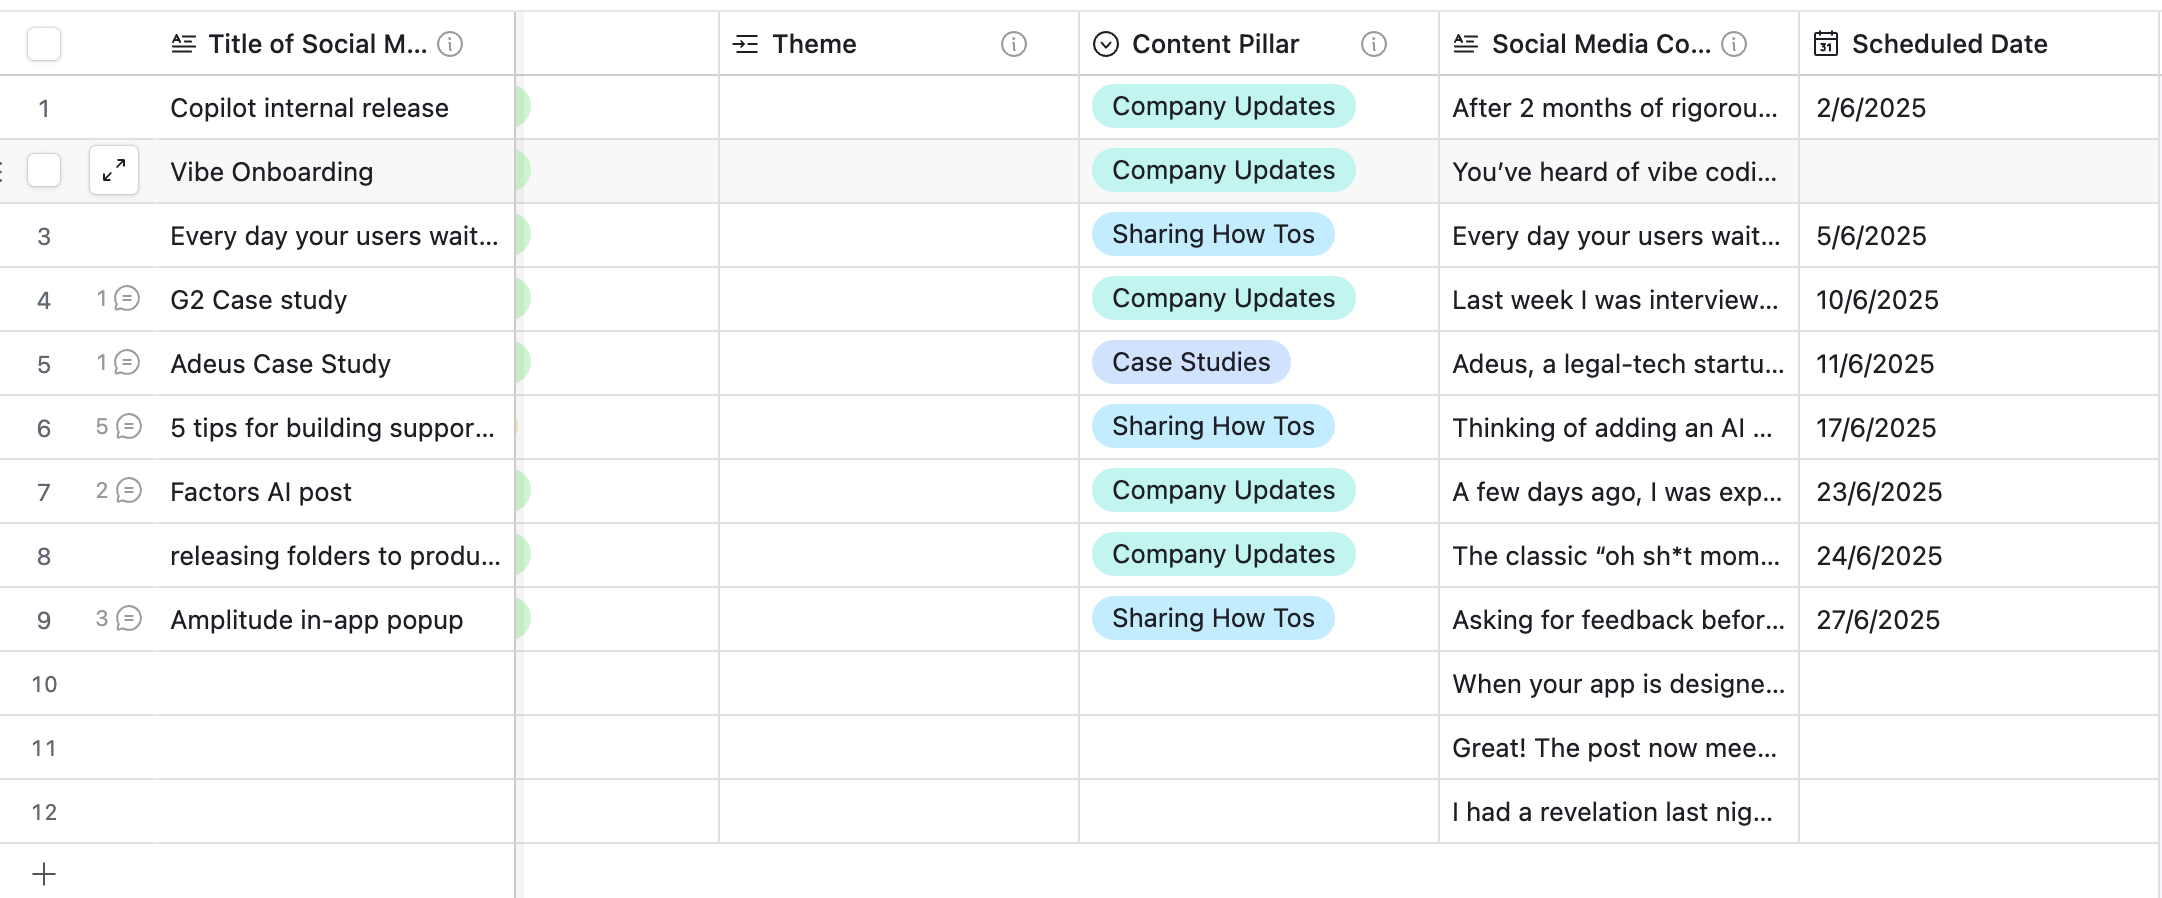
The final output looks something like this:
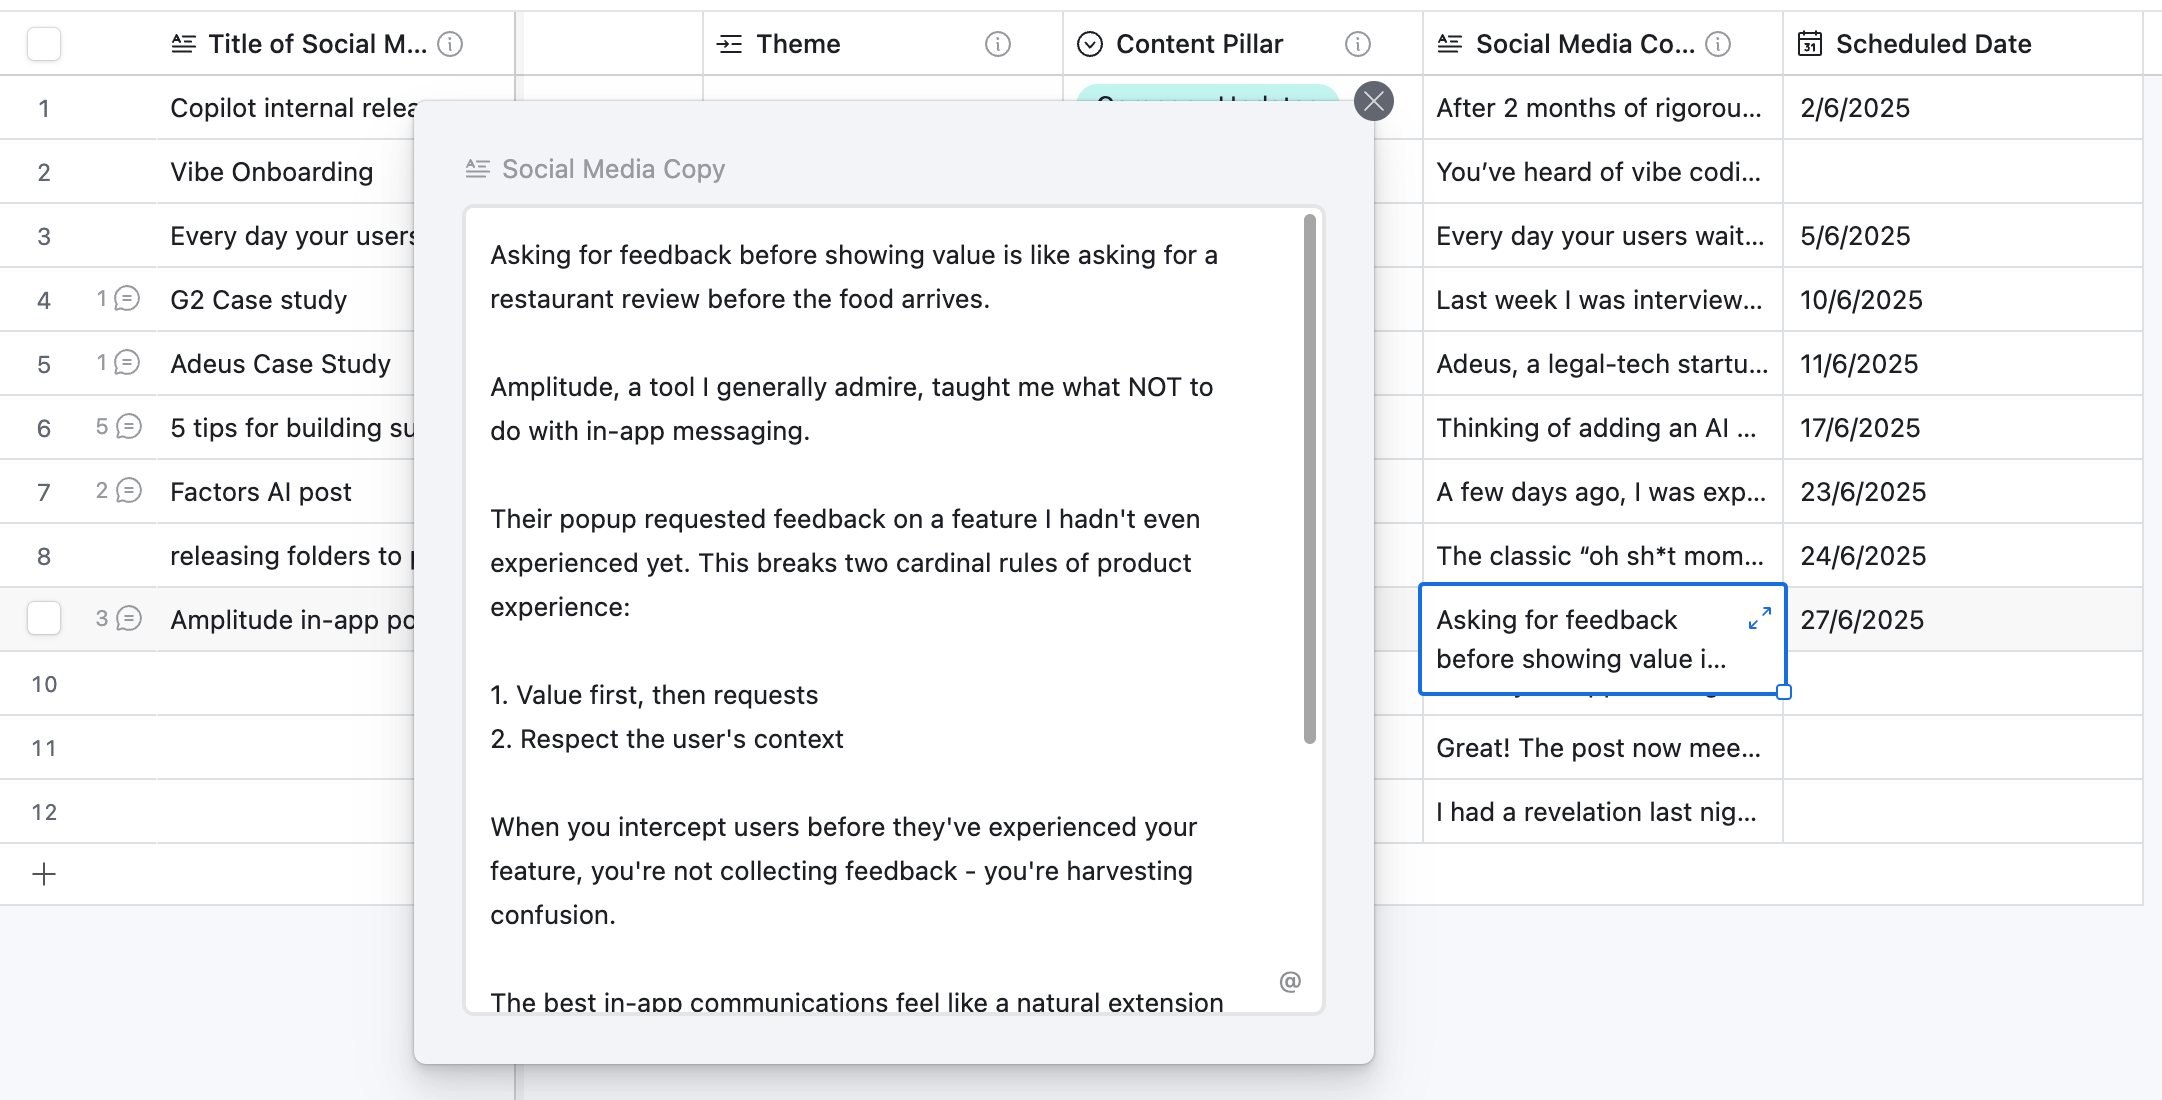
And when you click on the column titled “social media copy” you can click on it and check out the full post:
This is the entire workflow and how you can build it on your own. I hope you found this useful.
Want me to build a custom solution like this just for you? Book a call with me and let’s jam!